Homeowners Maintenance Manual

Bonded Builders Warranty Group
P
r o t e c t i n g
P
r o t e c t i n g
Dr e a mDr e a m
the
the
Am e r i c A n
Am e r i c A n
Homeowner’s
Maintenance Manual

Homeowner’s
Maintenance Manual
Bonded Builders
Warranty Group
1500 Kings Highway
Port Charlotte, FL 33980
homeowners.bondedbuilders.com
Copyright 2008. All Rights Reserved.

Dear New Homeowner,
The Bonded Builders Homeowner’s Maintenance Manual is written in a manner that we hope will help
you understand how your new home functions. It is a resource manual, which is intended for informational
purposes only.
If you follow these few simple maintenance procedures, in a timely manner as described in this manual,
your home will give you many years of pleasure and comfort.
The manual explains in simple and easily understood
language your normal Homeowner’s Maintenance
responsibilities, which should always be conducted
in a prudent, cautious and safe manner.
If you feel that certain types of maintenance or repairs are
beyond your particular capabilities, we suggest and urge
you to call a professional, licensed contractor to perform
the needed work.
We have attempted to cover all of your home’s
maintenance areas with as much pertinent information
and their primary needs as possible. Since our manual
is widely distributed in many states, some information
may not pertain or apply to your geographic location. It
is impossible to address every scenario or method of
maintenance. If we have omitted anything and you are
unsure of how to proceed, we suggest that you refer to
the manufacturer’s written instructions, or contact a local
professional contractor.
IMPORTANT NOTE REGARDING ANY AND
ALL MANUFACTURED ITEMS
(eg: appliances, garage doors, windows and doors, toilets,
sinks, tubs, faucets, etc.)
The suggestions and recommendations found in this
manual are not intended to replace or substitute any
of the manufacturer’s recommendations. If you should
notice a conflict between our suggestions and those
recommendations provided by the manufacturer, the
manufacturer’s directions and guidelines always
supercede our suggestions.
NOTE: THIS MAINTENANCE MANUAL ADDRESSES VARIOUS TYPES OF CONSTRUCTION THROUGHOUT THE
COUNTRY. THEREFORE, SOME OF THE CONSTRUCTION MATERIALS DESCRIBED IN THIS MAINTENANCE
MANUAL MAY NOT BE APPLICABLE TO YOUR HOME.

Welcome To Your New Home!
In order to acquaint you with the maintenance requirements and warranty information about your
new home, we are providing you with this Homeowner’s Maintenance Manual which consists of
four chapters:
1. Homeowner’s Maintenance Checklists
2. General Information & Safety Tips
3. Homeowner’s Maintenance Information
4. Glossary of Construction Terms
This book will provide useful information which will assist you in the maintenance and service
requirements of your new home.
The Homeowner’s Maintenance Checklists provide several lists of important preventative
maintenance procedures required at periodic intervals. By adhering to these checklists, you can
discover and correct minor maintenance problems before they become a major expense.
The General Information & Safety Tips section contains valuable information concerning public
utilities coming into your home as well as a few safety tips which you should observe when doing
routine maintenance.
The Homeowner’s Maintenance Information section gives you an explanation of the basic
components of your home. This section will note the normal repairs that may be required and
gives you helpful hints on how to care for your home.
e Glossary of Construction
Terms defines for the layman descriptions and terms used in the construction industry.
A few minutes spent in reviewing this section can result in you having a more comprehensive
knowledge of how your home is constructed and can be of great benefit when dealing with
construction trades people.
Table of Contents
Homeowner’s Maintenance Checklists................................................................................................
After Move-In Checklist ........................................................................................................................
Every Month Checklist .........................................................................................................................
Every Six Months Checklist .................................................................................................................
Annual Checklist ..................................................................................................................................
Seasonal Checklist ..............................................................................................................................
A Special Checklist for Condensation, Mold & Mildew .......................................................................
General Information & Safety Tips ..................................................................................................
Utility Lines, Cables & Pipes .............................................................................................................
Homeowner’s Maintenance Information ..............................................................................................
Air Conditioning and Heating .............................................................................................................
Appliances ...........................................................................................................................................
Attic .....................................................................................................................................................
Bathroom Maintenance .......................................................................................................................
Ceramic Tile ........................................................................................................................................
Grout Stain Removal Guide .................................................................................................
Cabinets ..............................................................................................................................................
Cable TV .............................................................................................................................................
Concrete .............................................................................................................................................
Condensation/Mildew .........................................................................................................................
Countertops & Vanity Tops ..................................................................................................................
Doors .................................................................................................................................................
Electrical System ................................................................................................................................
Lighting Fixtures .................................................................................................................................
Smoke Detectors ................................................................................................................................
Security System & Intercom ............................................................................................................
Exterior Wall Finishes .........................................................................................................................
Fireplaces ..........................................................................................................................................
Flooring - Carpet,Tile, Hardwood & Resilient ......................................................................................
Framing & Carpentry ..........................................................................................................................
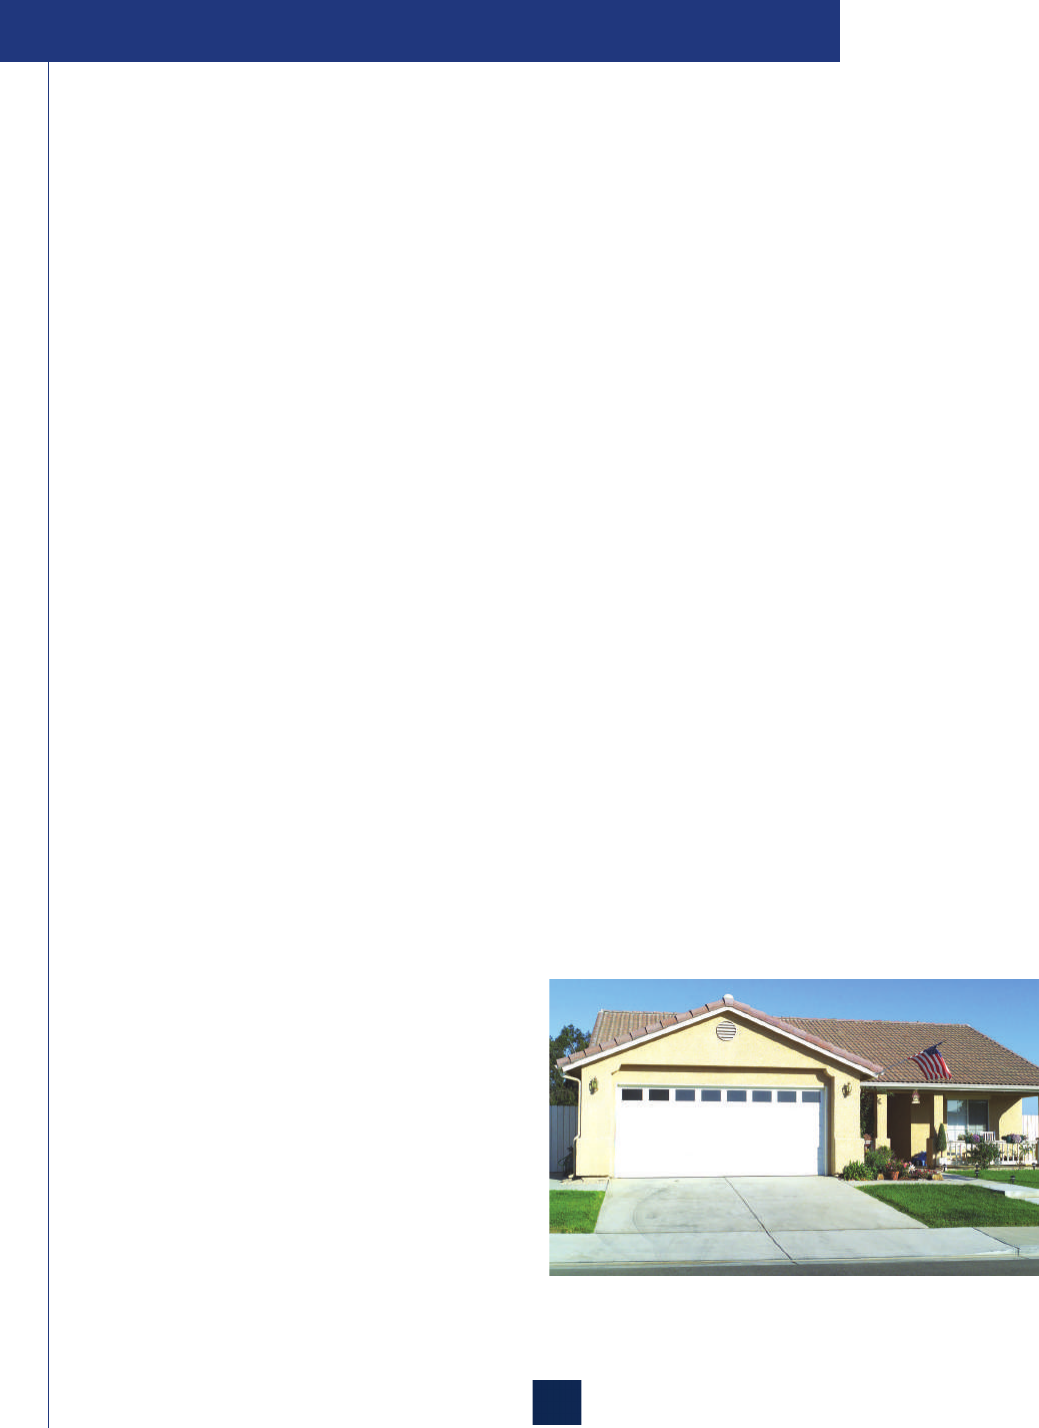
Garage Doors .....................................................................................................................................
Interior Walls & Ceilings .....................................................................................................................
Landscaping, Lawn, Shrubs and Sprinklers .......................................................................................
Mirrors & Shower Enclosures ............................................................................................................
Painting & Caulking ..............................................................................................................................
Plumbing System ................................................................................................................................
Plumbing Fixtures ...............................................................................................................................
Roofing,Gutters,Downspouts ..............................................................................................................
Screen Enclosures ................................................................................................................................
Shelving ..............................................................................................................................................
Shutters (Hurricane) ...........................................................................................................................
Stairs ..................................................................................................................................................
Swimming Pool ..................................................................................................................................
Windows/Screens ..............................................................................................................................
Appliance and Systems Catalog.........................................................................................................
Glossary of Construction Terms ............................................................. ...........................................
1.1
1.2
1.3
1.3
1.5
1.6
1.6
2.1
2.2
3.1
3.1
3.7
3.8
3.9
3.9
3.10
3.11
3.11
3.12
3.15
3.16
3.18
3.21
3.23
3.23
3.23
3.23
3.27
3.28
3.33
3.33
3.34
3.35
3.38
3.39
3.42
3.46
3.51
3.52
3.53
3.53
3.54
3.54
3.55
3.57
4.1

Chapter One
Homeowner’s
Maintenance Checklists

1.1
Welcome home! Even new homes have maintenance requirements and warranty details you
should know about. This Homeowner’s Maintenance Manual will acquaint you with an easy-to-
follow breakdown of your responsibilities:
1. Homeowner’s Maintenance Checklists 2. General Information and Safety Tips
3. Homeowner’s Maintenance Information 4. Glossary of Construction Terms
This book will provide useful information which will assist you in the maintenance and service
requirements of your new home.
The Homeowner’s Maintenance Checklists provide important preventive maintenance procedures
required at periodic intervals. By adhering to these checklists, you can discover and correct minor
maintenance problems before they become a major expense.
The General Information and Safety Tips section contains valuable information concerning public
utilities coming into your home as well as a few safety tips which you should observe when doing
routine maintenance.
The Homeowner’s Maintenance Information section gives you an explanation of the basic
components of your home. This section will note the normal repairs that may be required and
gives you helpful hints on how to care for your home.
The Glossary of Construction Terms defines for the layman descriptions and terms used in the
construction industry. A few minutes spent in reviewing this section can give you a better
understanding of how your home was constructed. It can be of great benefit when dealing with
construction tradespeople.
Your new home was designed to meet or exceed the requirements of the local building code as it
read on the date your builder applied for the building permit.Your home was built to last for
generations, but it has numerous components and systems that require periodic maintenance.
Taking time to do preventive maintenance will make your home safer and save you money by
keeping your home in working order. Most home maintenance projects will require only a few
simple tools. Here are a few tools that you may find useful for normal home maintenance chores:
Adjustable wrench Pliers Utility knife
Flat-blade screwdriver Flashlight/ batteries Phillips head screwdriver
Claw-hammer Electric drill & drill bits Shop-grade vacuum cleaner
Caulk gun & caulk 6’ step ladder Extension ladder
Work gloves Electrical extension cord Shovel
Toilet plunger Tape measure Assorted nails, screws, nuts,
bolts and sandpaper
By implementing the following preventive maintenance suggestions, you can help keep your home
functioning properly with minimal problems.
To help you pinpoint when specific maintenance items should be performed, this checklist is di-
vided into four time periods:
The Homeowner’s Maintenance Checklist

1.2
"GUFS.PWF*Ot&WFSZ.POUIt&WFSZ4JY.POUITt"OOVBMMZ
Additionally, you may be provided with manufacturer manuals and operating instructions for various
appliances and systems in your home. The suggested maintenance procedures in these manuals
should be closely adhered to.
BATHROOMS AND MAIN FLOORS
ᆓApply grout sealer to ceramic tile grout if you wish to give the grout additional protection
against discoloration from spills and stains.
ELECTRIC
ᆓ Locate the main circuit breaker in the electric panel box and show family members how to
turn it off in case of an emergency.
FIRE EXTINGUISHER
ᆓ Purchase a general purpose fire extinguisher for each floor of the home plus one small
kitchen extinguisher in case of grease fires. Demonstrate proper usage to family members
in case of emergency.
FIRST AID KIT
ᆓ Keep first aid materials and a book on first aid procedures in an accessible location.
FLOORING
ᆓ Attach furniture protectors underneath furniture legs to protect floor finishes.
LANDSCAPING
ᆓ Review and implement recommendations in the Landscaping and Grading Section of this manual.
PLUMBING
ᆓ Locate the main water line shut-off valve and all individual plumbing fixture valves, and
show all family members how to close them in case of a plumbing emergency.
GAS
ᆓIf your home has natural gas, locate the gas shut-off valve by the gas meter and show all
family members how to close it in case of an emergency.
The Homeowner’s Maintenance Checklist
After Move-in Checklist

1.3
AIR CONDITIONING AND HEATING
ᆓCheck air filters and clean or replace as necessary
ᆓVacuum air supply and air return registers to remove dust and lint.
GARBAGE DISPOSAL
ᆓClean disposal blades by grinding up ice cubes. Freshen it with baking soda and by grinding
up citrus fruit rinds.
ᆓTest and reset Ground Fault Circuit Interrupters (GFCI) breakers.
INTERIOR CAULKING
ᆓCheck for cracks or separations in caulking around sinks, bathtubs, toilets, faucets, counter
tops, back splashes, ceramic tile walls, ceramic floors, window sills and any other areas
originally caulked by your builder. To repair these areas, use an appropriate caulking
compound and follow the caulking instructions in the relevant sections of this manual.
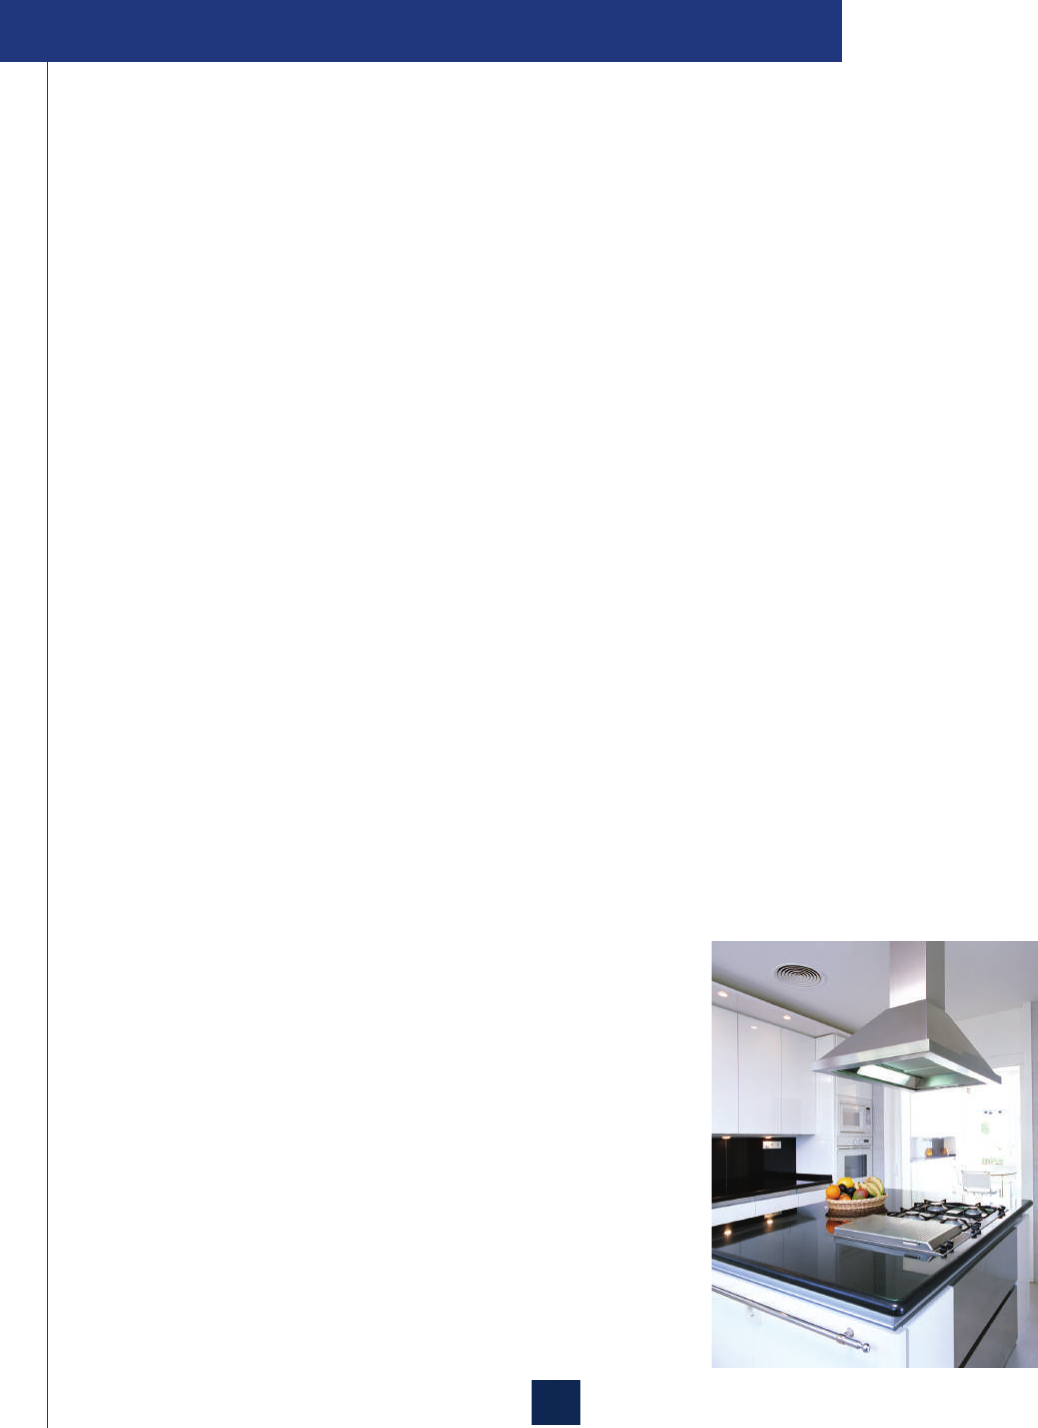
RANGE HOOD FAN
ᆓ Clean or replace dirty filter.
SPRINKLER SYSTEM
ᆓAdjust sprinkler heads for proper coverage.
CABINETS
ᆓClean and apply a light coat of wax to wood-finish cabinets.
CAULKING/PAINTING
ᆓ Check all areas originally caulked by the builder, especially exterior windows and doors.
ᆓCheck exterior paint and stain surfaces (especially stained doors) and refinish as needed.
DOORS
ᆓCheck screws on door lock set and hardware, and tighten as necessary.
ᆓLubricate bi-fold and by-pass doors as necessary.
ᆓ Clean sliding door track and apply silicone spray to tracks as necessary. Caution – only use
a silicone lubricant; oil will cause the rollers to deteriorate. Take the necessary steps to
protect adjacent flooring from the silicone, as it may cause discoloring. Oil moving parts of
the garage doors.
Every Month Checklist
&WFSZ4JY.POUIT$IFDLMJTU

1.4
ELECTRIC
ᆓCheck electrical extension and appliance cords. Replace frayed or split cords.
EXTERIOR FINISHES
ᆓCheck for cracks and voids in exterior caulking and re-caulk as necessary. Follow the
maintenance instructions contained in the painting section of this manual.
ROOFING
ᆓ Visually inspect roof from the ground for broken or missing tiles or shingles and gaps in flashing.
ᆓ Check and clean gutters and downspouts, if installed.
AIR CONDITIONING SYSTEM
ᆓHave HVAC contractor perform six month maintenance check up if you live in the high
temperature, high humidity area.
ᆓEnsure that air supply registers are not blocked by rugs, draperies or furniture.
ᆓ Make certain the concrete foundation that the A/C unit sits on is level.
ᆓRemove excess leaves from vents.
PLUMBING
ᆓCheck assessable water supply lines and valves to sinks, toilets, refrigerator and clothes
washer. Tighten if loose or leaking.
ᆓClean out faucet aerators, spray nozzles and drains.
ᆓCheck pipes and drains for water leakage.
WINDOWS
ᆓCheck sills for caulking cracks or separations and re-caulk as necessary.
ᆓCheck weather stripping around windows and repair or replace as necessary.
ᆓCheck windows for smooth opening and closing operation. Clean tracks and lubricate as
necessary, using silicone spray.
ᆓInspect window screens and repair or replace as necessary.
FIRE EXTINGUISHERS
ᆓCheck fire extinguishers to ensure they are fully charged.
SMOKE DETECTORS
ᆓ Test smoke detectors and change batteries if needed. If you live in the part of the country
that has Daylight Savings Time, when you change your clocks would be a good time to
change your batteries.
ᆓ Clean and/or vacuum.
&WFSZ4JY.POUIT$IFDLMJTU

1.5
ATTIC
ᆓ Check attic vents to ensure that soffit vents are not blocked with insulation and move
insulation back to its original location if there are voids on the attic floor.
ᆓ Check inside attic for signs of roof leaks. Be extremely careful not to damage or disturb
electrical wiring or plumbing pipes that may be in the attic.
CAUTION: Be extremely careful entering, exiting and walking in the attic. If you are unsure
performing this task, you should contact a contractor.
CABINETS
ᆓ Check drawers and hinges for proper alignment. Tighten and adjust as needed.
DOORS
ᆓ Check and repair or replace weather stripping on exterior doors as necessary.
ᆓ Tighten all bolts on garage door.
ᆓ Check the fit of exterior doors at their thresholds. Many designs are adjustable.
WINDOWS
ᆓ
Check all windows for gaps in caulking on the exterior of the house.
AIR CONDITIONING SYSTEM
ᆓ Have HVAC contractor perform annual maintenance check-up.
CLOTHES DRYER
ᆓ Check dryer hose for lint. A clogged hose may decrease the drying efficiency of the dryer.
FIREPLACE
ᆓ Have chimney professionally cleaned as necessary.
ᆓ Inspect chimney for nests.
PLUMBING
ᆓ Remove water heater residue following instructions in the Plumbing Fixtures Section
of this manual.
PRESSURE CLEANING
ᆓ Clean roof tiles and asphalt shingles (where applicable) of mildew and dirt as necessary.
ᆓ Clean pool deck and reseal as necessary.
ᆓ Clean pavers, driveways, patios, and walks as necessary.
ᆓ Clean exterior finishes such as siding, stucco, brickwork, stone of mildew
and dirt as necessary.
SEPTIC TANK
ᆓ Check and clean as necessary.
Annual Checklist
1.6
Seasonal Checklist
ᆓ Follow all instructions for safe operation of any fireplace or wood-burning stove.
ᆓ Brush snow off gutters and away from downspouts, as applicable.
ᆓ Remove ice and snow from concrete surfaces and avoid using de-icing
agents with damaging salts.
ᆓ Decorate safely for the holidays. Do not overload circuits or use worn extension cords.
ᆓ Winterize/service sprinkler system.
ᆓ On pleasant days, open windows to allow house to breathe.
ᆓ If your home has hurricane accordion shutters, tracks should be lubricated and shutters
tested prior to the start of the hurricane season.
Interior Mold in Residential Buildings
Mold and mildew in residential homes is not new. Mold grows on damp or wet surfaces. Left
untreated, mold spores can become airborne. Spores are like seeds when they settle on vulnerable
surfaces and they can consume organic material since they are part of our ecological system, help-
ing to recycle organic material. Based on this information, detecting moisture is the key to resolving
the problem. Musty air in the home is a warning sign. Homeowners need to be aware that, under
the right conditions, some condensation could appear on walls, windows or in the air conditioning
vents. In such cases, one must clean and dry these
areas and increase the ventilation in the home. Obtain
a dehumidifier for any area with persistent dampness,
such as a basement that isn’t air conditioned.
Mold can be prevented in areas where water has been
spilled if a leak occurs. In such cases, water could get
behind a wall and mold growth could occur. Look for
discolored areas (usually black) or mold on surfaces.
Such areas also can be caused by problems such as
leaky pipes under sinks, windows left open for rain to
come in, water leakage through uncaulked windows,
leaky roofs, etc.
Uncontrolled mold can be a health hazard. Proper
maintenance of your home will go a long way
toward eliminating or keeping moisture and humid-
ity to a minmum. Consult your personal physician or a
local government health authority for guidance if there
is any concern for your health. Use of some or all of
the items below will help to eliminate major problems
with mold.
A Special Checklist for Condensation, Mold & Mildew

1.7
• Have your air-conditioning system serviced by a recognized professional
company at least annually. Ask for advice from an air-conditioning specialist if you are
unsure about proper usage of your air conditioner.
• When outside weather is warm with low humidity, open windows to allow air circulation
through the house.
• Increase circulation of heated air.
• Run the air conditioner during humid months of the year.
• Obtain a dehumidifier for any damp areas of the home, such as steamy bathrooms,
basement, indoor pool area or attached greenhouse.
• Repair any water leaks quickly.
Take measures to keep water away from the foundation. There are many other ways to care for
particular situations but the best of all is to use common sense. The objective is to keep your home
dry and free from leaks or water intrusion and excessive condensation.
A Special Checklist for Condensation, Mold & Mildew

Chapter Two
General Information
& Safety Tips

Introduction
Every aspect of building your home, from laying the foundation to the final coat of paint, is an art
form and was done by a qualified professional selected by your builder. By following the tips in this
Homeowner’s Maintenance Manual you can prevent minor problems from developing into major
ones. Your home will retain its value and you can experience the pride of ownership for years to
come. This manual is not intended to be a “Do-It-Yourself” step-by-step guide, but it does provide
useful information about the care and maintenance of your home. Please bear in mind that any
repairs made by the homeowner or someone hired by the homeowner may void the
manufacturer’s or builder’s warranty on the item being repaired.
While it is important to know what you are doing before you attempt any repair, it is equally important
to know when to stop. If the project is more complex than you originally thought, and exceeds your
ability to make the repair...STOP… call in someone who knows what they are doing. It is better to
admit a lack of knowledge than to compound the problem and create a major expense.
Your local home improvement center or hardware store can provide you with a variety of services
beyond selling you merchandise. They usually have “Do-It-Yourself” books that provide detailed
information about specific areas of the home. Many of them offer classes on a wide range of
subjects from carpet and tile installation to selecting the proper tools for any given job. Frequently
the person waiting on you can provide useful information that will help you in selecting the right
materials for the project.
Personal Safety
Accidents happen. They are called accidents because they were never intended to happen. They
frequently occur because of the lack of precaution by the injured party. If hindsight was foresight,
very few homeowners would be found in hospital emergency rooms.
A few dollars invested in eye protection, proper shoes and gloves may prevent a serious injury.
When working around fiberglass insulation (such as attic crawl spaces) always wear long sleeves
and gloves. You should take a shower as soon as possible after finishing the project.
Every home should have one or more ladders. In selecting a ladder make sure that it meets your
needs for reach and weight requirements. When working on or around electrical fixtures, never use
an aluminum ladder. A ladder made of fiberglass is recommended for most applications. Pay close
attention to the warning labels affixed to the ladder. They are there for your protection.
It is important to understand the function of any tool that you are using, especially power tools.
Read all accompanying instructions carefully before attempting to use the tool.
If your home has a home stand-by generator, read the manufacturer’s maintenance manual before
attempting any periodic maintenance.
Keep a first aid kit on hand at all times. Remember, the trauma of a trip to the emergency room
may be avoided if you use a little common sense when working in or around your home.
2.1
General Information & Safety Tips

2.2
Introduction
Your local utility companies provide a variety of services to your home. In most cases, even though
their lines cross your property, you have no ownership or control over them until they pass through
a metering device (electricity, water and gas). In the case of telephone lines and coaxial cable, they
must pass through an exterior wall. Service or alterations to any utility line should be done only by a
competent, licensed professional.
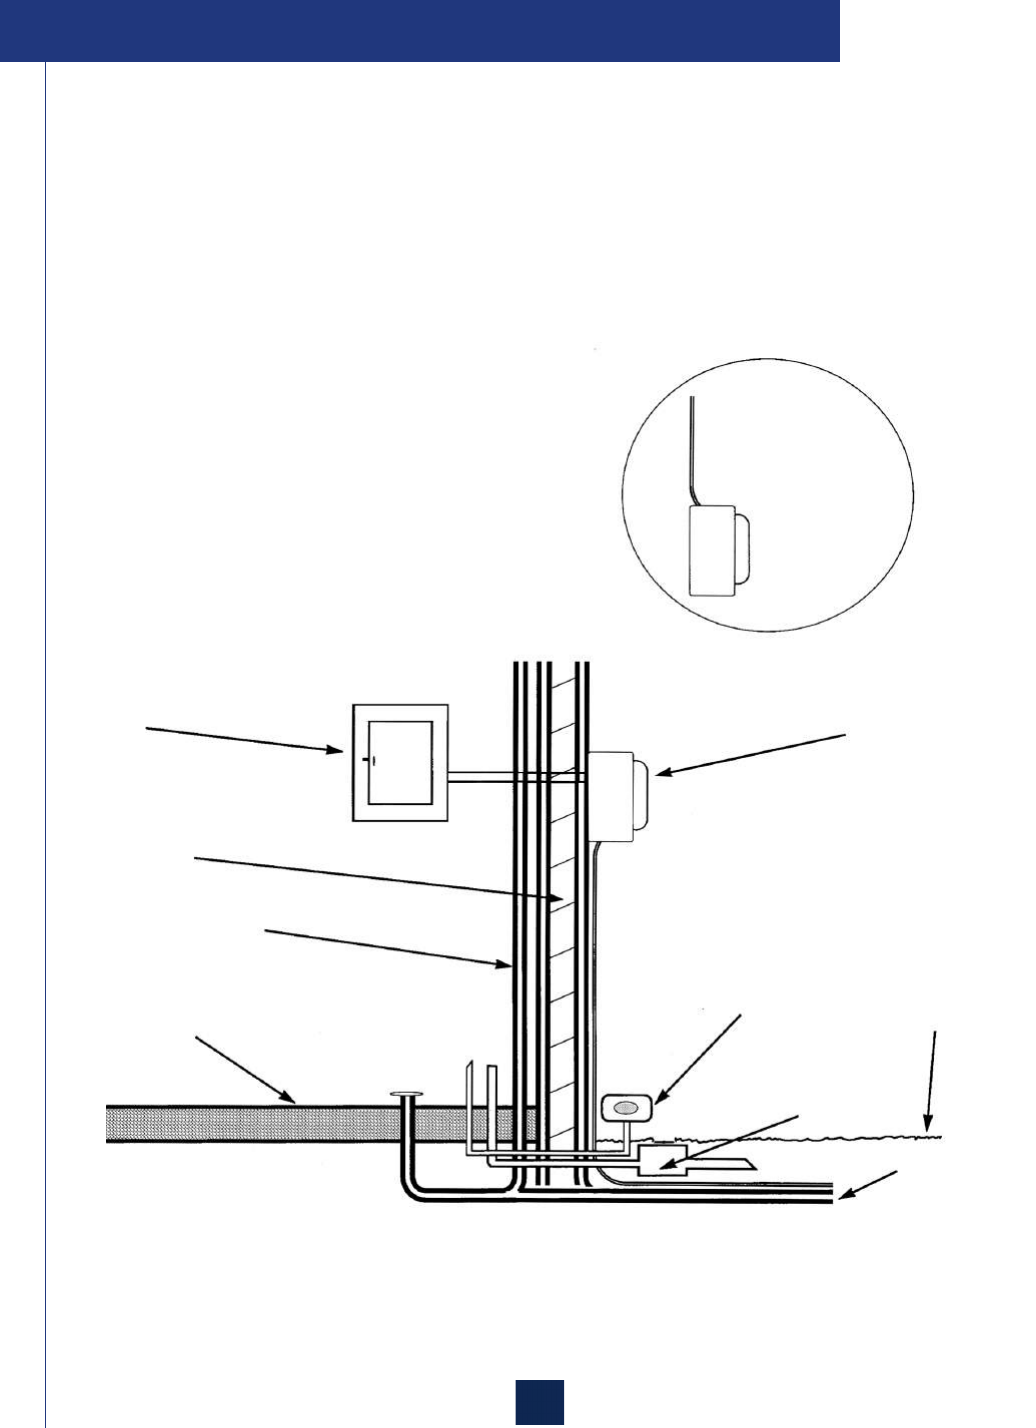
The illustration on the next page will provide a basic idea of where to look for various utility lines.
Emergency Shut-offs
Your builder will show you where the main shut-off valves and switches are located in your home.
Every qualified person in your home should know where these switches and valves are located and
how to turn them off in an emergency.
Electricity
Electricity does not discriminate. It is an equal opportunity killer. Never attempt any electrical repair
unless you absolutely know what you are doing. For any additional service needs or major repairs,
you should call a licensed electrical contractor.
Even when attempting a minor repair, you must have the electricity turned off to the device you are
working on. This must be done at the circuit breaker box. Turning off a wall or lamp switch will not
always prevent a shock.
Every receptacle, lamp and electrical device is controlled by a circuit breaker in the main circuit
breaker box. Each circuit should be labeled and you should know its function. Never try to defeat
the purpose of a circuit breaker. If it frequently “trips,” this is generally a sign of a more severe
problem, and a competent, licensed electrician should be called. The following simple steps may
prevent a severe electrical shock:
A. Open the circuit breaker box and locate the proper circuit breaker. Turn it off.
B. Close the panel door and tape a note across the front of the box informing others
that you have turned off a circuit breaker and not to touch anything. If you can lock the
panel, do so.
DO NOT ATTEMPT ANY ELECTRICAL REPAIR UNLESS YOU ARE LICENSED AND QUALIFIED!!
Utility Lines, Cables & Pipes
2.3
Utility Lines, Cables & Pipes
NOTE: Entrance of telephone and coaxial
television cables may be at the point
most convenient to the utility company.
Electrical
Power
Supplied by
Overhead Lines
Circuit Breaker Box
Exterior Wall
Plumbring Stack
Floor and/ or Slab
Electric Meter
Gas Meter
(where available)
Water Meter
(may be inside)
Ground
Sewer Line

Chapter Three
Homeowner’s
Maintenance Information

3.1
A. Air Conditioning and Heating Equipment
The air conditioning and heating equipment was installed by the HVAC (Heating, Ventilating and Air
Conditioning) contractor.
The air conditioning and heating system(s) provides year-round climate control and consists of a
thermostat to control temperature, an air handler unit to heat or cool the air, a filter to remove
particles from the air, plus a fan unit to distribute and circulate air throughout the home via ducts
and registers. Air conditioners have an outdoor condensing unit or compressor which must be kept
sufficiently free of obstructions (such as shrubbery) to allow air to flow freely.
NOTE: In certain areas of the country that experience extreme high temperatures, water cooled air
conditioning systems may be used rather than air cooled systems. The difference between the two systems
is how the heat is removed from the condenser. Water cooled units flow water over the condenser coils to
remove heat and air cooled systems blow air across the condenser to remove heat. In areas where there can
be hard freezes, water must be drained from both the condenser unit and water supply line.
NOTE: Window coverings should be installed to maintain consistent room temperature. Direct sunlight
entering the house will increase the temperature in the affected area and will also fade furniture and carpets.
Homeowner’s Maintenance Guidelines
Service Contract: When there is a heavy demand on your HVAC system, you are encouraged to
take advantage of the extended annual service contract that is available from your air conditioner
supplier. This contract typically provides seasonal check-ups of the heating and cooling components,
plus periodic cleaning; the advantage being that scheduled service may reduce system failure by
preventing problems before they occur.
Before Calling for Service:
1. Check to see that the thermostat is properly set.
2. Check the circuit breaker in the panel box. If tripped, reset by switching the
breaker from the full “Off” position to “On.” If the circuit breaker will not reset, contact
the HVAC contractor.(See Circuit Breakers in the Electrical System Section.)
3. Check the electrical disconnect switch, located on or near the air handler, and reset.
4. Check the exterior disconnect switch located outside the home near the
compressor, and reset.
B. Air Filter
The air filter, located adjacent to the air handler unit or in the return air grille, helps reduce the flow
of dust into the air. As the filter collects dust, it reduces the system’s efficiency and must be either
cleaned or replaced. Your builder has installed one air filter in each filter location and will, at the
walk-through, demonstrate proper filter installation, cleaning and replacement procedures. After
that, the regular cleaning, replacement and maintenance of air filters is the homeowner’s responsibility.
Air Conditioning & Heating

3.2
Homeowner’s Maintenance Guidelines
Monthly filter cleaning or replacement will provide cleaner air, improve air flow, and help reduce
utilities costs. To remove, clean or replace filters, turn the air conditioner/furnace and fan off using
the thermostat control, then carefully remove the old filter and clean, or insert a new one.
Replacement filters are available through hardware and home supply stores. Make sure to buy
the correct size for replacement.
NOTE: There are filters available that need to be replaced only every three (3) months and other filters that
are washable and do not need to be replaced.
C. Thermostat
The thermostat controls the entire heating and cooling system. The thermostat provides a fan
switch to circulate the air when neither heating nor cooling is needed.
To maximize energy efficiency and minimize utility bills, set the thermostat to a comfortable level
normally between 68° F to 71° F for heating, and between 76° F to 78° F for cooling, and leave it
there. Then set the fan switch to either the “ON” or “AUTO” position.
The less frequently you change the thermostat setting, the more comfortable you will be, the lower
your utility bills will be, and less wear and tear on the system’s compressor will incur. Changing
settings frequently will cause the supplemental heater to run more often, and turning the system on
or off expends extra energy to bring the temperature back to a comfortable level. Setting air condi-
tioning controls too low does not cool the home faster and the same principle applies to heating.
Programmable thermostats can save energy and money without sacrificing comfort and convenience
by reducing the amount of time heating and cooling systems operate. You can program different
temperature settings for different times of the day and days of the week based on when you are in
your home. When programmed properly, the heating and cooling systems will operate less frequently,
consume less energy and lower utility costs. Programmable thermostats can be purchased at
hardware and home supply stores.
D. Air Distribution System
Duct Work: Ducts carry and distribute heated or cooled air to each room.
Registers: Two kinds of registers are used: air supply registers (located on the wall or ceiling) that
deliver warm or cooled air into the room; and air return registers (located on walls, ceilings or under
the air handler access door) that return air from the room back into the air handler fan to be
re-heated or re-cooled.
To regulate temperatures on different floors or rooms during different seasons, adjust the air supply
registers by partially opening or closing them, thus restricting or moving additional air into each room.
Vacuum supply and return registers to ensure they remain dust free. Check that registers are not
blocked by draperies, furniture or other obstructions that restrict normal air flow.
Air Conditioning & Heating

3.3
Interior doors in each room are undercut to allow return air to circulate throughout each room when
the doors are closed. Do not close doors to regulate room temperatures.
Caution: Burning candles for prolonged periods of time may, in some instances, create a
phenomenon known as “ghosting.” Ghosting occurs when soot from a burning candle is released into the air,
carried throughout the house through the air conditioner, and expelled through the vents. The soot adheres to all
surfaces including ceilings, fabrics and countertops. It is especially visible on the carpet at the base of bedroom
doors. Cleaning is very difficult and is a homeowner’s responsibility.
To avoid ghosting in your home, follow these few simple steps:
1. Buy candles made with hard wax and with thin braided wicks that curl over when burned.
2. Buy candles with low aromatic properties and with wicks that burn with a low flame.
3. Buy candles with cotton or paper wicks and refrain from buying candles with metal-core wicks.
4. Do not allow candles to smoke and keep them out of drafts.
5. Keep matches and wick debris out of the candle.
6. Extinguish candles after one hour of continuous burning. Allow the candle to cool
before relighting.
7. Large numbers of candles should be burned in the fireplace with the damper
open to allow the smoke and emission to escape.
8. Stop using candles that leave a visible soot ring on their containers.
E. Exterior Compressor/Condensing Unit
Homeowner’s Maintenance Guidelines
Keep the condensing unit (compressor) level and keep the area surrounding the unit clear to allow
unimpaired air flow. Do not plant bushes too close to the unit and be careful that dirt, leaves and
grass clippings are cleared away. For a thorough cleaning, contact an HVAC contractor. Do not
build a deck around or over the compressor unless there is an 18 inch clearance on the sides and a
6-foot minimum clearance on top.
F. Condensate Control
Dehumidification is part of the function of your air conditioning system. The moisture removed from
the air is condensed into water and is then referred to as “condensate.” The condensate forms and
is collected on the evaporator coil which is located in the air handling unit (except on one-piece
package units). The condensate drain removes the water. Regular maintenance should be performed
by the A/C contractor of the drain pan and line to control algae build-up and eliminate water leaks.
Homeowner’s Maintenance Guidelines
Install algae tablets in the condensate drain pan regularly. Flush condensate drain pan and lines
regularly. Drains should be flushed from the inside of the house toward the outside. Never open the
air handling unit without first disconnecting the power. Algae tablets are available through your air-
conditioning contractor or home improvement center.
Air Conditioning & Heating

3.4
Helpful Hints:
a. Check and replace or clean filters every month. Clogged filters mean higher
operating costs.
b. Don’t try to maintain different temperatures in different rooms by totally closing
duct outlets — you will unbalance the system and reduce its efficiency.
c. Use bath and kitchen exhaust fans sparingly when air conditioning is operating.
d. To reduce the time your air conditioner must be on, do heat-producing chores such
as baking and dish washing, during the cooler hours in the morning or evening.
e. Check weather stripping and caulking around doors and windows for leaks.
f. Shade your home with trees wherever possible.
g. Keep all windows and exterior doors shut when air conditioner is on.
h. Do not short-cycle your compressor by moving the thermostat up and down too rapidly.
Set your temperature slowly and leave it for at least five minutes before resetting.
i. In case of outside temperatures exceeding 95° F, a differential of 15° F is acceptable.
G. Heat Pump
Your home may be equipped with an electric, forced-air heating system that includes a heat pump.
The heat pump is an electrically powered, single-refrigeration unit that provides both heating and
cooling functions. It operates on the principle that outdoor air, even in winter, contains heat or thermal
energy. During winter, the heat pump draws in outside air, extracts the heat and then circulates it
throughout the home. In the summer the process is reversed, whereby the heat pump removes heat
from indoor air, discharges it outdoors and then circulates cool air throughout the home.
A heat pump can be expected to operate continuously if outside temperatures fall below 50°F.
Heated air coming from the registers feels cool to the touch. This is normal since the heat pump
generates a low level of heat, sometimes below 90°F, while normal body temperature is 98.6°F.
Supplemental Heat: When outdoor temperatures fall to at least 50°F, the heat pump may be
unable to draw sufficient heat from the outside air and a supplemental heating unit automatically
turns on. You will know it is operating when the blue/green light on the thermostat is lit. The heating
elements, located in the furnace unit’s air handler, will turn on for a short time. The supplemental
heat will also turn on if the thermostat is adjusted more than two degrees above room temperature.
Emergency Heating: Should the heat pump fail, activate the emergency switch on the thermo-
stat. The red light indicates that it is on. This will stop the heat pump from operating and will provide
supplemental heat until the HVAC contractor arrives.
Defrosting: During winter, ice can accumulate on the sides of the heat pump’s exterior coil. When
ice covers 80 percent of the surface, the system automatically activates a defrost cycle that lasts
about five minutes, heating the coil to melt the ice. It will also activate the supplemental heat to
prevent ducts from blowing cold air into the home during the defrost cycle. This process may occur
several times each day, and you will notice that steam rises from the unit when it occurs. This is
completely normal and is not cause for concern.
Air Conditioning & Heating

3.5
Homeowner’s Maintenance Guidelines
Keep the heat pump unit level and keep the area surrounding the unit clear to allow unimpaired
air flow. Do not plant bushes near the unit and be careful that dirt, leaves and grass clippings are
cleared away. For a thorough cleaning, contact an HVAC contractor.
Do not build around or over the air conditioner unless there is an 18-inch clearance on the sides
and a 6-foot minimum clearance on top.
Air Conditioning & Heating
3.6
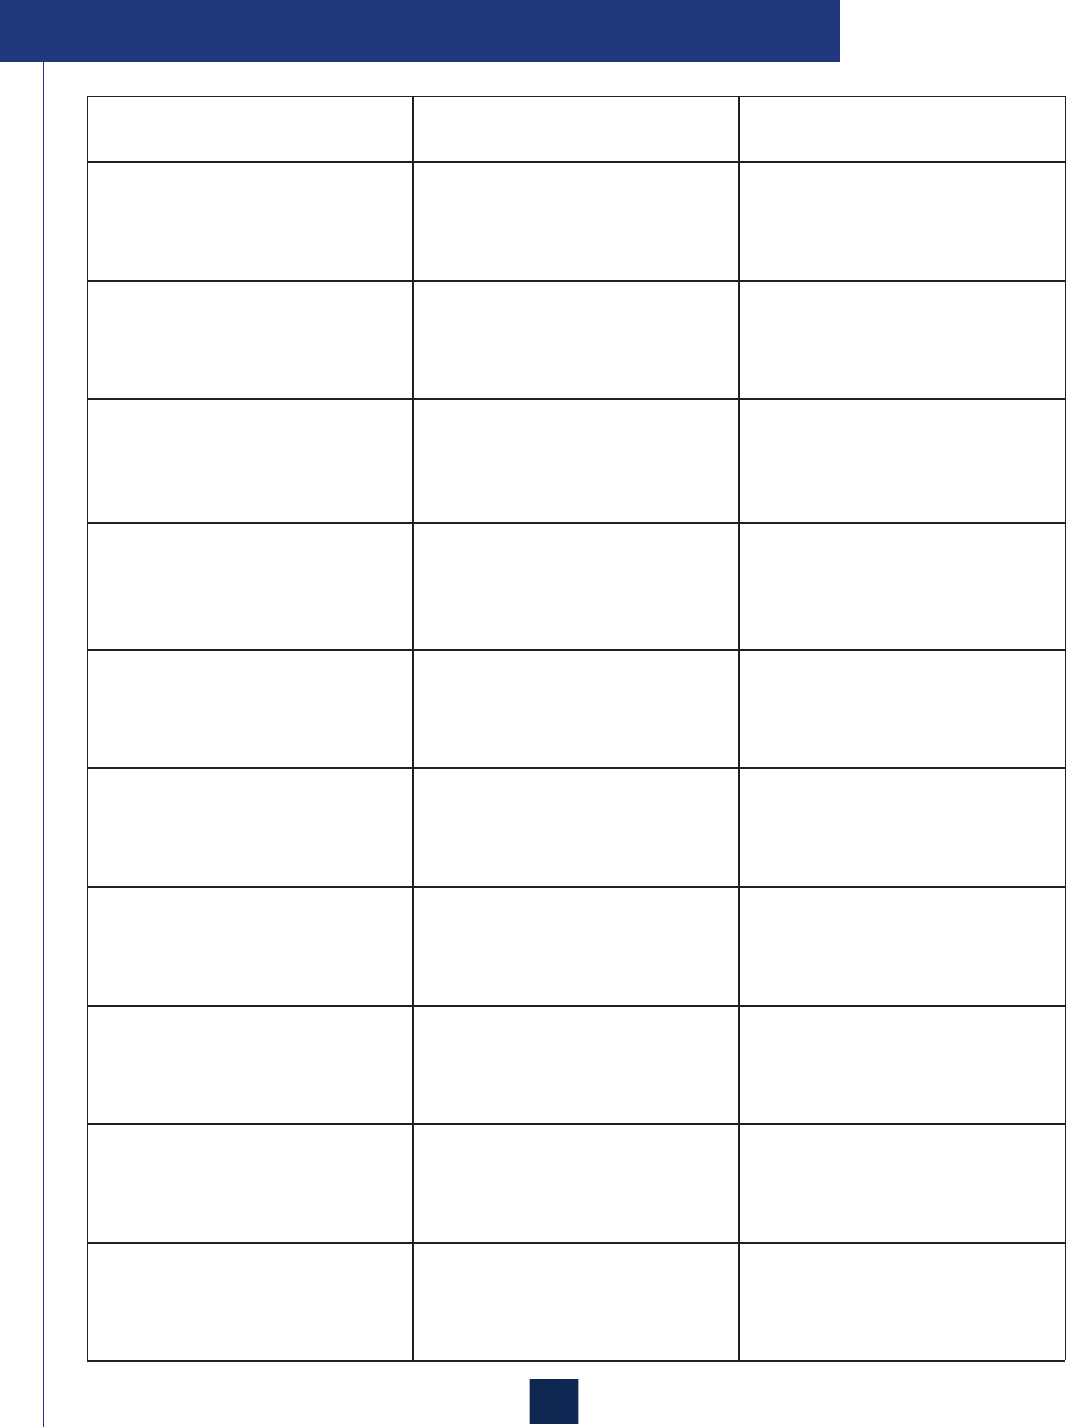
PROBLEM LIKELY CAUSE SOLUTION
Air temperature in different
rooms or floors is uneven.
Air distribution unbalanced.
Registers are obstructed.
Adjust air registers. Clear
obstructions away from registers.
Reduced air flow or excessive
dust on vents and registers.
Dirty air filter. Clean or replace air filter as
necessary.
Indicator light on thermostat
stays on continuously.
Disconnect breaker at panel
box tripped.
Check disconnect breaker.
Reset or replace as necessary.
Heat pump, fan or air
conditioner not operating.
Low refrigerant or dirty
air filter.
Reset circuit breaker at
panel box or unit.
Air conditioner or heat
pump not operating properly.
Outside unit obstructed by
debris: bushes leaves, etc.
Clear obstructions from
top and sides of unit.
Inside air handler is leaking
water.
Condensation drain clogged
or inside coil is frozen.
Call HVAC contractor. Check
manufacturer’s warranty.
Inside or outside coil is frozen. Low refrigerant or dirty
air filter.
Call HVAC contractor. Clean or
replace filter. Raise thermostat to
90° to thaw.
Excess water on window panes.
Excess humidity in home.
Adjust thermostat setting. Use
exhaust fans while cooking or
bathing.
Burning smell when winter or
auxiliary heat first turned on.
Accumulated dust on electrical
coils.
Normal. Happens once each
year.
Blue/green light on the thermostats
stays on continuously.
Disconnect Breaker tripped at heat
pump.
Check disconnect breaker.
Reset or replace as necessary.
Solutions to Common Heating and Air Conditioning Problems
3.7
Introduction
Your home may be equipped with a variety of appliances, such as an electric oven, range hood,
dishwasher, refrigerator, microwave oven, garbage disposal, washing machine and dryer. At move-in
time, you should test all appliances for proper operation. Where applicable, fill out and mail in
warranty card. Failure to do so may void the manufacturer’s warranty. Review the manufacturer’s
service manuals for operation and maintenance instructions. File your manuals in a convenient
location for future reference.
Many manufacturers offer toll-free customer service to answer questions about appliance problems
and operation. Some helpful numbers are:
GE Service 800-432-2737 Whirlpool 800-253-1301
Kitchen Aid 800-422-1230 Jenn-Air 800-688-1100
Sub-Zero 800-222-7820 Sears (Kenmore) 800-366-7278
Frigidaire 800-374-4432 Amana 800-628-5782
Maytag 800-807-6777 LG Service 800-243-0000
In-sink-Erator 800-558-5700
For appliance repair protection that extends beyond the manufacturer’s warranty period, we suggest
you consider a service contract available through an appropriate local contractor or the manufacturer.
If you purchase your own appliances, carefully measure existing appliance openings to ensure
proper fit. Check that doorway widths leading to the appliance location are wide enough to move
the appliance through.
Homeowner’s Maintenance Guidelines Before calling for service:
If an electrical appliance fails to work, complete the following checklist before calling the appropriate
contractor; otherwise you may be charged for a service call.
1. Check that the appliance is plugged in.
2. If the appliance is plugged into a wall-switched
electrical outlet, make sure the switch is “ON.” If
the appliance is plugged into a GFCI circuit,
check and reset the button if necessary.
3. The circuit breaker on the panel box controlling
the appliance should be in the “ON” position.
4. Some appliances come with their own separate
fuses or circuit breakers. Review the manufacturer’s
service manual for the exact location, then check
for proper setting.
5. Annually check the dryer vent for obstructions.
Accumulated lint should be removed by
disconnecting and then vacuuming the dryer vent.
Appliances

3.8
Helpful Hints:
Refrigerators/Freezer: Check and clean the gaskets regularly to ensure a tight seal. Refrigerator and
freezer temperatures should be set at the temperatures recommended by the manufacturer. DO NOT
PLUG a refrigerator or freezer into a “ground/fault” (GFCI) receptacle, because the circuit may trip
and not be discovered for some time, allowing the contents of the refrigerator or freezer to spoil.
Dishwasher: Use only when you have a full load. Use the shortest wash cycle.
Cook Tops/Stoves/Ovens: Do not allow dirt to accumulate. Clean with a recommended over-
the-counter cleaner. Do not use harsh abrasive unless specified. Clean all filters regularly.
Garbage Disposal: Always use cold water when disposal is working. Corn cobs and husks,
bones, celery or any other food that shreds should not be put into the disposal. If the machine be-
comes jammed, use the wrench to free the mechanism and try again. The disposal will rust if not
used regularly. If you are going to be away for an extended period of time, a teaspoon of oil will
help prevent the mechanism from freezing.
Range Hood Fan or Microwaves: The range hood fan filters collect grease and should be
cleaned regularly. Soaking the filters or lightly brushing them in hot soapy water is the best cleaning
method. Be sure the filters are dry before reinstalling them.
Microwave Oven: Be sure that vent louvers are not blocked.
Introduction
The attic space below the roof is part of the roof truss system. When inspecting the attic, walk on the
wood members only. The drywall ceiling of the room below is not designed to support any weight.
Homeowner’s Maintenance Guidelines
The attic truss system is not engineered to support additional weight and should not be used for
any storage purpose. Materials stored can also be a fire hazard. Do not cover any vents with
insulation or any other material. Insulation on the attic floor is for the thermal protection of the
rooms below. If the insulation is moved, it will leave gaps between the insulation panels and may
obstruct the attic vents. Always replace moved insulation back to its original position.
Building codes require attic and crawl space vents to minimize accumulation of moisture. Attic
ventilation occurs through vents in the soffit (the underside of the overhangs) or on gable ends.
Driving rain or snow sometimes enters the attic through these vents. Do not cover them to prevent
this. Instead, cover the insulation in front of the vent. When you do this, precipitation that blows in
safely evaporates and ventilation can still occur.
Appliances
Attic

3.9
Also see Ceramic Tile Walls and Plumbing sections
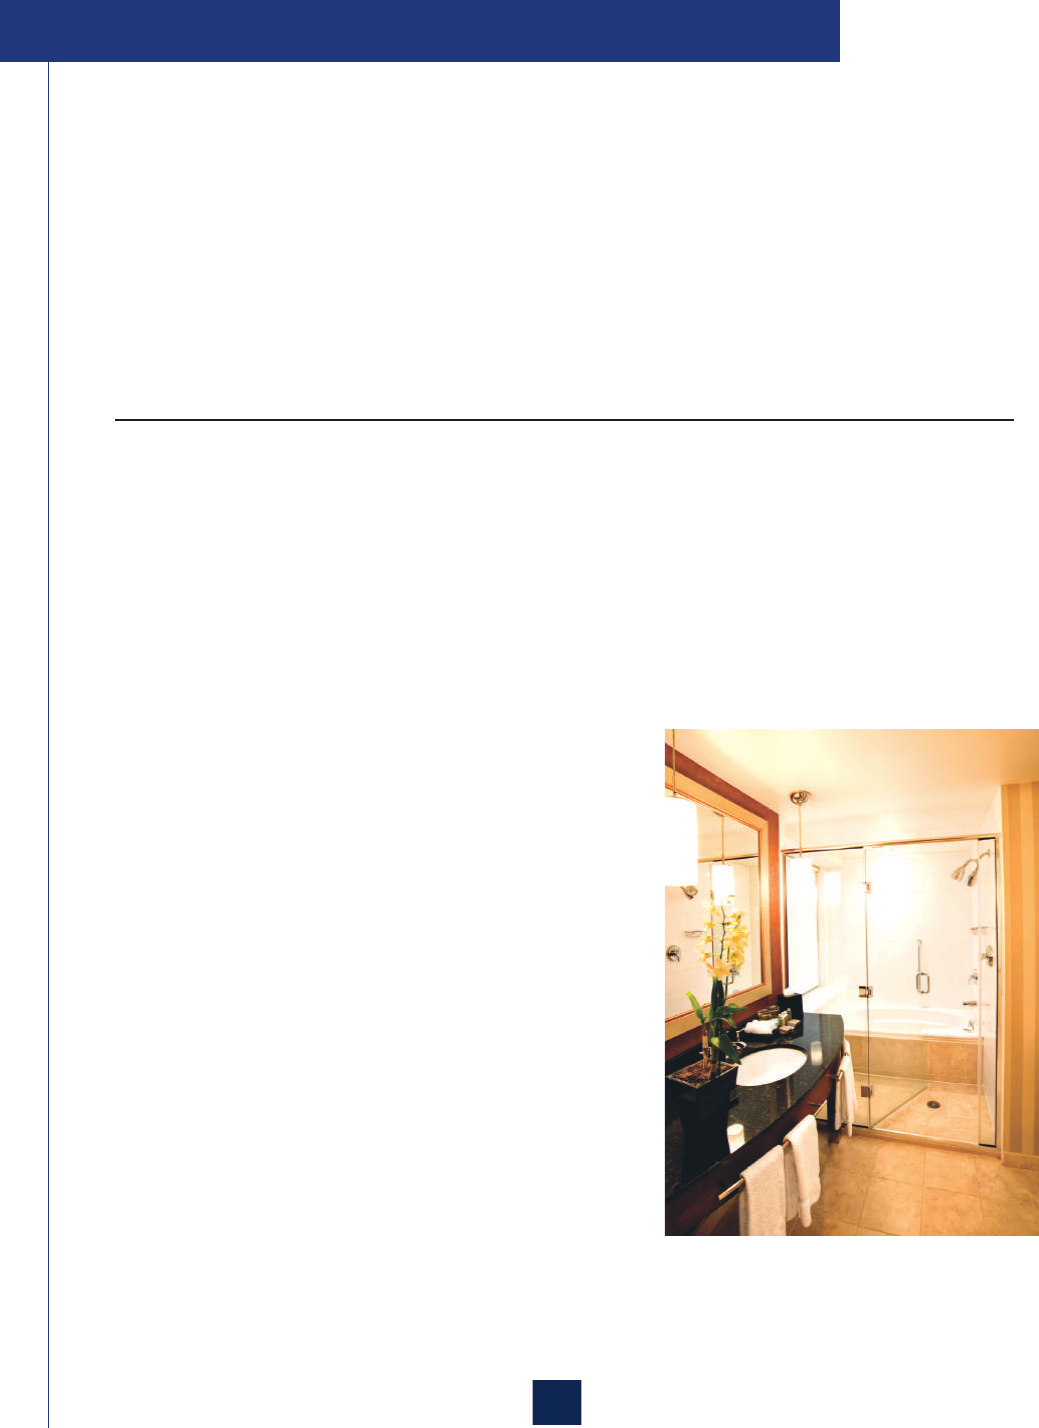
Homeowner’s Maintenance Guidelines
Mildew: Moisture and mildew problems will occur in any room where water vapor is present. To
reduce mildew, turn on the exhaust fan or slightly open a window when bathing. Wipe off wet tiles
when done, then hang up towels and washcloths to dry. To clean mildewed surfaces and reduce
mildew odors, apply a liquid mildew agent in a well-ventilated room, followed by a disinfectant and
thorough rinsing with clear water. Moisture and mildew removal is a homeowner’s responsibility.
Soap Scum: In some geographic areas, water that is high in mineral content can contribute to
soap scum build-up. To clean and remove residue, wash the affected surfaces with a mild vinegar
and water solution or use mildew removers found in most stores.
Rust stains: The contact of wet metal on sink surfaces — for example, the bottom of a shaving
cream can — may produce rust stains. To remove them, apply a powered rust remover, carefully
following the manufacturer’s instructions.
Introduction
The ceramic tile walls in your bathrooms or kitchen are easy to maintain and, if property maintained,
will be impervious to water. The seams, joints and sealers are not waterproof and require proper
maintenance to prevent water seepage and damage to materials adjacent to and underneath the tile.
Cracks in the caulking joints between tile and tub, in the shower stall corners and at the floor, are
normal and are caused by the degree of moisture present in every bathroom, as well as from the
normal shrinkage of caulking material. Separation between the tub and wall tile is caused by the
weight of the tub filled with water.
Re-grouting and re-caulking are Homeown-
er’s Maintenance responsibilities for the life
of the home. For other problems
concerning bathtubs, sinks, etc., see
the Plumbing Fixtures section.
Bathroom Maintenance
Ceramic Tile

3.10
Homeowner’s Maintenance Guidelines
Caulk cracks and separations of seams adjacent to tile with a top quality flexible caulk, taking care to
wipe the tile clean once caulking is complete. Do not use clear silicone-based caulk since it yellows
with age and stains easily. See Re-Caulking of Tubs and Showers in the Plumbing Fixtures section.
Glazed Tile Showers: Use an all-purpose bathroom cleaner. Let stand for five minutes, rinse
and dry. Use a mixture of equal parts water and white vinegar or a commercial tile cleaner. For
stubborn stains, use chlorine bleach or scouring powder containing a bleaching agent. Let stand
four to six hours, then scrub and rinse thoroughly. To remove mildew, use a commercial tile cleaner
or chlorine bleach or ammonia. Do not mix chlorine bleach and ammonia!
Unglazed Tile Walls: Sponge with a diluted solution of water and soapless detergent.
For deep-cleaning, use scouring powder paste. Let stand five minutes. Then scour with a brush.
Rinse and wipe dry.
1. Never use abrasive cleaners or harsh chemicals or solvents on ceramic tile.
2. Unglazed tiles may need to be sealed on a regular basis.
3. Wipe off spills immediately.
4. Never use harsh cleaning agents such as steel wool pads which can scratch or
damage the surface of your tile.
5. Do not use a cleaning agent that contains color on unglazed tile. The pores in
the ceramic could absorb the color.
6. Test scouring powders on a small area before using overall on tile.
7. If continuous staining is a problem on grout joints, use a sealer.
Grout Stain Removal Guide
Stain Removal Agent
Grease and fats Soda and water or commercial spot-lifter
Inks and dyes
Household bleach
Mercurochrome
Ammonia
Blood
Hydrogen peroxide or household bleach
Coffee, tea, food, fruit juices,
lipstick
Neutral cleaner in hot water, followed by hydrogen
peroxide or household bleach

3.11
Introduction
Kitchen, laundry room and bathroom vanity cabinets are all selected for their attractive appearance,
durability and ease of care. With proper maintenance, the cabinets will remain serviceable and
attractive for many years.
Homeowner’s Maintenance Guidelines
Wood Cabinets: Wood cabinet tone, grain and color variations are normal and reflect the natural
characteristics of real wood.
Clean wood cabinets with the same gentle care you would give any fine wood furniture. A light coat
of wax or lemon oil applied once or twice a year will protect the finish and enhance the appearance.
Cabinet-mounted coffee makers are not recommended since the rising steam will damage solid
wood and wood veneer, causing fading or delamination. For the same reason, position regular
coffee makers out from underneath the upper cabinets and near the front of the counter.
Laminate Cabinets: Clean laminate cabinets with soapy cloth or sponge, using a non-abrasive
liquid household cleanser for more stubborn stains. There are one-step cleaning products available
for laminates that clean, reduce streaking, and leave surfaces polished. As with all cleaning
products, carefully follow the manufacturer’s instructions.
Shelves: Shelves are not designed to hold weight that exceeds 20 pounds per square foot. Keep
canned goods, flour, sugar and heavier products on the bottom shelf of the base cabinets. If
desired, apply contact paper to shelves to protect against scratches and stains.
Drawer and Hinge Care: Check the hinges at least once a year for proper alignment and
tightness, using a screwdriver to make necessary adjustments. Check drawers for easy movement
and apply a silicone spray to the drawer guides should sticking occur.
Repairing Nicks and Scratches: Hardware stores offer color-matching putty, stains, and poly-
mer fillers to cover and repair cabinet nicks and scratches.
The homeowner is responsible for fading damage or delamination caused by heat, steam or water
intrusion.
Introduction
Homeowner’s Responsibility: The homeowner is responsible for contacting the local cable com-
pany for the initial hook-up. Roof antennas and/or satellite signal receiving dishes are not allowed
in some communities and you should check with your Homeowner’s Association (if applicable) be-
fore proceeding with any installation.
Cabinets
Cable T.V. System

3.12
Concrete
Foundation and Floor Slabs: In monolithic construction, the floor slab, garage slab, foundations
and footings are all poured in concrete at the same time. Most builders use heavily reinforced
concrete monolithic slab construction. In some states, in order to prepare the soil for the foundation,
a termite spray is applied to the ground prior to pouring the concrete slab. After the first year, it is the
homeowner’s responsibility to maintain a termite contract.
One thing to understand about concrete is that it will crack!
It is important to understand that concrete is a porous material that will expand, contract, and crack
as a result of temperature changes, shrinkage, stress and settlement. Hairline cracks that may
appear on foundation walls and be visible on garage floors are common and are usually cosmetic,
as opposed to structural. Shrinkage occurs from the normal curing process of concrete that var-
ies with the time of year and the moisture conditions that exist when the concrete is poured. Slab
stress and settlement are typically caused by soil conditions and loads such as the weight of the
walls. These forces can create a variety of stresses which, in combination with seasonal temperature
variations, can cause concrete and masonry foundations to develop non-structural cracks.
Home Slab and Garage Slab: Due to the large size of concrete home and garage slabs, shrink-
age cracks (less than 1/4 inch wide) are common, and are usually the result of expansion and con-
traction. These shrinkage cracks are normal and it is best to leave them alone, since attempts to fill
the cracks will not stop the expansion and contraction. Cracks in slabs, patios, garage floors, side-
walks and driveways are common and require no additional attention. They are cosmetic in nature
and do not affect the integrity of the concrete. Any attempt to repair chips or cracks in concrete will
result in product and color variation.
Color variations in concrete are a common occurrence and are beyond the control of the builder or
sub-contractor.
Homeowner’s Maintenance Guidelines
Clean concrete with a solution of five tablespoons of baking soda to a gallon of water. Before using
the cleaning solution, wet the floor with clear water and loosen the dirt with a steel brush or
scraping blade.
A concrete sealer may be applied to the floor, following the manufacturer’s directions, approxi-
mately six months after you move in. This will make it easier to clean and will reduce concrete dust-
ing. Note:Use of concrete sealer may make the floor slippery when wet.
A. Concrete Block
Introduction
In many homes concrete blocks are used to construct the exterior walls. The concrete blocks are
set in place and then reinforced with steel and additional concrete. Concrete block construction
requires occasional painting and caulking. Vertical or horizontal shrinkage caused by temperature
changes and home settlement are usually cosmetic as opposed to structural and are a homeowner’s
responsibility. Additionally, concrete block foundation walls are often covered in stucco in certain
areas in the country and vertical or horizontal shrinkage stucco cracks are only cosmetic and can
be sealed when the home is painted.
3.13
B. Stamped Concrete
Introduction
Concrete is placed between forms, color hardener is applied to cover the surface then troweled into
the surface; color release is applied, then tools are placed to stamp the pattern a minimum of 21
days later, the driveway or patio will be pressure cleaned and sealed.
C. Decorative Concrete Topping (Spray Deck)
Introduction
Spray Deck is a decorative type of material that can be applied to a 4” concrete surface. It is
generally used around pools and patios.
In most cases, exterior concrete cracks are due to expansion and contraction because of soil
movement, temperature variations and pool settling.
Homeowner’s Maintenance Guidelines
Per manufacturer’s instructions: To remove dirt, mildew, etc., hose down area with water and
sprinkle powdered laundry detergent on tile deck and scrub with a soft nylon brush. Let sit five
minutes and hose off immediately. Work in small areas so mixture does not dry onto surface. Do
not use any abrasive chemicals or pool water which contains chlorine bleach, acid or household
bleach. Do not pressure clean deck unless you intend to reseal and stain; it can scar and remove
surface.
D. Driveways, Sidewalks, Patios, Porches, Steps and Stoops
Introduction
In most cases, exterior concrete cracks are due to expansion and contraction because of temperature
variations, soil movement and slight home settlement. Driveways are not designed to handle the
extreme weight of dual-axle and dual-wheel vehicles.
Homeowner’s Maintenance Guidelines
Lawn fertilizer left on the driveway, sidewalks
and patios will stain the concrete and cause
rust spots. This can be prevented by immedi-
ately hosing off the driveway, sidewalk or patio
after applying fertilizer.
Water used to irrigate lawns may contain
mineral deposits such as iron that can cause
driveway, sidewalk and patio staining and mil-
dew. Keep excessive weight such as sand,
lumber and moving vans off the driveway to
prevent cracking. Rust and grease stains are a
homeowner’s responsibility.
Concrete
3.14
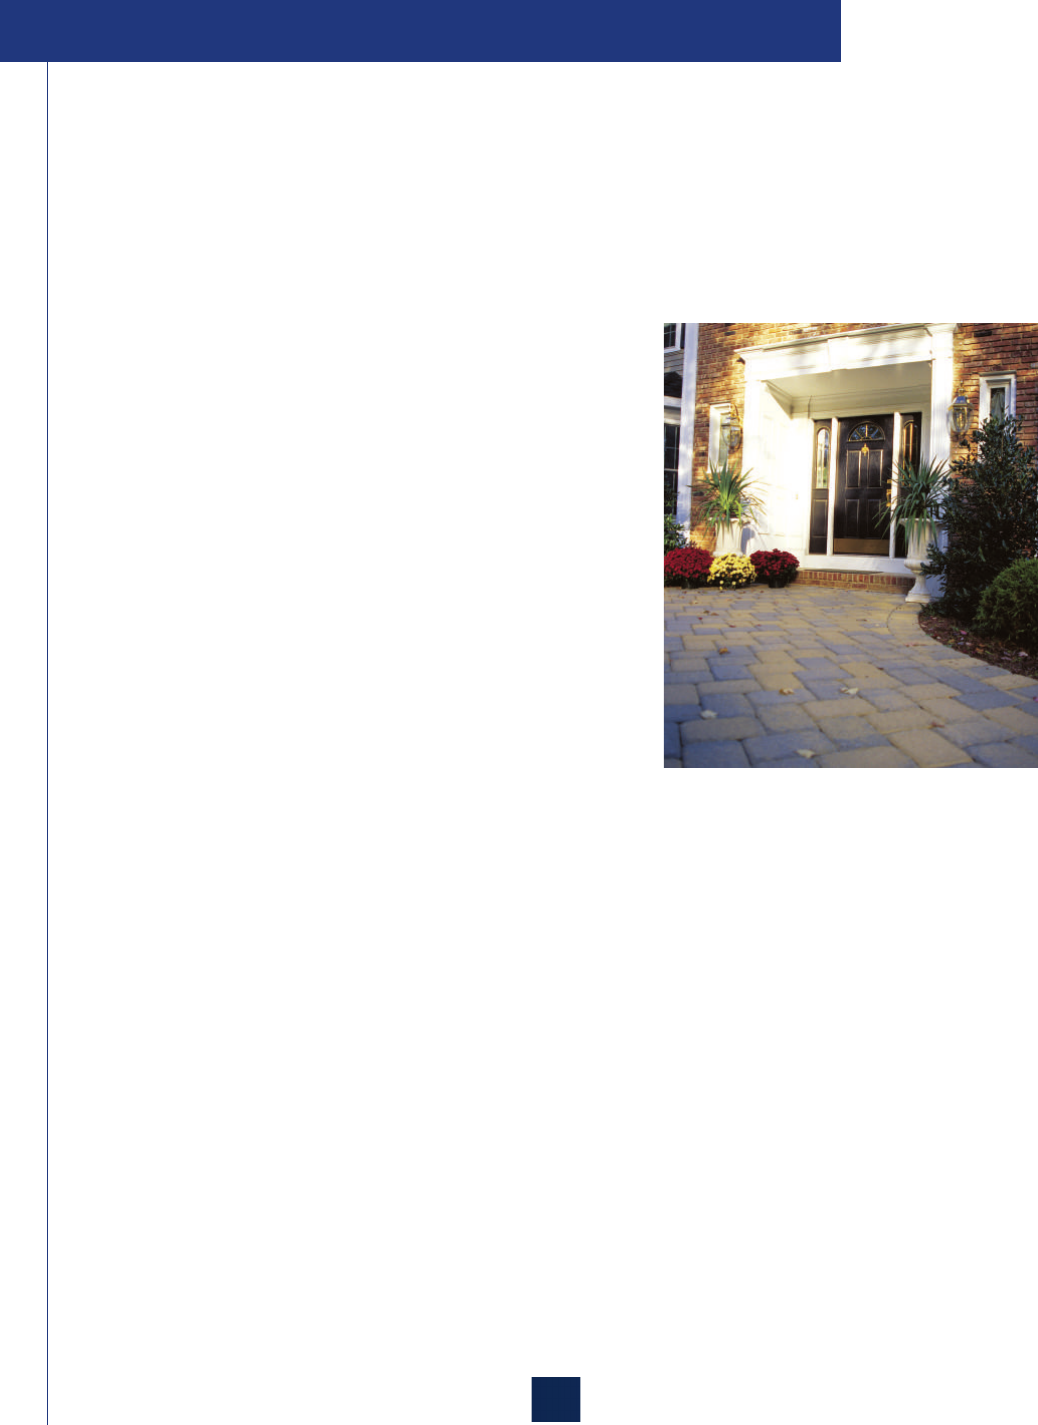
E. Pavers
Introduction
Pavers are a concrete product. Minor cracks and chips due to production, transportation, handling
and installation will be present. Color variations between pavers may also be present initially,
but will diminish as they cure. Efflorescence is a whitish haze that may occur during the first six
months. It is a salt deposit brought to the surface by evaporating water. This haze will eventually
wear off or it may be removed by using a special cleaner.
Homeowner’s Maintenance Guidelines
Pavers can be pressure cleaned/washed periodically.
Weed killer should be applied to the joints to inhibit
weed growth.
NOTE: During pressure washing do not apply pressure
directly to the joints as this will remove the sand and
possibly dislodge your pavers and cause sinking.
Pavers can be sealed eight weeks after installation. They
should be pressure washed and allowed to dry several
days without rain or sprinklers hitting them prior to sealing.
Re-sanding, sealing and weed removal is a Homeowner’s
Maintenance responsibility. Do not seal if efflorescence
is present. Do not seal if pavers are damp or moist.
F. Blacktop Driveways
“Blacktop” or asphalt driveways require little or no structural maintenance for quite a few years.
As the driveway ages, the deep black color will most likely fade and appear light black or gray.
The blacktop can be brought back to look like new by applying a seal coat annually or as often as
desired. Be sure to follow the manufacturer’s instructions when applying the new material. For
extensive and structural repairs, we suggest you retain a professional asphalt contractor.
To extend the life of the asphalt driveway, avoid gasoline or oil spills if possible. Clean off any
excessive fertilizer that may fall on the driveway as soon as possible in order to avoid discoloration.
Concrete
3.15
Introduction
Condensation, or the appearance of moisture that occurs when warm moist air comes into con-
tact with a colder surface, is most prevalent in new homes, especially during the first year. This is
caused by the large quantities of water used to build the new home, from the concrete foundations
to the paint on the walls. As this water evaporates, and the drying out process occurs, the moisture
takes the form of condensation on interior windows.
Another source of indoor humidity is everyday water usage. For example, a family of four doing
laundry, bathing, and using the dishwasher, puts approximately 2 to 5 gallons of moisture into the
air every day.
Window condensation is produced by conditions beyond your builder’s control.
Mildew is a fungus that spreads through the air in microscopic spores. They love moisture and feed
on drywall surfaces or dirt. On siding, they look like a layer of dirt. Cleaning mildew from your home
is your responsibility. Solutions that remove mildew are available from local paint or home
improvement stores. Wear protective eyewear and rubber gloves for this task; the chemicals that
remove mildew may be unfriendly to humans.
Homeowner’s Maintenance Guidelines
Ventilation: Proper ventilation is the safe and steady way to reduce indoor humidity,
condensation and mildew.
1. Ensure that the clothes dryer is properly
vented to the outside and that the vent is
clear of obstructions and lint. Do not push
the dryer too far back or the vent hose may
become kinked and therefore obstructed.
By placing a 2x4 piece of wood behind the
dryer, this situation can be prevented.
2. Kitchen, bath and utility exhaust fans should
be used to carry moist air outside. Use the
fans for short time periods since they exhaust
cooler air-conditioned air outside the home.
3. Adjust the registers to maintain even
temperatures throughout the home. Do not
try to speed up the evaporation process by
creating extremely high temperatures in the
wintertime. This will cause the house to dry
out unevenly, creating cracks and other
problems.
Condensation/Mildew
3.16
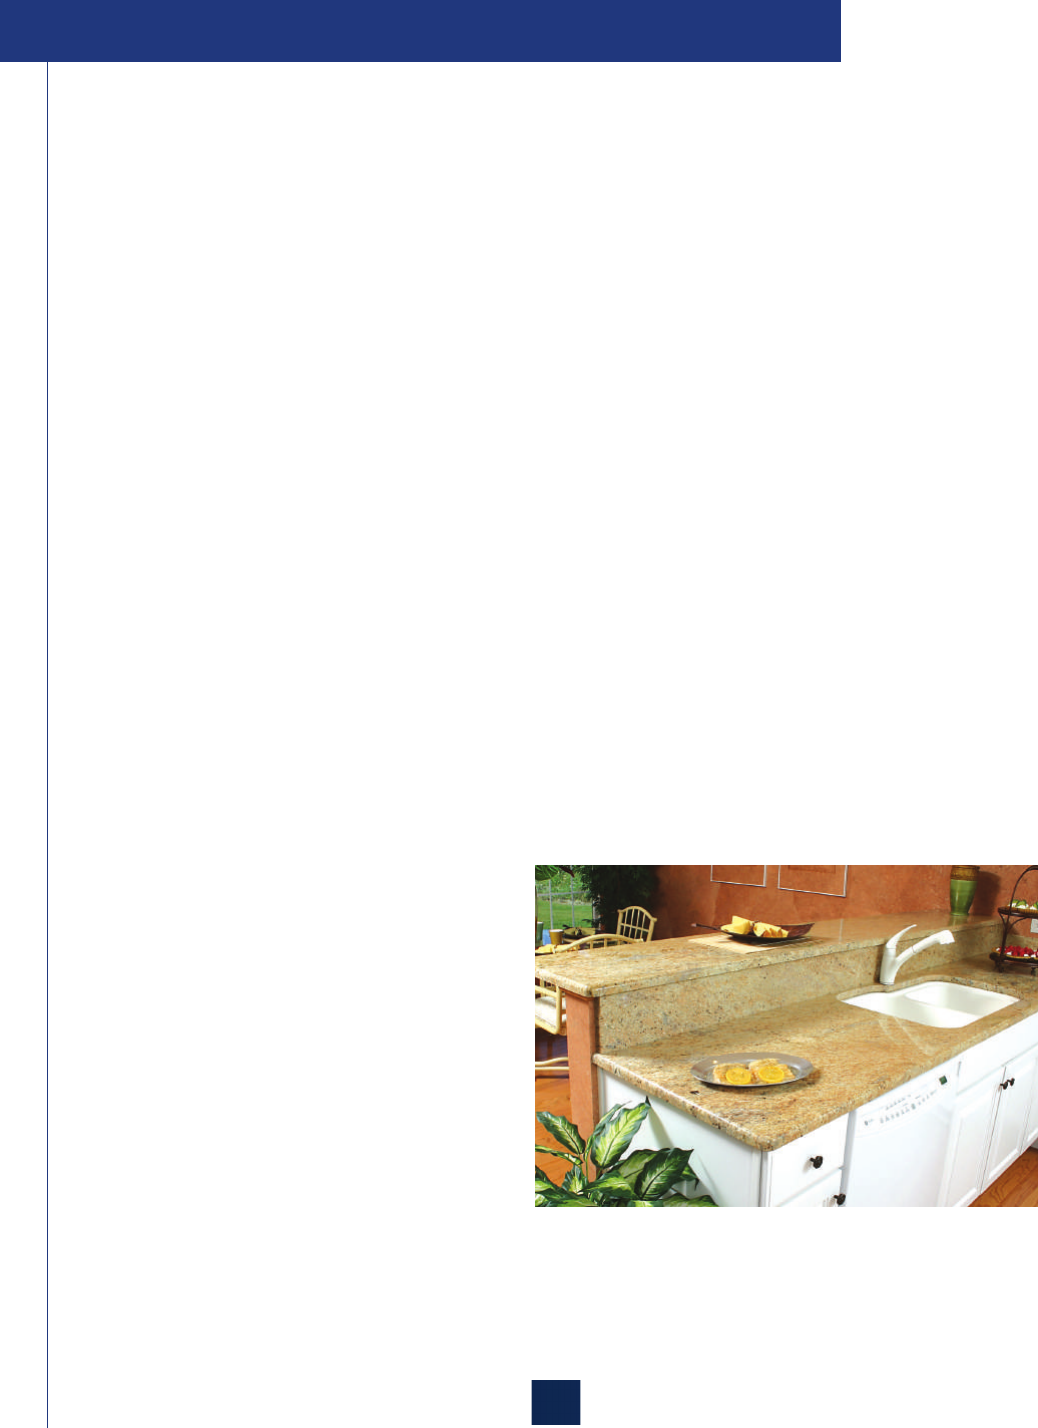
Introduction
Kitchen and bathroom counter tops are covered with laminate material or cultured marble.
(For ceramic tile countertops, see Ceramic Tile section.)
Homeowner’s Maintenance Guidelines
Laminate Counter Tops: Clean laminate counter tops with a soapy cloth or sponge, or use a
non-abrasive liquid household cleaner for more stubborn stains. There are one-step cleaning
products available for laminates that clean, reduce streaking and leave surfaces polished. As
with all cleaning products, carefully follow the manufacturer’s instructions.
Caution: Keep standing water away from the backsplash, sidesplashes, seams and seal around
the sink. These areas are prone to water damage, since excessive moisture will eventually break
down the seal and cause swelling or delamination of the counter top. Check seams periodically
and re-caulk as necessary.
If countertops or back splashes swell or buckle, it may be due to not maintaining the caulking.
This is an important part of your routine maintenance. Joints in laminated surfaces should be
periodically caulked to maintain a dryer moisture barrier.
A. Cultured Marble Vanity Tops
Clean cultured marble with a damp cloth and a non-abrasive detergent. When re-caulking, use a
flexible caulk. A gel-gloss or aerosol spray may be used for polishing.
Counter Top Precautions:
1. Keep counter top dry at all times.
2. Excessive heat can cause charring,
burning, lifting or blistering. Do not
place hot irons or burning cigarettes
directly on counter top surfaces. Use
protective hot pads or trivets under
countertop electrical appliances.
3. Always use a cutting board since
knives will cut the surface.
4. Steam from an open dishwasher
may cause swelling and delamina
tion. Allow time for the dishwasher
to cool before opening the door. To
further reduce moisture damage,
apply a silicone spray to the underside of counter tops, directly over the dish washer and
two feet left and right of the dishwasher.
5. Do not use clear silicone caulk, as it yellows with age and stains easily.
Countertops & Vanity Tops

3.17
B. Ceramic Tile Countertops
Clean countertop tiles with a damp cloth and remove accumulated film with a soapless, non-
abrasive detergent or tile cleanser. Use a mild vinegar and water solution to remove grease and
soap scum. Keep white tile seams clean by brushing with diluted bleach in a well-ventilated room.
Apply a grout sealant with a small brush to reduce grout staining, taking care to keep the sealant
off the tile surface.
Caulk cracks and separations of seams adjacent to tile with a silicone caulk, taking care to wipe
the tile clean once caulking is complete. Do not use clear silicone caulk, as it yellows with age
and stains easily.
Countertops can be damaged by dropped objects or by forcefully hitting the counter edges.
C. Natural Stone Countertops
Granite - Granite is a type of real rock called igneous rock, which means it was once molten and it
formed as it cooled deep within the earth. It is extremely hard and durable, and practically scratch-
proof. It can be highly polished and shiny or finished in a variety of other ways. Granite countertops
are easily cleaned because of low porosity. Wipe up wet spills immediately, especially acidic liquids
like citrus juice, alcohol or soft drinks. Never wipe countertops with an acidic cleanser (like vinegar
or lemon) or harsh chemicals/abrasive cleaners. Granite should have a protective sealant applied
periodically to prevent staining.
Quartz - Quartz, unlike granite, is virtually non-absorbent and never has to be sealed or polished
and is essentially maintenance free. Only three other natural minerals; diamonds, sapphires and
topez are harder than quartz making it naturally scratch-resistant. Quartz requires little maintenance.
Simply wipe surface with soap and warm water on a regular basis to maintain its beauty and shine.
D. Solid Surface Countertops - Man Made
Such as, but not limited to, Formica, Corian and Wilsonart Laminate
Caring for your solid surface countertop is as simple as wiping the surface with a damp cloth.
If a stain develops, wipe it away with soap and water. If this does not remove the stain, consult
your manufacturer’s instructions on products which can be used on your top. Do not expose the
surface to harsh chemicals such as paint remover, turpentine, nail polish remover or stove and
drain cleanser. If these chemicals come in contact with the surface, immediately wash them off with
water, using appropriate safety measures to avoid injury.
Although solid surfacing can be repaired, certain steps should be taken to protect it. Be sure to use
a cutting board instead of cutting directly on the surface. Hot pans and heat-producing appliances,
when set directly on the countertop, can mar the product’s beauty.
Countertops & Vanity Tops

3.18
Introduction
Your home comes with a variety of doors, which may include interior doors, French doors, louver
doors, bi-pass and bi-fold doors, sliding glass doors, exterior doors and garage doors.
A. Interior Doors
Interior doors expand and contract in reaction to temperature and moisture changes, and will be
wider in humid summer periods and narrower during dryer winter months.
Homeowner’s Maintenance Guidelines
Sticking Doors
: Home settlement or damp weather may cause swelling that puts the doors out of
alignment. In some cases, this may only be temporary due to seasonal variations, and the sticking
will tend to correct itself without any adjustment.
If door adjustment is required:
1. Check hinge screws for tightness.
2. Fold sandpaper around a wooden block and sand the edge that sticks. A small plane
can also be used, but be careful not to remove too much material from the door. Also
the use of a bar of soap on the door top and frame may help.
3. Always paint or varnish sanded or planed areas to protect the wood from future
moisture penetration and sticking.
Door Precautions: Interior doors are usually hollow core and are not designed to support
attachments and hanging accessories. Hanging heavy items on door knobs, or at the top of a
door, can damage hardware and hinges. These doors are also undercut to allow air movement.
Slamming: Slamming doors can damage both doors and jambs, and can even cause cracking
in walls. Teach children not to hang on the doorknob and swing back and forth; this will loosen the
hardware and cause the door to sag.
Shrinkage: Use putty, filler or latex caulk to fill any minor separations that develop at mitered
joints in door trim. Follow with painting. Panels of wood doors shrink and expand in response to
changes in temperature and humidity. Touching up the paint or stain on unfinished exposed areas
is your home maintenance responsibility.
B. Bi-Fold and Bi-Pass Doors
Keep the door tracks free of paint and dirt, and apply a small amount of silicone spray to the guide
edges of the tracks.
C. Sliding Glass Doors and French Doors
Keep sprinklers away from sliding glass doors and French doors when watering the lawn. Sliding
glass doors have been sealed against water, but occasionally, high winds and driving rains can
Doors

3.19
create a vibration that causes some leakage. Neither this, nor the water that accumulates in the
tracks, can be prevented. This is also true for French doors.
The sliding tracks should be kept clean and free of debris. Rollers should be lubricated and
adjusted if needed to maintain a smooth operation.
Clean glass with a spray glass cleaner and wipe frames with sudsy water and a soft cloth.
Periodically clean the bottom of the door track, and check to ensure that drain holes are clear of
obstructions. To keep the doors moving freely, apply a silicone spray to the tracks. Do not use oil,
which may cause premature deterioration of the rollers.
In some cases, the glass is tinted to help block the rays of the sun. If you feel you need solar
protection film on your glass, it is important to note that ALL SOLAR FILM MUST BE APPLIED TO
THE INSIDE PANE OF GLASS. Otherwise, heat build-up between the layers of glass will cause
the glass to crack.
D. Exterior Doors
An exterior door that is properly aligned, fitted, weather-stripped and maintained will help control
energy costs. Exterior doors are often steel-clad or fiberglass to prevent warpage and to maximize
insulation. An exterior door will warp to some degree, due to temperature differences between the
inside and the outside surfaces. Warpage should not exceed 1/4” measured diagonally from corner
to corner.
NOTE: Wood exterior doors should be checked every six months for signs of weathering and
repainted as necessary.
Painting: Steel-clad or fiberglass doors are maintenance-free and require little attention except
for painting and upkeep from dents and scratches.
Weather stripping: Weather stripping on exterior doors helps maintain the home’s energy
efficiency, preventing the loss of conditioned air, and reducing the infiltration of outside air.
Weather stripping must remain in place to operate effectively.
1. Replace weather stripping that becomes loose or damaged.
2. Prolong the life of vinyl and rubber weather stripping by applying a silicone spray.
3. The sweep weather stripping at the bottom of the door may require replacement
from time to time. To replace, remove the sweep and match with a replacement
available at any hardware store.
4. To raise or lower the threshold, adjust the screws on the wood or metal portion of
the threshold. Keep threshold caulked at all times.
5. Keep sprinklers away from doors.
Doors

3.20
Homeowner’s Maintenance Guidelines
The brass door locks, door handles, hinges and stoppers
used throughout the home are exposed to both inside and
outside elements, pollution, extreme elements, and common
everyday use. This may cause them to discolor or become
pitted. The manufacturer does not guarantee the finish of
any product. Clean these with a damp cloth and do not use
abrasive cleanser or solvents. Periodic polishing, follow-
ing manufacturer’s recommendations, will help maintain the
original luster and appearance. Do not use brass polish on
lacquered brass parts or fixtures.
Locks: Lubricate door locks with graphite or other
waterproof lubricant. Avoid oil, as it will gum up.
Failure to Latch: If a door will not latch because of minor
settling, you can correct this by making a new opening in the jamb for the latch plate (remortising) and
raising or lowering the plate accordingly.
Hinges: You can remedy a squeaky door hinge by removing the hinge pin and applying a silicone
lubricant to it. Avoid using oil, as it can gum up or attract dirt. Graphite works well
as a lubricant but can create a gray smudge on the door or floor covering beneath the hinge if too
much is applied.
Keys: Keep a duplicate privacy lock key where children cannot reach it in the event a youngster
locks himself or herself in a room. The top edge of the door casing is often used as a place to keep
the key. A small screwdriver or similarly shaped device can open some types of privacy locks.
Your interior door locksets can loosen over time. If you notice excessive play in the lockset, we
recommend tightening the screws located in the cover plate. If the doorknob has become inoperative,
it could mean that the interior mechanism has slipped out of place. Remove the knob, realign the
interior mechanism, reset the knob, then tighten the exterior screws. Should a lock be hard to
operate, apply a graphite lubricant to the keyhole and lock mechanism. This will usually help the
lock to operate more smoothly.
Door Hardware/Locks/Hinges/Keys

3.211
Introduction
The electrical system in your home is designed for safe, trouble-free service and meets both local
and national electrical code requirements. Any additional alteration or modification to the original
electrical system installation will void all applicable warranties.
Homeowner’s Maintenance Guidelines
Electrical Safety Cautions:
Do-it-yourself electrical wiring is dangerous. Improper electrical wir-
ing is dangerous. Improper electrical repairs can endanger the lives of your family and jeopardize
your homeowners insurance in the event of fire or electrical injury. Always use a licensed electrician
to make electrical repairs, adjustments and additions.
Electrical Storm Caution: It is recommended that you unplug television sets, computers and
telephones during electrical storms.
Power Failure: If the electrical power goes out, check first to determine if neighbors are also without
power, and if so, contact the utility company. Before attempting to reset the circuit breakers, check that
power has been restored to the area. If neighbors have power, check the main circuit breaker in the
panel box. See Homeowner’s Maintenance Guidelines under Circuit Breakers in this section.
Be aware that not every electrical power problem is due to problems within the home’s electrical
system. Utility companies experience a variety of situations that effect power supplies, including
power surges and interruptions, peak overload periods, and even total shutdowns.
Electric Meter: The utility company installed an electric meter to measure your electric usage for
billing purposes. Their invoice is based on kilowatt-hours used over a given time period, with a
kilowatt-hour being the energy expended by 1000 watts for one hour. Should you have any questions
about the meter functions, please contact the customer service department at the utility company.
Circuit Breakers: Electrical wiring and appliances are protected by circuit breakers to stop circuit
overloading. The main circuit breaker is located in the electrical panel box, and if tripped for any
reason, entirely cuts off all electricity to the house. The smaller circuit breakers within the panel
box control appliances, wall switches, lighting, and the HVAC system, and each switch should be
clearly marked as to what it controls. Do not tamper with the electrical service entrance cable that
provides power to the service panel.
Circuit Tripping Causes and Remedies: Thunderstorms, lightening and power failures can
cause circuit breakers to trip. If only your home is affected, try to reset by switching the breaker to
full “OFF” then back to full “ON” position. If this does not reset the breaker, or if the breaker contin-
ues to trip, do not continue resetting the breaker as this can damage the panel box, wiring, or the
appliance that it controls. Call a licensed electrical contractor for a service inspection.
Overloaded circuits can also cause tripping. This occurs when too many appliances are used on
one circuit. To reduce the load, remove plugs of appliances that may cause the overloading, then
reset the breaker as described above. If you install a microwave oven or other appliances that
require large electrical loads, you may need a licensed electrical contractor to add additional
wiring to accommodate the load.
Outlets and Wall Switches: If an electrical outlet does not work, check first to make sure that the
outlet is not controlled by a wall switch. If the outlet still does not operate, contact an electrical contractor.
Electrical System

3.22
Do not plug a refrigerator or freezer into a GFCI controlled outlet. There is a good chance
that if the GFCI trips, you food will be ruined before you notice the problem.
Ground Fault Circuit Interrupters: GFCI electric outlets help to prevent electrical shock,
and are installed in kitchens, bathrooms, garages, and exterior areas where water may be
present. GFCI receptacles are sensitive to power surges and interrupt power under certain
conditions to prevent injury, Do not plug refrigerator or freezers into GFCI outlets.
GFCI outlets are often wired in a series. For example, the garage GFCI outlet controls the bath-
room, and may possibly control other outlets throughout the home. In other words: if the electrical
outlet in the bathroom is not functioning, check the GFCI in the garage. Also be aware that some
homes have multiple GFCIs, so be certain to inspect and reset the affected outlet.
If a GFCI receptacle is not functioning, press the “RESET” button on the wall plate to restore
proper operation. If that does not work, check and reset the circuit breaker in the panel box first,
then press the GFCI Reset button. If the outlet still fails, it may indicate a short in the appliance.
If other appliances will not operate, an electrician should be contacted and the GFCI replaced.
To test GFCI’s, press the “TEST” button on the receptacle. The outlet should not perform. To reset,
press the reset button.
Arc Fault Circuit Interrupter
As of January 2002, The National Electrical Code requires all 15 and 20 ampere outlets installed in
bedrooms to be protected by an Arc Fault Circuit Interrupter (AFCI) in addition to standard circuit
breakers in your home.
There is a difference between an AFCI and a standard 15 or 20 ampere circuit breaker. The stan-
dard circuit breaker is made to detect overheating due to overloading on the circuit, not due to elec-
trical faults caused by electrical low level arcing which the AFCI is designed to detect. A standard
breaker may not trip if not enough electrical current has flowed through to trip it due to heat buildup
within the breaker. The AFCI can sense when an arc or short circuit is about to spark and quickly
trip the circuit.
Arc faults are typically the result of:
Worn electrical insulation
Damaged plug-in appliance cords
Punctured electrical cable from errant screws and nails
Attaching electrical cable too tightly to the studs
Loose electrical connections
The AFCI reset button is generally located in or near the circuit breaker panel box and should be
checked regularly. If the AFCI trips after it has been reset, you should call a professional electrician.
Pre-wired for Telephones: Most homes are pre-wired for telephones. If you experience problems
with the telephone system you should contact your local phone company.
If the telephone company states that there is trouble in the house wiring and your house is less
than one year old, please call your builder.
Electrical System

* * * Free Preview End * * *
Purchase Required To Gain Total Access
Visit www.landlordleaseforms.com To Purchase Landlord Lease Forms Package