The Complete Idiots Guide To Electrical Repair

A member of Penguin Group (USA) Inc.
Electrical
Repair
by Terry Meany
00 8964 FM 11/24/03 11:30 AM Page i
Copyright © 2000 by Terry Meany
All rights reserved. No part of this book shall be reproduced, stored in a retrieval
system, or transmitted by any means, electronic, mechanical, photocopying,
recording, or otherwise, without written permission from the publisher. No patent
liability is assumed with respect to the use of the information contained herein.
Although every precaution has been taken in the preparation of this book, the pub-
lisher and author assume no responsibility for errors or omissions. Neither is any lia-
bility assumed for damages resulting from the use of information contained herein.
For information, address Alpha Books, 800 East 96th Street, Indianapolis, IN 46240.
THE COMPLETE IDIOT’S GUIDE TO and Design are registered trademarks of Penguin
Group (USA) Inc.
International Standard Book Number: 0-7865-4938-6
Library of Congress Catalog Card Number: Available upon request.
06 05 04 87654
Interpretation of the printing code: The rightmost number of the first series of num-
bers is the year of the book’s printing; the rightmost number of the second series of
numbers is the number of the book’s printing. For example, a printing code of 00-1
shows that the first printing occurred in 2000.
Printed in the United States of America
Note: This publication contains the opinions and ideas of its author. It is intended to
provide helpful and informative material on the subject matter covered. It is sold with
the understanding that the author and publisher are not engaged in rendering profes-
sional services in the book. If the reader requires personal assistance or advice, a com-
petent professional should be consulted.
The author and publisher specifically disclaim any responsibility for any liability, loss,
or risk, personal or otherwise, which is incurred as a consequence, directly or indi-
rectly, of the use and application of any of the contents of this book.
00 8964 FM 11/24/03 11:30 AM Page ii
Publisher
Marie Butler-Knight
Product Manager
Phil Kitchel
Associate Managing Editor
Cari Luna
Acquisitions Editor
Randy Ladenheim-Gil
Development Editor
Alexander Goldman
Production Editor
Christy Wagner
Copy Editor
Amy Lepore
Illustrator
Jody Schaeffer
Cover Designers
Mike Freeland
Kevin Spear
Book Designers
Scott Cook and Amy Adams of DesignLab
Indexer
Brad Herriman
Layout/Proofreading
Fran Blauw
Mary Hunt
Liz Johnston
00 8964 FM 2/12/03 2:57 PM Page iii
Contents at a Glance
Part 1: The Basics: Out of the Dark Ages 1
1 Fear of Frying 3
A brief intro to your electrical system.
2 What Is Electricity Anyway? 15
The why, how, and where of electricity.
3History Lessons 27
Electricity has always been around, but it took a lot of
smart guys to harness it and make it useful.
4 If Your Walls Could Talk 39
Codes, inspectors, and a closer look at your wiring.
5 More Wall Talk 53
Your wiring shouldn’t be a puzzle; all you need to do is
understand the pieces and how they go together.
6 When You Buy a House 67
How to be an electrically smart buyer when you go house
hunting.
Part 2: Safety, Tools, and Contractors 81
7 Caution Signs and Safety Concerns 83
Electrical shocks can be more than shocking; here’s how to
avoid them.
8Call Me Sparky 97
To do your own electrical work, you should look at the job
the way an electrician would.
9 Extension Cords and Multiple Strips 111
A great convenience—as long as you don’t abuse them.
10 Electing for Electricians 125
What to look for in, and expect from, a qualified electrician.
Part 3: Components and Simple Repairs 135
11 Switches and Receptacles 137
Telling the difference from one type to another.
12 Replacing Old Switches and Receptacles 149
Simple repairs to get you started.
13 Lighting Up 171
From bare-bulb fixtures to halogen lamps, there’s a light
for every purpose.
14 Light Fixes 187
You don’t need to live in the dark if you know how to
repair your lights.
15 Working Around Existing Wiring 205
Here are some guidelines for accessing and tying into your
system.
00 8964 FM 2/12/03 2:57 PM Page iv
16 Trouble, Troubleshooting, and Safety 223
Avoiding bigger problems later by staying out of trouble now.
Part 4: Power Hungry 233
17 Service with an Attitude 235
More power to you when you upgrade to a new service panel.
18 Adding New Circuits 247
Additional power calls for more circuits; here’s how to add
them.
19 Kitchen Power 251
Cooking should be convenient, and new kitchen wiring
goes a long way toward accomplishing that.
20 Bathroom Wiring 263
Water and electricity can mix if you follow the rules.
21 The Great Outdoors 275
You don’t need to limit your electrical work to the indoors
when you have a whole yard to light up.
22 Electric Heat and Air Conditioning 287
There’s more than one way to get some cool comfort or
winter warmth from your electrical system.
Part 5: Refinements 299
23 Workshops, Offices, and Generators 301
Extending your system after you’re finished with the basics.
24 Your Own Hi-Tech Revolution 317
Power at your fingertips when you wire for remote controls
and media madness.
25 Alarms, Detectors, and Security 333
Protecting your family and your home from smoke, fire,
and intruders.
26 More Low-Voltage Wiring 349
Intercoms, doorbells, and thermostats help complete your
wired world at home.
27 A Few Alternatives 359
Accessing electricity is great, but saving energy can be a
big plus, especially with your utility bill.
28 Putting It All Together 373
Looking at the big picture.
Appendixes
A Resources 385
BGlossary 387
Index 391
00 8964 FM 2/12/03 2:57 PM Page v

Contents
Part 1: The Basics: Out of the Dark Ages 1
1 Fear of Frying 3
A Wired World ......................................................................4
Linear Logic ........................................................................4
Follow the Electrical Code ....................................................5
Safety Rules, Mr./Ms. Homeowner ........................................5
Mutual Respect ....................................................................6
Do It Yourself or Hire It Out? ................................................6
Drilling and Pulling ............................................................7
Neatness Counts ..................................................................8
Simple Projects First ............................................................9
System Checkup ....................................................................9
Plugless in Seattle ................................................................9
Let There Be Light ..............................................................10
Hot Spots ..........................................................................10
Special Needs ....................................................................10
Confused About Fuses? ........................................................11
Circuit Breakers ....................................................................12
More Power to the People ..................................................12
2 What Is Electricity Anyway? 15
Go with the Flow ................................................................16
Staying Current ..................................................................17
AC/DC ..............................................................................17
You’re Grounded ................................................................18
Voltage Provides the Push ..................................................19
Know Your Volts: 120/240 ................................................20
Amps for Short ..................................................................20
Watt’s That? ........................................................................21
Wattage Around the House ................................................21
This Joule Isn’t a Gemstone ................................................22
Resistance Isn’t Futile ..........................................................22
All Wire Isn’t Created Equal ..............................................23
No Substituting ..................................................................25
00 8964 FM 2/12/03 2:57 PM Page vi
3 History Lessons 27
An International Effort ........................................................28
The Pioneers ........................................................................28
Ben Franklin Flies a Kite ....................................................28
Galvani’s Frog Legs ............................................................29
Watt ..................................................................................29
The Amp Man ..................................................................29
Oompa-Ohm ......................................................................30
Coulomb Was Très Cool ....................................................30
Other Electrical Fellows ......................................................31
Edison, Mega-Inventor ........................................................31
Let There Be Light ..............................................................32
Our First Big Power Plant ..................................................33
Tesla Needed a Lawyer ........................................................33
Early Safety Measures ..........................................................34
The Standards Change ........................................................35
Fuses to Breakers ................................................................35
Just One Ceiling Light ........................................................35
Knob-and-Tube Wiring ........................................................36
Wiring Evolves ....................................................................36
Creeping Home Power Demands ........................................37
4 If Your Walls Could Talk 39
The National Electrical Code ..............................................40
You and the Code ..............................................................41
Local Rules, Local Inspectors ..............................................41
The CEC ............................................................................42
Underwriters Laboratory ....................................................43
Are You Up-to-Date? ............................................................44
Two-Wire and Three-Wire Systems ....................................44
Feeling Polarized ................................................................45
Circuit Breakers vs. Fuses ....................................................46
This One Blows ..................................................................47
This One Trips ..................................................................47
The Main Shutoff ..............................................................48
The More Power the Better ..................................................49
Look to Future Needs ..........................................................49
Cost Comparisons ..............................................................49
Panels and More Panels ....................................................50
00 8964 FM 2/12/03 2:57 PM Page vii

viii
The Complete Idiot’s Guide to Electrical Repair
5 More Wall Talk 53
Branching Out to Break Up the Load ................................54
Amps, Watts, and Wire Gauge Working Together ..............54
Circuits and Runs ..............................................................56
Know Your Circuits with a Circuit Map ..............................57
What Are Friends For? ......................................................58
GFCIs—Ground-Fault Circuit Interrupters ........................58
Wire Systems Old and New ................................................60
Do You Need to Replace? ....................................................61
Jump Up to 200 Amps ......................................................61
Good Wire, Bad Wiring ....................................................62
When New and Old Collide ..............................................62
Location, Location ..............................................................64
Your Checklist ......................................................................64
6 When You Buy a House 67
Caveat Emptor or Buyer Beware! ........................................68
Who Does the Inspection? ..................................................68
The Preliminaries ..............................................................68
Testing! Testing! ................................................................69
The Other Tool You Need ..................................................71
Smoke Alarms ....................................................................72
Aluminum Wiring ..............................................................72
What’s the Story? ..............................................................73
What You Should Look For ................................................74
Warning: Aluminum Wiring Ahead ....................................75
Solutions ............................................................................75
The Great Outdoors ............................................................77
Attic Insulation Problems ....................................................77
A Breath of Fresh Air ..........................................................78
More Testing ........................................................................78
Some Final Points ................................................................79
Part 2Safety, Tools, and Contractors 81
7 Caution Signs and Safety Concerns 83
Shocks Galore ......................................................................84
When You Can’t Let Go ....................................................84
How Much Can You Take? ................................................85
Timing Is Everything ..........................................................86
00 8964 FM 2/12/03 2:57 PM Page viii

ix
Contents
Know Your First Aid ............................................................86
The Source of the Problem ..................................................87
Quiz #1 ................................................................................87
Safe Work Practices ..............................................................89
Turn It Off! ........................................................................89
One Hand Behind Your Back ..............................................90
Test, Test, Test ..................................................................90
On Dry Ground ..................................................................90
Watch That Ladder ............................................................90
Tool Health ........................................................................91
A Lesson from Your Kids ....................................................91
Speaking of Kids … ............................................................91
Some Statistics ....................................................................93
Electro Kindling ..................................................................94
New Service Doesn’t Let You Off the Hook ........................95
More Information ................................................................95
8 Call Me Sparky 97
An Electrician’s Mindset ......................................................98
Think Before You Drill ......................................................99
Minimum Damage, Minimum Repairs ................................99
Permits ..............................................................................100
Keeping the Inspector in Mind ..........................................100
The Code Calls the Shots ................................................101
Insurance Issues ..............................................................101
Tools of the Trade ..............................................................102
Hand Tools ......................................................................102
Power Tools ....................................................................103
Care and Feeding of Power Tools ......................................106
Bits ..................................................................................107
Rent or Buy? ....................................................................108
UL-Approved Parts for You ................................................109
Home-Improvement Stores vs. Electrical Wholesalers ....109
9 Extension Cords and Multiple Strips 111
Extension-Cord Protocol ..................................................112
What the NEC Says ........................................................112
One Size Doesn’t Fit All ..................................................113
When Cords Go Bad ........................................................114
00 8964 FM 2/12/03 2:57 PM Page ix

x
The Complete Idiot’s Guide to Electrical Repair
Know the Rules ................................................................115
Homemade Cords ............................................................116
Multiple-Outlet Devices ....................................................116
Surge-Suppression Devices ................................................118
What Do They Do? ........................................................119
Computers Aren’t Very Tough ..........................................120
Suppressors for Everyone ..................................................121
Speaking About Computers ..............................................122
More Rules ......................................................................122
Going Whole Hog ............................................................122
10 Electing for Electricians 125
Hiring It Out ......................................................................126
Contracting for a Contractor ............................................126
License and Bonding Spoken Here ....................................127
The Name’s Bond, Surety Bond ........................................127
Insurance Is a Must ..........................................................128
Three in One ....................................................................129
Plans and Specifications—Always! ....................................129
Who Draws Them Up? ....................................................130
Allowing Substitutions ....................................................131
Comparing Bids ..............................................................131
About Those Contracts ......................................................131
Write It Down ..................................................................131
Change Orders ................................................................132
A Deal’s a Deal ................................................................132
Cleanup and Wall-Repair Woes ........................................133
Electricians Hate Plaster Walls ........................................134
Fire Blocks ......................................................................134
Part 3 Components and Simple Repairs 135
11 Switches and Receptacles 137
There’s One for Every Purpose ..........................................138
Switches ............................................................................139
Three-Way Switch ............................................................139
Four-Way Switch ..............................................................139
Switch/Receptacle Combo ................................................140
Ganging Up ....................................................................141
Pilot-Light Switch ............................................................141
00 8964 FM 2/12/03 2:57 PM Page x

xi
Contents
Dimmers ..........................................................................141
Timers and Doorbells ......................................................142
Receptacles Galore ............................................................142
Don’t Forget the Boxes ......................................................143
They’re Not All the Same ................................................143
Plastic or Steel? ................................................................145
Check the Size ..................................................................145
Cover ’Em Up ....................................................................146
Brass: New and Old ........................................................147
The Artful Flare of Ceramics ............................................147
12 Replacing Old Switches and Receptacles 149
Probing the Problem ..........................................................150
Checking the Devices ........................................................151
Continuity Coming Up ....................................................153
New Switches ..................................................................154
Three-Way Switch ............................................................157
Four-Way Switch ..............................................................159
The Great Outdoors ..........................................................161
Dimmers ..........................................................................161
Old Wire, New Switch ......................................................161
Disreputable Receptacles ..................................................162
Check and Check Again ..................................................162
Test for Grounding ............................................................164
Two-Wire Grounding ........................................................165
Installing a New Receptacle ..............................................166
Grounding an Old Receptacle ..........................................168
Aluminum Wiring ............................................................169
13 Lighting Up 171
How Illuminating ..............................................................172
Measuring Your Lighting Needs ........................................173
Distinguishing a Lumen from Illuminance ........................174
Know Your Lighting ........................................................175
Aim High, Low, and Wide ................................................176
Lighting Up Outside ........................................................176
Combining Lighting Styles ................................................178
Looks Are Something ........................................................181
What’s Your Type? ............................................................181
Incandescent ....................................................................182
00 8964 FM 2/12/03 2:57 PM Page xi

xii
The Complete Idiot’s Guide to Electrical Repair
Tungsten-Halogen Lamps ................................................182
Fluorescent Lighting ........................................................183
When Cheap Power Reigns ..............................................184
Other Considerations ........................................................185
14 Light Fixes 187
Inspect First ......................................................................188
Time to Replace ..............................................................190
Installing a Box ..............................................................191
Try a New Style ................................................................193
Fluorescent Fun ................................................................194
The Pieces Inside ..............................................................194
Even More Efficiency ........................................................195
Fluorescent Woes ..............................................................195
Lamps ................................................................................199
The Easy Repairs ..............................................................199
Bugged by Bad Plugs ........................................................200
Round-Cord Plugs ............................................................201
Sock It to Your Socket ......................................................202
A Dose of Reality ..............................................................202
15 Working Around Existing Wiring 205
The Dangers of Overextending Yourself ..........................206
Your Total Load ..............................................................206
Don’t Estimate, Calculate! ..............................................208
Leave Dedicated Circuits Alone ........................................208
Uh-Oh, Old Wiring ..........................................................209
Mixing Old and New Wiring ............................................209
How Much You Can Keep? ..............................................210
Walls Everywhere ..............................................................211
Boxes and the Code ..........................................................215
The Perils of Plaster ........................................................215
Drywall ..........................................................................216
Boxes in Ceilings ..............................................................216
No Access, Now What? ....................................................217
The Woodwork Comes Off ..............................................218
Get Your Drill Out ..........................................................218
Insulation Obstacles ........................................................218
The Finish Work ................................................................219
Fitting All Those Wires In ................................................219
Plaster and Drywall Repair ..............................................220
00 8964 FM 2/12/03 2:57 PM Page xii

xiii
Contents
16 Trouble, Troubleshooting, and Safety 223
The Rules Once More ........................................................224
Warning Signs ....................................................................225
Hot Stuff ..........................................................................225
Short Circuits ..................................................................226
Power Cords ....................................................................227
Lamps ............................................................................227
Incandescent Light Fixtures ..............................................227
Fluorescent Woes ..............................................................228
Fire Hazards ....................................................................228
Don’t Overextend with Extension Cords ............................229
Regular Tests You Should Do ............................................229
General Precautions ..........................................................230
Power Outages ..................................................................231
Part 4Power Hungry 233
17 Service with an Attitude 235
One New Service Coming Up ..........................................236
Overhead and Exposed ......................................................236
Going Underground ..........................................................239
New Service/Old Service ....................................................239
Fuse Box Becomes Junction Box ........................................239
New Panel, Old Panel ......................................................240
Anatomy of a Panel ..........................................................240
Location Is Everything ......................................................242
Grounding Your Panel ......................................................242
Breaker, Breaker ..............................................................243
Subpanels—a Real Convenience ......................................243
Subpanel Alternatives ......................................................244
Subpanel Considerations ..................................................244
What’s This Going to Cost? ..............................................245
18 Adding New Circuits 247
Write Up a Plan ................................................................248
Power Everywhere ............................................................248
15 Amps or 20? ..............................................................249
Plenty of Dedicated Circuits ............................................249
00 8964 FM 2/12/03 2:57 PM Page xiii

xiv
The Complete Idiot’s Guide to Electrical Repair
Roping the House ..............................................................250
Keeping the Inspections in Mind ......................................250
19 Kitchen Power 251
The Well-Wired Kitchen ....................................................252
Dedicated Circuits Everywhere ..........................................252
Small-Appliance Circuits and GFCIs ................................253
Wiring the Fridge ..............................................................254
Two More Exceptions ......................................................255
Ranges and Ovens ............................................................255
Disposers ........................................................................255
Dishwashers ....................................................................256
Big Appliances: Stovetop and Range ..................................257
Keep or Replace Your Appliances? ....................................258
Lighting the Way ..............................................................258
Work Lights ....................................................................259
Accent Lighting ................................................................259
Lots-o-Switches ................................................................259
Ventilation ........................................................................260
You Have a Choice ..........................................................260
Up and Out, Down and Through ......................................260
Bigger Is Better ................................................................261
Wiring Concerns ................................................................262
20 Bathroom Wiring 263
GFCI Is a Must ..................................................................264
Installing the Fan ..............................................................265
How to Size It ..................................................................266
Roof or Wall Vent? ..........................................................266
So Many Different Switches ..............................................266
It’s Cold in Here ................................................................267
Baseboard Heating and Forced Air ....................................268
Heated Floors ..................................................................268
Heat Lamps ....................................................................268
Some Codes Don’t Like Electric Heat ................................269
More Bathroom Toys ........................................................269
The Luxury of Warm Towels ............................................269
Fog Be Gone ....................................................................269
On-Demand Hot Water ....................................................270
00 8964 FM 2/12/03 2:57 PM Page xiv

xv
Contents
Bathroom Lighting ..........................................................270
Incandescent Fixtures ........................................................270
A Possible Laundry Room? ..............................................272
21 The Great Outdoors 275
Light Up the Night ............................................................276
Light Pollution ................................................................276
Other Concerns ................................................................278
Drilling and Digging ........................................................279
Metal and Plastic ............................................................280
You Can’t Use Cable ........................................................280
Dig It ..............................................................................281
The Job So Far ................................................................281
Draw Up a Plan ..................................................................282
Skip the Digging ................................................................282
Light Options ..................................................................283
Low-Key Low Voltage ......................................................283
Fiber Optics ....................................................................284
120-Volt Lights ................................................................284
Fancy Fixtures ..................................................................285
22 Electric Heat and Air Conditioning 287
Electric Furnaces ................................................................288
Seal Those Ducts ..............................................................289
Zone In ............................................................................290
Hooking Them Up ............................................................291
Heaters with Receptacles ..................................................291
Going Portable ................................................................291
Radiant Heating ..............................................................292
Heat Pumps ........................................................................292
Whole-House Ventilation ..................................................293
Air Conditioning ..............................................................293
Air-Conditioning Alternatives ..........................................294
Shade ..............................................................................294
New Construction ............................................................295
Hot-Water Heaters, Big and Small ....................................295
Mixing Water and Electricity ............................................296
Hot Water on Demand ....................................................296
00 8964 FM 2/12/03 2:57 PM Page xv

xvi
The Complete Idiot’s Guide to Electrical Repair
Part 5Refinements 299
23 Workshops, Offices, and Generators 301
Workshops ........................................................................302
Woodshop Details ............................................................302
Raceways or Cable? ........................................................303
Safety Power Controls ......................................................303
Lighting Your Workroom ..................................................304
A Breath of Fresh Air ......................................................304
Home Offices ....................................................................305
Beyond Manual Typewriters ............................................305
Voice and Data Coming Through ....................................306
Conduit for Future Options ..............................................307
How Fast Can You Go? ....................................................307
The Need to Suppress ......................................................308
An Outside Job: Raceways ................................................308
It’s a Wiremold World ......................................................309
Generators ..........................................................................310
The Mechanics of a Generator ..........................................311
Resistive and Reactive Loads ............................................312
Read the Manual ............................................................314
24 Your Own Hi-Tech Revolution 317
The Automated Home ......................................................318
A Wealth of Possibilities ....................................................319
Decisions, Decisions ..........................................................321
Mixing and Matching ........................................................322
Speed Demons and Slowpokes ..........................................322
Coax Dance ....................................................................324
Look Ma, No Wires ..........................................................325
Hedging Your Wiring Bets ................................................325
Staying Alive with Cat 5 ..................................................325
Cooperating with Coaxial Cable ......................................327
Fiber-Optic Cable ............................................................327
Package Deal ..................................................................327
X-10, an Original ............................................................328
The Installation ................................................................328
Staying in the Closet ........................................................329
Jacks Here, Jacks Everywhere ............................................329
Is It Worth the Trouble? ..................................................330
00 8964 FM 2/12/03 2:57 PM Page xvi

xvii
Contents
25 Alarms, Detectors, and Security 333
A Class 2 Act ......................................................................334
Alarm Systems ..................................................................334
To Monitor or Not To Monitor ..........................................335
False Alarm ....................................................................335
Hard Wired or Wireless? ..................................................336
Wireless Is Almost Effortless ............................................337
X-10 System ....................................................................338
Driveway Alarms ............................................................338
We’re Watching You ........................................................338
Some Oddball Alarms ......................................................339
Installation Issues ............................................................340
Smoke Detectors ................................................................341
Wireless or Hard Wired? ..................................................342
Photoelectric or Ionization? ..............................................343
The Law ..........................................................................344
What About Carbon Monoxide? ......................................344
Smoke and Heat: Install Both? ........................................346
What’s Safe Enough? ......................................................346
26 More Low-Voltage Wiring 349
No Escaping Mom with an Intercom ................................350
Phone-Based Systems ......................................................350
Hard-Wired Intercoms ......................................................350
Wireless Intercoms ..........................................................351
Video Door Phones ..........................................................351
Ding Dong, Door Chimes ................................................352
Wired to Ring ..................................................................352
Chimes ............................................................................353
Wireless Chimes ..............................................................353
Wiring for One or Two Buttons ........................................354
Troubleshooting an Existing Doorbell ..............................354
Thermostats ......................................................................355
Thermostat Replacement ..................................................356
Wireless Thermostats ......................................................357
The Wired World at Home ................................................357
00 8964 FM 2/12/03 2:57 PM Page xvii

xviii
The Complete Idiot’s Guide to Electrical Repair
27 A Few Alternatives 359
Conserve and Save ............................................................360
Watts Add Up, Doc ............................................................360
Energy-Efficient Lighting ..................................................361
Heating ..............................................................................362
Thermostats ......................................................................362
Air-Conditioning Alternatives ..........................................363
Improving Your Air Conditioning ......................................364
Sizing Up Your Air Conditioner ........................................365
Time to Get Efficient ........................................................365
Cool Your Hot-Water Costs ..............................................366
Drips and Flows ..............................................................366
The Appliances ................................................................366
Your Hot-Water Tank ......................................................367
Keeping the Outdoors Outdoors ......................................367
Look Through Any Window ............................................368
Insulation ........................................................................368
Here Comes the Sun ..........................................................368
Is It Worth It? ....................................................................369
Resources ............................................................................370
28 Putting It All Together 373
How Far Do You Go? ........................................................374
Time and Money Considerations ......................................375
Added Value ....................................................................375
Convenience ....................................................................376
Estimating the Job ............................................................376
A Realistic Time Frame ......................................................378
Sample Jobs ........................................................................378
Hiring an Electrician ..........................................................382
AResources 385
B Glossary 387
Index 391
00 8964 FM 2/12/03 2:57 PM Page xviii
Foreword
Some years back (in high school as a matter of fact) I was involved with the technical side
of the drama department. On one particular occasion, while we were hanging and testing
lighting fixtures, I happened to look over to one of my classmates, who was grasping a
fixture and the steel railing unusually tightly, and whose hair was defying certain laws of
gravity.
He was the recipient of a few spare volts from a lighting fixture that was not properly
grounded. It was probably at that moment that I developed a great respect for electricity.
(My classmate suffered no long-term damage—though he did become an actor …)
After many years working in theatre and architecture, I have seen bizarre electrical work—
some by homeowners, some by electricians. What separates good electrical work from the
bizarre is the cleanliness of the job. I know one electrician who, if he nicks a piece of cable
anywhere along its run, will pull it out and start over, no matter how long the run. It is
that attention to detail, that striving for perfection, that makes him such a good electri-
cian. He understands that there is little room for error. You should follow
similar standards.
Electricity has simple rules—this manual gives you a good insight into those rules. Please
consider reading the entire book before you jump into a single project. There are so many
good tips spread throughout the manual. Two most important things: 1) Turn off the
power before you do any work. Resetting the clocks is much easier than resetting your
cranium. 2) Know your limitations. If you have any doubts, call a licensed electrician.
A good plan is also helpful for your projects. All electricians work from blueprints.
Drawings help to organize the whole project. A good electrician will have a number of
drawings and will outline exactly how wires will be pulled throughout the project. This
advance work can save hours of frustration and repair time spent on extraneous holes in
walls.
And please don’t underestimate the power of new lighting. Chapters 13 and 20 provide ex-
amples of ways to beautify your home. Just by changing your standard household screw-in
light bulb to a directional PAR lamp you can change the entire appearance of your envi-
ronment. Additional lighting on work surfaces can improve vision and make tasks easier.
The Complete Idiot’s Guide to Electrical Repair is like no other reference manual. I teach
Lighting Design at New York’s Fashion Institute of Technology, and in the past when it
came to teaching about electricity, no book existed that so clearly and thoroughly covered
electricity and wiring. I am pleased to put The Complete Idiot’s Guide to Electrical Repair on
my list of textbooks. This is not just a manual for beginners—handymen and other ad-
vanced homeowners will find invaluable information and tips to make wiring faster, easier,
and less expensive.
I wish you all good fortune on your future projects, and don’t forget to secure the ground
wire.
Matthew Tirschwell
President
Tirschwell & Co., Inc.
Architectural Lighting Design
00 8964 FM 2/12/03 2:57 PM Page xix
Introduction
Electrical wiring, fixtures, and appliances have been part of our homes for almost a
century, and they’ve been a wonder, unless your system is almost a century old! Then
you have to wonder if it’s safe, let alone satisfactory to meet the demands of a modern
lifestyle. Even if you have a newer system, you may still want to make additions to it
and extend its capabilities. In principle, this is just another remodeling job, but we
treat wiring differently. Adding a circuit isn’t the same as adding a cabinet.
A poorly planned or installed cabinet won’t shock you or create a fire hazard. Nor
does it require a permit and an inspection. You can hang it crooked or hang it over a
water pipe, and it will still do its job. Electrical work isn’t so easy, but it isn’t incom-
prehensibly difficult, either.
Many of us have little understanding of our electrical systems, or electricity itself for
that matter, so we call electricians when we can’t figure out why the lights keep going
out or when we want to add a receptacle to a bedroom. Even in an age of supermoms
and multitasking dads, we can’t know how to do everything, but does electrical wiring
need to be all that daunting? No, it does not, as you’ll see by the time you’ve finished
reading this book.
Big jobs, like installing a new electrical service, are usually best left to professional
electricians, but anyone with a few tools, some elementary math skills, and a free
weekend can add a circuit or replace old light fixtures. Wiring is a relentlessly logical
process (well, that and a lot of drilling and pulling). The rules are clearly spelled out
and easy to follow. You can put away your unwarranted fears about electricity—but
not your precautions—and safely do much of your own work.
The chapters that follow will give you a better understanding of just what electricity is
and how wiring systems work. We’ll walk through the steps for everything from re-
placing a switch to wiring a bathroom. As you read, the mystery will slowly wear off
as you start planning more lights, receptacles, and upgrades. You can even automate
your house and set it up like one of the bad guy’s fortresses in a James Bond movie.
Like any remodeling project, upgrading or adding on to your electrical system will re-
quire planning and a budget, at least for the bigger jobs. Large jobs, such as rewiring
the bulk of your house, should be broken down into smaller jobs so they’re less over-
whelming. If you try to do too much at once, it’s easy to find yourself with a jumble
of wires, all of your circuits disconnected, and the end of the day approaching.
Remember, you’re learning some new skills. You won’t become a master electrician
overnight.
Electrical work brings some secondary tasks along with it. In some cases, you’ll have
to open up your walls and ceilings, and this means patching those holes later.
Patching is usually followed by painting. It’s tempting to let this go since it’s surpris-
ingly easy to let three or four years pass by looking at partially patched and unpainted
walls. Be sure to give yourself enough time to complete the entire job.
00 8964 FM 2/12/03 2:57 PM Page xx
Finally, remember why you’re doing these projects: to make your home more comfort-
able, up-to-date, and safe.
How to Use This Book
Working on your house can be like raising children: Every day is an adventure. You want
as few adventures as possible when you work around electrical wiring, though. In fact,
one good-size adventure could be your last if you manage to shock yourself in a big way.
Unlike other remodeling projects, electrical work is less broadly disruptive (you’re not
tearing out entire walls, for instance—at least, you’d better not be), which is a big plus.
This book is set up to give you a broad overview of electricity and systems first and
follow up with actual projects, starting with the simplest. It’s not an apprenticeship,
but you’ll have enough information to evaluate your system and make intelligent de-
cisions about its condition and any need to upgrade. And you’ll be a little more savvy
when hiring an electrician.
Your work must always follow your local codes. Beyond that, you can add circuits and
gadgets to your heart’s content.
How this book is organized:
Part 1, “The Basics: Out of the Dark Ages”: Before you do any electrical project, you
need to know how your system works, where all those wires go, and what a service
panel does. Snoop around your panel or fuse box and check out all of your electrical
devices so you’ll know what you’re dealing with.
Part 2, “Safety, Tools, and Contractors”: Many construction companies claim that
safety is their first concern, and it should be yours, too, especially when you work
around electricity. The right tools are always a must, whether you buy, borrow, or rent
them. A few words about contractors are included here, too, should you decide to hire
the work out.
Part 3, “Components and Simple Repairs”: You have to start somewhere, so I’ll start
with defining switches, receptacles, and fixtures and then discuss how to repair and
replace them. Troubleshooting skills will make some repairs easier and faster.
Part 4, “Power Hungry”: Part 4 deals with the big jobs: a new service panel and run-
ning circuits to kitchens, bathrooms, and outdoors. If you don’t have gas or oil, you
should read about electric heat (air conditioning, too).
Part 5, “Refinements”: Once you’ve taken care of the basics, you’ll want to do more.
Workrooms, low-voltage wiring, and security systems all have their say in this part.
And who doesn’t need a doorbell? Finally, a few thoughts on conserving electricity.
Acknowledgments
Few books are solo efforts, and this one is no exception. I’d like to credit everyone
whose generous efforts and contributions helped bring this manuscript together.
00 8964 FM 2/12/03 2:57 PM Page xxi

xxii
The Complete Idiot’s Guide to Electrical Repair
I’d like to thank my technical editor, Don Harper, who corrected me on more than a
few occasions. When I least expected it, a fax would come over the line with the rele-
vant electrical code and his notations on it.
Images are everything in a how-to book, and I am grateful for the artwork provided
by Pamela Winikoff at Leviton; Raymond Venzon of Makita USA; Mike Mangan of
MKM Communications; Joyce Simon at Western Forge (for Craftsman Tools); Pat
Gengler (Milwaukee Electric Tool Corporation); Paige Malouche, Marketing Services
Manager at Progress Lighting; the Wiremold Company; Saverio Manciniof Mintz &
Hoke, Inc.; and Tom Monahan. Kibby Bowen, along with her husband, Brock, pro-
vided the black-and-white photography.
On the writing side, Randy Ladenheim-Gil at Alpha Books and Alex Goldman han-
dled the editing and have my thanks for doing so.
Christy Wagner at Alpha Books put it all together.
Finally, my gratitude to my agent, Andre Abecassis of the Ann Elmo Agency, who
keeps finding me such interesting assignments.
Special Thanks to the Technical Reviewer
The Complete Idiot’s Guide to Electrical Repair was reviewed by an expert who double-
checked the accuracy of what you’ll learn here, to help us ensure that this book gives
you everything you need to know about home electrical repair. Special thanks are ex-
tended to Don Harper.
Don Harper is a licensed Washington State electrical contractor and holds both an
electrical administrator certificate and an electrical journeyman card. He is a graduate
of the Construction Institute Trades Council and has taught first-year electrical classes
there for seven years. His company, Harper Electrical, does both new and remodeled
residential wiring as well as installations for high-tech communication and software
companies.
Trademarks
All terms mentioned in this book that are known to be or are suspected of being
trademarks or service marks have been appropriately capitalized. Alpha Books and
Penguin Group (USA) Inc. cannot attest to the accuracy of this information. Use of a
term in this book should not be regarded as affecting the validity of any trademark or
service mark.
00 8964 FM 11/24/03 11:30 AM Page xxii

Part 1
The Basics: Out of the Dark Ages
In many ways, life was much simpler before the advent of electricity. People slept
longer—after all, there wasn’t much else to do when it got dark—and worked fewer
hours for this same reason. Candles and gaslights just didn’t cut it when it came to
providing safe, well-lit working and living spaces.
In addition to lighting the way, electricity powers just about everything you touch and
use. You should be able to enjoy all the benefits of a wired home—lights, receptacles,
and the toys of civilization—wherever you want them. This is a doable goal regardless
of the age of your house or its wiring. With some basic knowledge and understanding
of your electrical system, you can surround yourself with power where you want it and
have conveniences at your fingertips.
Before you start snipping away at your old knob-and-tube wiring, read through these
first few chapters and get the basics. You’ll find out how electricity flows from your
local utility to your espresso maker in a safe, predictable manner and how you can
keep it that way. All the wires running through your walls want to live an orderly life
and have no interest in the anarchy of bad wiring jobs (which are not an uncommon
problem in old homes, unfortunately). You don’t want a future homeowner uncovering
your work and wondering, “How could anyone wire like this?” It won’t happen after
you’ve gotten these chapters under your tool belt.
01 8964 Part 1 2/1/00 7:59 AM Page 1

01 8964 Part 1 2/1/00 7:59 AM Page 2

Chapter 1
Fear of Frying
In This Chapter
➤
The logic behind your electrical system
➤ Getting the job done
➤ A brief inspection of your wiring
➤ Fuses and circuit breakers
➤ Running power where you want it
I once had a client who was installing some light fixtures in his Seattle home. While
he was working, his mother called from New York. When told by her daughter-in-law
what her son was doing, she screamed, “You tell him to get down. Doesn’t he re-
member what happened to Mr. Schneider down the street? He got electrocuted doing
such things. What is he thinking, this son of mine?”
Mr. Schneider, it seems, didn’t know very much about electricity or his home’s wiring.
Electricity isn’t some kind of barely contained liquid fire inside your wiring just
waiting to strike and burn innocent victims. It’s a civilizing force in our lives that we
won’t live without. Even when we go camping, we often take battery-powered gadgets
so we can rough it in comfort.
This chapter will show you that your house’s wiring, if done correctly and legally, is a nice,
logical system that should be respected, not feared. You’ll get a better feel for the work in-
volved in upgrading or altering your system. You also will start to think about changes and
improvements you might not have considered previously. Think of this as a bare-bones in-
troduction to get you thinking about your electrical system and how to upgrade it.
You’ll also learn to do your work safely without worrying your mother too much.
02 8964 CH01 2/1/00 8:02 AM Page 3
Part 1
➤
The Basics: Out of the Dark Ages
4
A Wired World
We take electricity so much for granted that it’s hard to believe many rural parts of this
country lacked electrification until the 1930s. Now we have it in every room of the
house, the garage, the basement, and even outdoors. Chapter 2, “What Is Electricity
Anyway?” will get into the science of electricity. As a homeowner, what do you need to
know before you start working on your wiring? What should you be looking for?
An electrical system is composed of a variety of parts, from those as large as a dam or
another power generator to others as small as the wiring attached to your doorbell.
The power coming into your house is much too powerful to use safely at full
strength. Instead, it’s broken down into smaller units through a system of circuits
with breakers or fuses and different-size wires. Every component along the way has a
role to play. Unlike income taxes, this is a very logical system.
Linear Logic
Left to its own devices, electricity wouldn’t be much good to us because it requires
some discipline to be useful. This discipline, in the form of electrical current, corrals
the charged electrons that make electricity and directs them so they can power our
lights, computers, and electric apple peelers. Your local utility company’s generators
produce the electricity and then “pipe” it to your home through wires and trans-
formers. The only time this is of any great interest to you is when there’s a disruption
in the distribution system that results in your power going off and your digital clocks
reverting to that annoying, flashing 12:00 signal when the power comes on again.
Electrical Elaboration
A utility company’s circuits can get overloaded just as circuits can overload in our own
homes. Too much demand for power to run fans and air conditioners during hot spells, for
instance, can cause a loss of power for entire neighborhoods. Trees are another culprit. All
it takes is one branch falling across some power lines to disrupt electrical service to any-
one depending on those lines. For this reason, power companies maintain ongoing tree-
trimming programs, which can be a difficult task in large rural areas. When a utility can
foresee excessive, short-term demand, it might selectively shut down power if it can’t pur-
chase additional power from another utility.
02 8964 CH01 2/1/00 8:02 AM Page 4

5
Chapter 1
➤
Fear of Frying
Once the power lines enter your house, your interest naturally perks up. Here, the
comfort and safety of you and your family are your number-one concerns.
Follow the Electrical Code
The installation of electrical systems in the United States is subject to local building
codes. As a rule, these requirements are based on the National Electrical Code (NEC).
(Canadians use the Canadian Electrical Code, or CEC.) The NEC carries no enforce-
ment power and is written as an advisory document only, but for all intents and pur-
poses, this is the main set of rules on which local codes are based.
The NEC is the guiding authority for electricians and is not exactly bedtime reading
for the rest of us. Local codes might be more stringent in some areas. As a home-
owner or an electrician, you have to be aware of any specific rules that your local
codes might impose.
Electrical codes spell out, among other things …
➤ Lighting requirements
➤ Receptacles needed per square foot of living
space
➤ How the system should be grounded
➤ Circuit sizes
➤ Required wire gauge or size per individual
circuit
➤ Special stipulations for kitchens, bathrooms,
hot tubs, pools, fountains, and outdoors
Codes are like personal relationships: Everything
can be going along just fine until there’s a misun-
derstanding or a misinterpretation of something
someone has said. Then all interested parties have
a problem. Electrical inspectors and electricians,
both professional and do-it-yourselfers, sometimes
have different interpretations of the code. For this
reason, you want to be absolutely sure your work is done in the most straightforward
manner possible, even if it means a little more expense or work on your part. After
all, regardless of your interpretation, it’s the inspector who makes the final ruling.
The authority having jurisdiction of the code will have the responsibility for making
interpretations of the rules (Article 90-4). Leave literary license to wayward authors.
Safety Rules, Mr./Ms. Homeowner
It has been suggested that early electricians at the turn of the century were a paranoid
lot. This was a new, untested medium that was replacing familiar gas lighting. These
Positively Shocking
The National Electrical Code
(NEC) is designed strictly as a
safety measure to protect you
and your property. It is not
meant to be an instruction
manual for amateur electricians
or to be used as a design specifi-
cation for your home or business.
The NEC covers most, but not
all, electrical installations.
02 8964 CH01 2/1/00 8:02 AM Page 5

Part 1
➤
The Basics: Out of the Dark Ages
6
electricians weren’t interested in developing reputations as de facto arsonists. Wiring
at the time was pretty simple to begin with, usually just lighting circuits, one recep-
tacle per average-size room, and a very small service or fuse box. Electricians used
lead solder followed by tape to join wires and do their work safely.
Your dealings with electricity should be equally safe, whether you’re installing a new
circuit or screwing in a light bulb. Electricity always is seeking an easy way to travel.
Sticking your fingers, screwdrivers, or car keys into light sockets or receptacles pro-
vides these charged particles with an alternative path to moving along a wire. An im-
properly grounded toaster can cook more than your bagels. We’ll cover the basic
safety rules in Chapter 7, “Caution Signs and Safety Concerns.” For now, you’ll need
to keep a few rules in mind when dealing with your electrical system:
➤ Don’t handle anything electrical if you’re wet or are standing on a wet surface.
➤ Never overload a circuit beyond its capacity.
➤ Extension cords are for temporary use only.
➤ Never start an electrical repair or addition until you’re sure how to do the job
correctly and the power is shut off.
➤ When a problem is beyond your expertise, call a licensed electrician.
Mutual Respect
Franklin D. Roosevelt said that the only thing we have
to fear is fear itself. He obviously never dealt with the
IRS. We can include electricity as one thing we don’t
have to fear, but we do need to respect it. You and your
electrical system will get along just fine as long as you
don’t demand more of it than it’s designed to provide.
Most problems with electricity result from poor work-
manship, code violations, and user abuse. Old systems
were designed to power far fewer toys and gadgets than
we have today. Trying to run three or four small
kitchen appliances out of one receptacle, rather than
running a new circuit, is just asking for trouble.
Do It Yourself or Hire It Out?
Electricians are one of the elite—and expensive—
building trades. They are trained and tested to become
licensed (a must when you’re hiring). They most likely
can do a large job faster than you can. As with any
Bright Idea
If you have to change a fuse or
check a circuit breaker in an area
where the floor might be damp,
lay down a piece of plywood
first. Standing on this will keep
you on dry ground, which is less
hazardous than damp concrete.
You also should wear dry, rubber-
soled shoes and leave one hand
in your pocket to keep from in-
advertently becoming a pathway
for the electrical current.
02 8964 CH01 2/1/00 8:02 AM Page 6
7
Chapter 1
➤
Fear of Frying
trade, electricians come equipped with the tools and knowledge that you are now just
beginning to acquire. This doesn’t mean you aren’t up to the challenge—for most
jobs, you will be. Once you understand how to run new circuits, replace lights, and
upgrade old wiring, you’ll be able to do your own electrical work in a professional
manner.
In addition to having a working knowledge of the
code requirements and knowing how to install
your wiring and fixtures, just what does this work
involve? The following sections explain this in
more detail.
Drilling and Pulling
The physical act of wiring is largely a matter of
getting power from point A to point B in a manner
approved by the code. Point A might be your main
service panel (where the power enters your house),
or it might be a receptacle on an adjoining wall.
Either way, you have to figure out the best route to
run your wire so A and B can be connected.
How do you define the best way? That depends on
your circumstances:
➤ Are your walls and ceilings open with the
studs and joist exposed?
➤ Do you have to work around old plaster and
lath or newer drywall?
➤ Is there basement, attic, or crawl-space access?
Much of an electrician’s time is spent drilling holes
in wall studs and floor joist and pulling electrical
cable from one fixture or receptacle to another.
This work is tougher in a finished house, especially
one with old plaster walls or limited access from ei-
ther a basement or attic crawl space. This is time-
consuming work, and its cost can be difficult to
estimate. In my opinion, these are perfect jobs for
homeowners who can take their time drilling and
“fishing” wires even if they don’t want to do the
final connections or fixture installations. A couple
of weekends or evenings with a commercial-quality
drill and a roll of electrical cable can greatly reduce
the time an electrician spends in your house—and
can greatly reduce your costs.
Ask an Electrician
In terms of training and ex-
pertise, an electrician starts out
as an apprentice before moving
up to certified journeyman
status. With additional training
and testing, he or she can be-
come a master electrician.
Bright Idea
It’s always easier to have two
people feeding and pulling wires
between floors, even if you can
do the work alone. Kids can get
in on the work, too. This gives
them a sense of accomplishment
as well as some basic knowledge
of how wiring works. This is a great
skill to have when they’re older
and are wiring their own homes.
02 8964 CH01 2/1/00 8:02 AM Page 7
Part 1
➤
The Basics: Out of the Dark Ages
8
Neatness Counts
I cannot emphasize enough the need for clean, neat, and accurate work when doing
your own electrical jobs. Inspectors aren’t fond of homeowners doing their own
wiring, and they probably will scrutinize your work more than the work of an electri-
cian. Chalk it up to one more example of life being unfair, or see it as motivation to
do the best work possible. (How’s that for making lemonade out of lemons?)
A new electrical service that’s been done well is a beautiful exercise in symmetry. All
the wires entering the service panel are installed at neat right angles without any ex-
cess length. Wires running along exposed basement floor joist are taut, stapled, and
secured. The point of the staple is to gently hold the cable in place. It is very easy to
damage the outer sheath of NMB (nonmetallic) cable if you aggressively pound sta-
ples against it.
Cable inside receptacle and switch boxes is cut clean and is folded in and out of the
way at the back of the boxes. These are not inordinate standards but the ones an in-
spector expects to see. You should expect them, too, whether you do your own work
or hire it out.
Can you get these results as a novice? Of course you can! It will take you longer than
a trained electrician, but so would just about any work that’s new to you. That’s why
you bought this book. This text—and a few good tools (see Chapter 8, “Call Me
Sparky”)—will see you through most electrical jobs with inspector-pleasing results.
Electrical Elaboration
A good electrical inspector will work with you on a project and will inform you of pos-
sible missteps that might be in the making. On my first commercial job, the inspector
didn’t say a word to the electrician about the way he was routing his cable between floors
until the job was almost finished. At that point, she told him it wasn’t correct and would
have to be redone. They disagreed about how to interpret the code, but nevertheless, she
should have brought up her concerns earlier. He didn’t have to reroute, but he did have
to change some panel boxes, which could have been avoided had they both communi-
cated more clearly.
02 8964 CH01 2/1/00 8:02 AM Page 8

9
Chapter 1
➤
Fear of Frying
Simple Projects First
Before you go yanking your old fuse box out, convinced that you can replace it before
dinnertime with new circuit breakers, look for a small job to do first. Most older
homes have at least one receptacle or switch that needs replacing. There are other
jobs to consider as well such as …
➤ Adding extra garage lights.
➤ Running a dedicated circuit for your office computer.
➤ Installing a bathroom fan.
➤ Adding lights to your backyard.
These are good jobs for practicing your evolving electrical skills without causing too
much disruption around your house. They all involve applying for a permit, sched-
uling an inspection, calculating an electrical load, running wire from a power source
to a fixture, installing the fixture, and making the final connections of wire, fixture,
and power source. Each of these jobs is a microcosm of a larger project such as re-
wiring your entire house, and each is a good confidence booster. You can even take
snapshots of your work to carry around in your wallet, but be prepared for some
strange looks from your friends when you pull them out for showing.
System Checkup
By now, you’re probably getting some ideas for the
kinds of projects you might consider doing, but
what do you really need to do? What shape is your
electrical system in now? The newer the house, the
more likely there is less code work to do. That is,
you shouldn’t have to correct any existing wiring if
it’s original to the house. This isn’t an absolute rule,
however! Sometimes an inspector misses something
or an owner does some work that isn’t up to code.
Older houses are more problematic. It’s common
to find a jumble of add-ons and questionable work
in an old home. Even a cursory inspection will
give you some idea of electrical improvements you
might consider making.
Plugless in Seattle
One of the biggest drawbacks to old wiring systems is a lack of receptacles or outlets.
Remember, our parents’ and grandparents’ generations had far fewer voltage-eating con-
sumer trinkets and entertainment devices than we have today. Current code calls for …
Ask an Electrician
Any work that extends an existing
electrical system by adding a cir-
cuit or a fixture usually requires a
permit and an inspection. Any
work that simply replaces an ex-
isting fixture, such as a light or a
receptacle, usually doesn’t.
Always check with your local
building department to be sure.
02 8964 CH01 2/1/00 8:02 AM Page 9

Part 1
➤
The Basics: Out of the Dark Ages
10
➤ A receptacle to be installed so a six-foot cord can be plugged in anywhere along
a wall in general living areas.
➤ Special ground-fault circuit interrupter (GFCI) outlets to be installed in kitchens,
bathrooms, near any sinks, and outdoors.
➤ Special considerations for floor-mounted outlets.
Could you use some additional receptacles? Is your bathroom receptacle up to code
with a GFCI? Look around your house to see if you could use some additional recep-
tacles. Also make sure your bathroom receptacle has a GFCI, as code requires.
Let There Be Light
Parents and teachers of a certain generation regularly reprimanded children to do their
reading in “decent” light, warning that they could “ruin” their eyes by using dim
lights. Whether you believe this to be a medical fact or not (I’ve heard it both ways),
why not give yourself as much light as possible when you read or do other close work?
Adding lighting where you want it is one of the great benefits of electrical wiring.
Lighting fulfills other purposes besides purely practical
ones. It can set a mood, spark romance, and ward off
ne’er-do-wells lurking outside on a dark night. Yard
lights invite summertime parties and welcome us home
in the winter. Adding additional lighting is a more com-
plicated job than simply adding a receptacle, but it cer-
tainly is within the scope for a homeowner to do.
Hot Spots
Any receptacle or switch that is hot to the touch is an
overloaded circuit. This is a circuit that is drawing
more current than it’s designed to draw. If you have
any hot spots, you must attend to them immediately.
(You can start by pulling a few plugs or turning off the
lights.) A shortage of receptacles or lights is an incon-
venience; an overloaded circuit is a danger that should
not be ignored.
Special Needs
Every home and homeowner is different. What might have been a perfectly accept-
able electrical system for a previous owner might be woefully deficient for you. May-
be you want to install a small baseboard heater in a bathroom located a long way
from the furnace. Your photography hobby might demand a darkroom. As an antique
car restorer, you can’t wait to set up a paint booth in the garage complete with indus-
trial heating units for that baked-on finish guaranteed to win a trophy or two.
Positively Shocking
When replacing lights, don’t as-
sume you can install a light with
higher wattage. The circuit might
not support the additional power
demand. You always should con-
firm the total demand by other
lights, receptacles, or appliances
before changing an existing fixture.
02 8964 CH01 2/1/00 8:02 AM Page 10

11
Chapter 1
➤
Fear of Frying
New houses often are constructed with the minimum number of code-required recep-
tacles and lighting. Exceptions are made with kitchen and bathroom lights; these are
high-profile areas that help sell houses, so builders make them brighter and more ap-
pealing with better lighting. Old houses often have a real hodgepodge of wiring that
you’ll probably want to upgrade and expand. One of the reasons you’re reading this
book is to custom design and improve your electrical system to suit your needs, not
those of a builder or a previous owner.
Confused About Fuses?
Every fully electrified house has either a fuse box
or a main panel box with circuit breakers. This is
the distribution center for the power coming into
your house. Without them, you would have one
whopping current running through your walls that
would burn out just about any appliance you tried
to run on it.
Fuses were used until approximately 1950, when
circuit breakers became the standard installation for
new construction. The fuses most of us are familiar
with are the round, screw-in glass types with a vis-
ible alloy strip inside the glass. These are called
plug fuses. Cartridge fuses, which have a cylindrical
shape, are the other common type of fuse.
If the current running across a plug fuse’s alloy
strip exceeds the amperage of the fuse, the strip
will melt, thus stopping the flow of electricity.
There is nothing inherently wrong with a system
using fuses, but they are dated and inconvenient.
If you don’t have any spares around when one
“blows”—you should always replace a fuse with
one of the same amperage—you’re out of luck. The other problem with plug fuses is
that a fuse with an amperage setting of 15, 20, 25, or 30 can be installed as a replace-
ment for a burnt-out fuse even if the original size should have been 15 amps. Even
though it is physically possible to install the wrong fuse, doing so could overload a
circuit and might even start a fire in your home. To prevent this, the installation of
an “S” type adapter will limit the maximum fuse size to 20 amps.
Circuit breakers, the modern standard for homes, are an improvement over fuses, as
you’ll see in the next section.
Bright Idea
If you’re uncomfortable putting
your hand into a fuse box to re-
place a burned-out fuse, you can
buy a tool to help with the job.
Electrical-supply companies sell
plastic fuse pullers specifically
made for gripping fuses and re-
moving them. The plastic will not
conduct electricity, so there’s no
danger of receiving a shock
through them.
02 8964 CH01 2/1/00 8:02 AM Page 11

Part 1
➤
The Basics: Out of the Dark Ages
12
Circuit Breakers
A circuit breaker serves the same function as a fuse, but it’s a more complicated de-
vice. It also is reusable. When a current that exceeds the breaker’s capacity or rating
passes through it, a pair of metal contacts is broken and remain so until the breaker is
reset. A breaker can be reset an almost indefinite number of times, although repeated
tripping is a sign of an electrical problem or overload. Any time a breaker trips or a
fuse burns out, you must find the source of the problem before you reset the breaker
or replace the fuse. Sometimes it’s only a single-occurrence problem such as running
too many appliances at once. If you can’t find an apparent cause in your use of the
circuit, you probably have a short in the system that must be addressed (see Chapter
16, “Trouble, Troubleshooting, and Safety”).
More Power to the People
Modern electrical systems give us access to plenty of safe, dependable power. Around
the turn of the century, it was a big deal to have a 60-amp service. Now, 200-amp
services are common in many houses, and some larger homes are even getting 400
amps of power. We are dependent on electricity for our safety and well-being. One
purpose of this book is to help you put it to the best use possible in your home.
Any electrical system can be improved and adapted to your individual needs and
specifications:
➤ A larger service of greater amperage can be installed.
➤ New circuits can be added.
➤ Existing circuits sometimes can be extended.
Electrical Elaboration
Although circuit breakers are the standard equipment for circuit protection in your home,
fuses are still used in many other applications. Fuses with ratings as high as 10,000 amps
and 136,000 volts are used in marine, automotive, telecommunications, and computer ap-
plications. Fuses provide circuit protection in motors, transformers, and an array of deli-
cate electronic equipment.
02 8964 CH01 2/1/00 8:02 AM Page 12

13
Chapter 1
➤
Fear of Frying
➤ Lights can be added anywhere there is a need for them.
➤ Additional wiring can facilitate modern contrivances from garage door openers
to barbecue rotisseries.
As you read on, you’ll learn how to perform these electrical chores by yourself or how
to evaluate your needs and discuss them intelligently with an electrician. Either way,
you’ll have power at your fingertips throughout your home.
The Least You Need to Know
➤
Electrical systems are logical, precise, and guided by local electrical codes.
➤ A do-it-yourselfer can safely do many electrical projects around the house, but
he or she should start with simple jobs first.
➤ A simple walk-through of your house and yard will give you some improve-
ment and upgrade ideas for your electrical system.
➤ Take the time to design your electrical system or upgrades to suit your needs,
lifestyle, and sense of convenience.
02 8964 CH01 2/1/00 8:02 AM Page 13
02 8964 CH01 2/1/00 8:02 AM Page 14
Chapter 2
What Is Electricity
Anyway?
In This Chapter
➤
How alternating current works
➤ Staying grounded for safety
➤ Knowing volts, watts, and amps
➤ Wire size matters
We use and depend on electricity every single day. All we usually know about it is that
it’s buried inside our walls, it runs our lights and VCRs, and we’re billed for it every
month or so. Terms such as kilowatt hours, amperage, volts, and current are Greek to
most of us. This is probably appropriate because the Greeks first described static elec-
tricity about 2,500 years ago. It was discovered that amber would accumulate a nega-
tive charge of static electricity when rubbed with sheep’s wool. Not known for a great
sense of comedy, this probably became quite the party trick at Greek get-togethers.
The word “electricity” has its root in the term electrum, which is Latin for “amber.”
Understanding electricity is like understanding cooking: Once you know a bit about
sautéing, cooking temperatures, seasonings, and how to make a decent pie crust, you
can muddle through meal preparation and come up with more-than-edible results. If
you know how electricity is produced and can toss around some vocabulary words,
such as alternating current and resistance, you’ll be more comfortable with your elec-
trical work. A task makes more sense when you understand its inner workings.
This chapter isn’t going to give you enough information to challenge a Ph.D. in elec-
trical engineering to a trivia contest at your local Jeopardy theme bar. You will, how-
ever, develop a working knowledge of electricity basics and how they apply to your
own electrical system.
03 8964 CH02 2/1/00 8:17 AM Page 15

Part 1
➤
The Basics: Out of the Dark Ages
16
Go with the Flow
Think back to your high school physics classes and all
those diagrams of atoms with electrons spinning
around a nucleus. (They’re the drawings that looked
like really small solar systems.) Basically, electrons spin
around because the protons in the atom’s nucleus
carry a positive charge (+) that repels the electrons’
negative charge (–). If enough of the electrons decide
to move on, preferably in a more or less uniform
stream, we end up with usable electricity.
Electricity comes in several flavors, but the two we’re
most familiar with are …
➤ Static electricity, in which the electric charges are
stationary.
➤ Dynamic electricity, in which the electric charges
are moving in a current.
When you were younger, the main value of static elec-
tricity was using it to shock unsuspecting siblings and
cousins after you had walked across a carpet. If you
didn’t do this when you were a kid, you can always
try it at your next holiday dinner. Cats also are good
targets, but their revenge usually is a messier affair.
Why does the shock occur? Because some electrons like
to travel, and they aren’t the most stable subatomic
particles. When you walk across a carpet (some are
worse than others), you pick up some of these hitch-
hiking electrons while leaving some of your own posi-
tive charges. They have to go somewhere, and your
sibling’s finger or a doorknob makes a dandy con-
ductor. If you touch a door frame, nothing happens
because wood is a good insulator. That is, it does not
allow electrons to easily move through it.
Static electricity is simply an imbalance of positive and
negative charges. When you get zapped, you’re just
the accountant trying to balance these charges. One
place you don’t want to balance these charges, by the
way, is with your computer, so you can either …
➤ Touch your metal desk chair before turning on your computer to get rid of any
pesky electrons that could affect your computer.
➤ Apply anti-static spray periodically to your carpet so it will have a more positive
charge and be less likely to give up its electrons.
Ask an Electrician
Electricity is the movement of
electrons. A conductor holds its
own electrons loosely, so current
can easily pass through. Metals,
such as copper wire, are good
conductors for carrying electric
current. An insulator has tightly
held electrons, which means cur-
rent does not flow through it.
Plastic, used to wrap around
copper wire, is a good insulator,
as is cloth, which was once used
for the same purpose.
Bright Idea
You can make your own inex-
pensive anti-static spray by com-
bining 1 teaspoon of liquid fabric
softener with 1 quart of water in
a spray bottle. Lightly spray your
carpet and renew as needed.
03 8964 CH02 2/1/00 8:17 AM Page 16

17
Chapter 2
➤
What Is Electricity Anyway?
Static electricity may be annoying, but dynamic electricity is another story altogether.
Staying Current
Electricity doesn’t do us much good if a bunch of errant electrons constantly change or-
chestras from one conductor to another. We want our electrons to move in a reasonably or-
derly fashion so they can do our bidding when we turn on the lights. A flow of electricity is
called a current, and it’s carried into our homes through wiring from local electric utility
companies. New electrical systems have the following three wires coming into your house:
➤ Two black or “hot” wires that carry the current to your service panel
➤ One bare neutral wire for carrying the current back to the power source and to
ground
An electrical current has a couple of different options, depending on your application.
AC/DC
When Thomas Edison and his crew invented a reliable electric light bulb, he followed
it up by developing the power systems to run it, rightfully envisioning a future world
full of light bulbs. (We usually refer to these as “light bulbs,” but “lamps” actually is
the correct term. Bulbs are for planting.) Edison employed direct current (DC), which
now is used in battery-operated gadgets in which the current flows from the negative
terminal of the battery to the positive terminal. A battery is basically a container of
chemicals whose electrochemical reactions produce excess electrons.
Our electrical systems use alternating current (AC), which was developed by Edison’s
contemporary, George Westinghouse, after he bought up patents from Nikola Tesla
and William Stanley. Once again, someone with business sense trumped the scientific
minds possessing the money-making ideas. It took Edison, the lampmeister, a few
years to go along with this AC business, but he eventually told Westinghouse’s son to
let his dad know he was right.
A direct current just means that the electric current flows continuously in one direction
and keeps going until it finds something to run such as a radio or a light bulb. An alter-
nating current flows in one direction—say, to a receptacle—and then flows back in the
opposite direction. You might be thinking, so what? When was the last time alternating
current was discussed on late-night talk shows? Probably never. Alternating current,
however, does have some useful, consumer-friendly features such as the following:
➤ Through a series of transformers, an AC can be increased or decreased in value.
(The current can be made stronger or weaker.) This means that, instead of a zil-
lion watts of power heading for your panel box, you’ll get a reduced amount
that you actually can use.
➤ Alternating current is efficiently transported over long-distance power lines.
➤ It’s easy to convert from AC to DC, but it’s expensive to go from DC to AC.
03 8964 CH02 2/1/00 8:17 AM Page 17

Part 1
➤
The Basics: Out of the Dark Ages
18
Electricity—from your
utility to you.
power plant
substation
utility pole and transformer
residential service
Electrical Elaboration
George Westinghouse installed the world’s first long-distance AC power lines in the unlikely
area of the San Juan Mountains near Telluride, Colorado. Rapid expansion of gold mining
had exhausted nearby timber supplies, the cheap fuel that ran the steam-powered machines
the mines required. L. L. Nunn, a partner in the Gold King Mine, traveled to Pittsburgh and
convinced a reluctant Westinghouse to build a generator and motor in the isolated moun-
tain region despite its freezing temperatures and avalanche dangers. Nunn threw the switch
on June 21, 1891, beginning a new era in electric power in the United States.
You’re Grounded
Now that you know what kind of current you have in your house (and everywhere
else), let’s discuss another critical feature—grounding. Your entire electrical system, if
it’s up to current code, is grounded for your protection. This literally means that one
wire of your electrical system leads back into the earth itself, where it will carry any
errant current that could otherwise shock or electrocute you.
The earth ends up being a good electrical conductor and a convenient return path for
electrons. In fact, the earth is used as a reference point for measuring the voltage in
our electrical systems.
03 8964 CH02 2/1/00 8:17 AM Page 18

19
Chapter 2
➤
What Is Electricity Anyway?
A ground wire can be attached to a ground rod that is deeply buried, or it can be a
length of copper wire buried near your foundation’s footings. A second physical
ground is usually your cold-water supply pipe near your service panel.
Modern house wiring is color-coded so you won’t confuse your hot, neutral, and
ground wires with one another. This coding is standard everywhere—there is no room
for artistic creativity here. The wire colors are …
➤ Black and red for hot wires
➤ White for neutral wires
➤ Bare (unsheathed) copper or green for ground wires
The black, red, white, and green colors refer to the plastic sheathing that contains the
wires themselves. If you have an old two-wire system (see Chapter 5, “More Wall
Talk”), you won’t have a ground wire. An old knob-and-tube system (see Chapter 3,
“History Lessons”) sheaths both the hot and neutral wires in black, which isn’t ex-
actly user-friendly when you’re trying to distinguish one wire from another.
It’s important to understand the difference be-
tween the grounding wire and the neutral wire.
The neutral white wire carries the electrical current
back to the power source after it’s passed through a
load (a ceiling light, a fan, a stereo, and so on).
That’s the nature of an alternating current. The
grounding wire, on the other hand, protects the
entire system. The neutral wire is more correctly
referred to as a grounded conductor. The bare or
copper wire is a grounding conductor.
Voltage Provides the Push
There are a lot of terms associated with electricity.
Different words refer to a current’s strength, the
speed at which it travels, and the rate at which it’s
consumed. Voltage is a sometimes-misunderstood term that means “electomotive
force” or, more simply, electrical “pressure.” Voltage also is the difference in electrical
potential between one end of a circuit and the other. In our electrical systems, voltage
is measured against the earth, which is at zero potential. In other words, it all starts
with the ground under your feet. Voltage gets the electrical ball rolling by giving a
push to electric power from your utility’s generator to your house or business.
Ask an Electrician
The term load refers to any
device that uses electricity. Your
house is basically one large cu-
mulative load, and lights, appli-
ances, and air conditioning are
individual loads.
03 8964 CH02 2/1/00 8:17 AM Page 19

Part 1
➤
The Basics: Out of the Dark Ages
20
Long-distance power lines carry huge voltages, from
around 155,000 to 765,000 volts. If you hooked your
vacuum cleaner up to that kind of power, you’d melt
its engine instantly—and possibly yourself as well. You
previously read that transformers reduce the voltage
before it enters your house. A few hundred thousand
volts might sound like fun to your kids, but you
should be grateful that you end up with a lot less
voltage, thanks to transformers.
Know Your Volts: 120/240
Your utility company supplies your home with a split-
phase 240-volt feed. This means that the two hot
wires coming into your service panel are each carrying
120 volts. This provides power for major appliances
such as electric stoves and clothes dryers that require
both 240 volts and 120 volts. Just about everything
else in your house only requires 120 volts.
Because of voltage drops in your house wiring, these
numbers might drop as low as 220V and 110V. Some
appliances and other electrical items even indicate on
their instructions that they are rated at 220V or 110V.
This is the manufacturers’ way of telling you that their
products will still work correctly when the voltage
drops. An electrician or builder might refer to a 220/110
system, but it’s really 240/120. This is an important
concept. Reread this paragraph if you find it confusing.
Amps for Short
Volts measure the force of an electrical current, which is
the movement of zillions of electrons. Amperes or amps
measure the number of electrons in a current moving
past a specific point on a wire or another conductor in
a one-second period of time. If you want an exact
number, one ampere equals one coulomb of electrical
charge moving across a conductor in one second (or
6,250,000,000,000,000,000 electrons per second).
Coulombs were named for that fun eighteenth-century
French physicist, Charles A. de Coulomb. If electricity were water, volts would be the
speed of the water, and amps would be the amount of water flowing through your hose.
Bright Idea
If you’re working with electricity
or with electrical tools outside
your house, you can’t avoid
some contact with the ground.
You can minimize any shocks by
using a wood or fiberglass ladder.
(Note: Electricians aren’t allowed
to use metal ladders.) Wearing
boots or shoes with thick rubber
soles also will provide insulation
between you and the ground.
Positively Shocking
Europe and other parts of the
world use a 220/240-volt elec-
trical system. Before you can
plug in your notebook PC, razor,
or hair dryer, you have to use a
converter to reduce the current
to 120V. Converters are available
at travel specialty stores and
many overseas hotels.
03 8964 CH02 2/1/00 8:17 AM Page 20

21
Chapter 2
➤
What Is Electricity Anyway?
A new three- or four-bedroom house often will have a 200-amp service; apartments or
small condominiums might only need 100-amp services. Individual fuses and circuit
breakers are measured in amperes. That is, they only allow a certain amount of cur-
rent to pass through before they shut down the current.
Watt’s That?
Watts are one of the measurements you will refer to in your electrical work. Most of
us know the term from buying light bulbs (I know, the term should be lamps, but this
isn’t an easy one to get away from) as in “Why do we have a shelf full of 60-watt
bulbs when I need 100?” A watt is a unit of electrical power. It tells you how much
electricity you’re consuming and being billed for by your utility company. This is why
you have a meter outside your house recording your usage.
A single watt is a minuscule way to measure power usage, so the following larger
units of measure are used instead:
➤ Kilowatt or kw (1 kw = 1,000 watts)
➤ Megawatt (1 megawatt = 1,000 kw or 1 million watts)
You’ve really got some usage problems if your electric bill indicates that you’re in the
megawatt range. (Perhaps you have a refrigerated warehouse on your roof.)
Wattage Around the House
How do watts figure into your electrical calcula-
tions? It’s simple: They tell you how much stuff
you can pile onto one circuit without overloading
it. You don’t want to put too much demand on a
circuit with too many watt-hungry loads. Some
simple math will keep you on the right track.
Watts equal voltage times amps. Let’s say you want
to install a new 15-amp circuit so you can add
some outlets or lights to your living room and
dining room. Because you won’t be running any
major appliances (assuming you don’t do your
laundry in the living room), this circuit will be
running on 120 volts rather than 240. Therefore …
120V × 15A = 1,800 watts
Terrific, you say. I can put in 18 100-watt lights.
Actually, you can’t, because you generally figure
on running only 80 percent of the maximum load
Ask an Electrician
The meter associated with your
electrical system is more correctly
known as a kilowatt-hour
meter. Your electric bill is calcu-
lated in kilowatt-hours (KWH).
Each kilowatt-hour equals 1,000
watts of energy used for one
hour. A 40-watt light bulb would
have to burn 25 hours to equal
1 KWH.
03 8964 CH02 2/1/00 8:17 AM Page 21
Part 1
➤
The Basics: Out of the Dark Ages
22
(see Chapter 5)—1,440 watts in this case—but that’s still 14 lights with watts to spare.
What if you want to plug in your new window-shattering, guaranteed-to-have-the-
neighbors-call-the-police music system that needs 1,900 watts all by itself? Time to re-
calculate. It’s going to need its own private 20-amp circuit before you can crank up
Eric Clapton’s original version of “Layla.” By calculating your electrical needs first,
you can accurately wire your house once without needing to make adjustments later.
Electrical Elaboration
Large appliances are on 240V lines because their power demands are so much greater
than small items such as lights or clock radios. An electric range, for example, can demand
more than 12,000 watts, and an electric dryer can draw close to 5,000 watts. Other major
appliances such as refrigerators and washing machines only require a 120V line. They usu-
ally are assigned a separate circuit.
This Joule Isn’t a Gemstone
Another oddball measurement you might run into if you buy, for example, a surge
suppressor for your computer equipment is a joule. Named after James Joule, all-
around smart guy and the son of a nineteenth-century English brewer, a joule in the
field of electricity is the amount of energy equal to 1 watt acting for one second.
When it comes to surge suppressors, the more joules of protection, the better.
Resistance Isn’t Futile
Everywhere we look in life, we find some form of resistance. For airplanes, it shows
up in the form of wind (and maybe an occasional bird or two). Water keeps kayakers
afloat, but it also slows them down some. Even the indomitable James Bond in his
Aston Martin DB5 had to contend with resistance when his tires hit the road.
It would be great if all the electrons in a current could go gliding across a copper wire
(or another conductor) free and clear, but pesky resistance prevents them from doing
so. Resistance in a conductor opposes the flow of an electric current. This results in
some of the electrical energy changing to heat, which you want to minimize. Hot
wires can be dangerous wires. On the other hand, resistance is built into the system
to control the strength of the current running through it. You also don’t want your
blender getting hit with 50 amps of electricity when you’re mixing a fruit shake.
03 8964 CH02 2/1/00 8:17 AM Page 22

23
Chapter 2
➤
What Is Electricity Anyway?
Electrically speaking, resistance is measured in ohms. Ohm’s Law (Ohm was a German
physicist with a great name) basically says that the smaller the wire or conductor, the
greater the resistance to a current. If you crank up the amps, you get even more resist-
ance, sometimes to the point of overheating and causing a fire. Loads that require more
amps also require larger wire to handle the current flow. If you increase the size of the
wire, the resistance goes down, and you get a weaker current with less voltage drop.
This is one of the reasons you have several dif-
ferent sizes of wire in your house.
Think of it this way: Imagine that the fire de-
partment is putting out a fire in your house.
You’re happy that they’re using a big hose
(just as a No.6 or No.10 is a big wire for big
jobs). But what if you’re just watering your
garden? Then you want to conserve water and
avoid flooding the garden. You’ll use a small
hose (just as a No.12 or No.14 wire is good for
small items such as light fixtures).
All Wire Isn’t Created Equal
Other than a brief foray in the 1970s when alu-
minum wiring was popular, copper is king
when it comes to house wiring. Copper rates
high on the conductivity scale. That is, it’s an
efficient pathway for an electrical current.
Conductivity Scale
Material Percentage
Silver 100%
Copper 98%
Aluminum 61%
Iron 16%
Nickel 7%
In addition to a wire’s conductivity, its size and the type of insulation around the
wire affect its ampacity, or the amount of current (in amps) it can carry before it ex-
ceeds its temperature rating. The greater its size, as measured in mils, the more cur-
rent it can conduct.
Every wire size has a maximum current that it can conduct. The following table
shows the most common residential wire sizes and their ratings.
Ask an Electrician
The diameter of a wire is meas-
ured in mils or, more accurately,
circular mils (CM). A mil
equals
1
/
1,000
of an inch. Wire is
assigned a gauge value by the
American Wire Gauge (AWG)
rating. The lower the number,
the thicker the wire. No.8 gauge
wire, for example, is thicker than
No.14 gauge wire.
03 8964 CH02 2/1/00 8:17 AM Page 23
Part 1
➤
The Basics: Out of the Dark Ages
24
Wire Gauge Rating
Gauge Value Ampacity
14 15 amps
12 20 amps
10 30 amps
8 40 amps
6 55 amps
Appliance and lamp cords use No.16 or No.18 wire, which is quite thin. This might
lead you to ask, “Well, if thinner wire has a lot of resistance and can heat up easily,
but thicker wire can hold more juice without overheating, why don’t we use thicker
wire throughout our homes? Wouldn’t that be safer?” This is a reasonable question,
and it has two answers: flexibility and cost.
Modern NMB cable, black
or hot conductor; white or
neutral conductor;
grounding conductor;
plastic insulation.
plastic insulation
red or hot conductor
grounding conductor
white or neutral conductor
03 8964 CH02 2/1/00 8:17 AM Page 24

25
Chapter 2
➤
What Is Electricity Anyway?
If you try to bend and fit No.8 wire so you can connect it to a light fixture, you’ll
come to appreciate the flexibility of smaller wire. Like just about anything else in life,
the larger the size, the greater the cost. There’s a reason home-improvement stores
periodically have loss-leader sales on No.12 wire but not any of the thicker stuff.
Other factors that affect your choice of wire will be discussed in later chapters.
No Substituting
The society of wire and conductors is a very closed one. No amount of politically cor-
rect persuasion will convince one gauge of wire to mingle with another. You should
not mix No.12 wire with No.14 on the same circuit, for example. Wire must match up
with its circuit breakers or fuses; No.14 wire doesn’t go with a 20-amp breaker, so don’t
confuse either party by mixing them together. You can install larger wire on a smaller
circuit breaker, but you cannot install a smaller wire on a larger circuit breaker.
The Least You Need to Know
➤
Electricity is a flow of electrons that, when in the form of an alternating
current, can be used to power our homes.
➤ All modern electrical systems are grounded for safety.
➤ Volts, amps, and watts are common measurements of electricity.
➤ There are several fixed wire sizes. Each size of wire is designed to carry a spe-
cific amount of amps. Don’t mix them up.
03 8964 CH02 2/1/00 8:17 AM Page 25
03 8964 CH02 2/1/00 8:17 AM Page 26
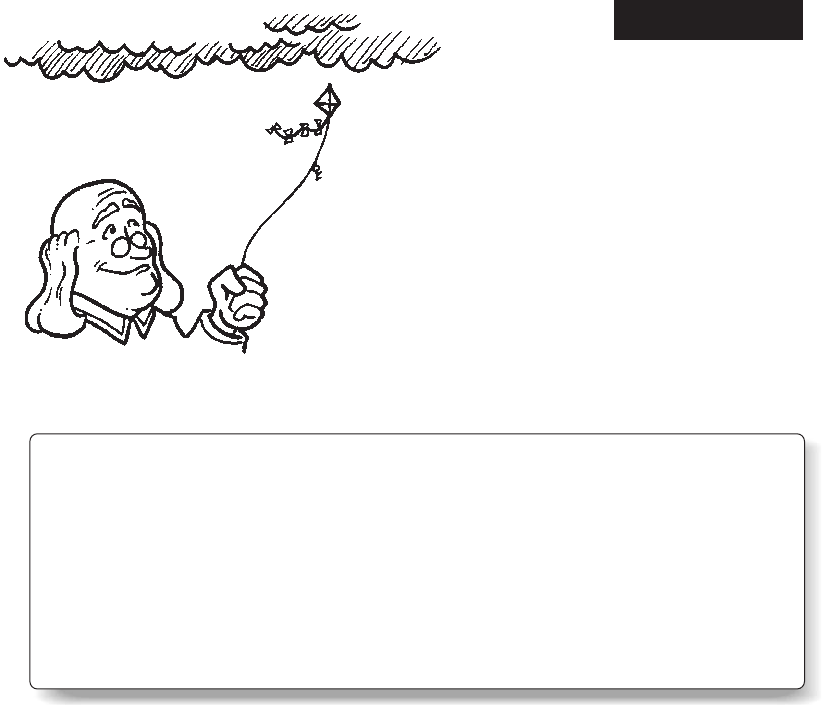
Chapter 3
History
Lessons
In This Chapter
➤
The people who brought us electricity
➤ Safety—always an issue
➤ Evolving standards
➤ Knob-and-tube wiring
➤ Demanding more power
Many people think of the era of electricity as beginning with Thomas Edison and his
electric lamp (or light bulb). His work was crucial in popularizing electricity and in
making it practical for modern life, but a long list of scientists preceded Edison in this
field. It took centuries of work just to discover what electricity is. I already mentioned
the Greeks and their party tricks—creating static electricity by rubbing a piece of
amber with wool or fur. They became pretty busy creating democracy as well as feta
cheese, so they didn’t get any further with electricity.
A couple thousand years later, around the year 1600, English scientist William Gilbert
got the ball rolling again when he coined the term “electric” while describing the
theory of magnetism. He was followed by a host of physicists, most of whom had
laws, theories, or measurements named after them. These scientists laid the ground-
work for industrialists like Edison and Westinghouse, who were able to exploit elec-
tricity and get it out of the laboratory.
04 8964 CH03 2/1/00 8:20 AM Page 27

Part 1
➤
The Basics: Out of the Dark Ages
28
Once the light bulbs started glowing, electricity became the computer industry of its
day, with constant innovations, the building of an infrastructure, and a steady array
of new uses. The dreams of merchandisers were realized in the years to follow, as they
convinced the world to buy new gadgets and products that everyone previously had
lived without, apparently in blissful ignorance. Electric lamps were followed by early
versions of curling irons, electric cars, and waffle irons. Today, even Edison would be
amazed at the electric world he helped create.
An International Effort
The development and nurturing of electrical power resulted from the work of scien-
tists and accidental discoveries on both sides of the Atlantic Ocean. This essentially
was a European and American deal, and it included contributions from England,
Scotland, France, Yugoslavia, Germany, and Italy. The earliest attempts to create or
reproduce electrical currents were through the use of crude batteries. The Energizer
Bunny wouldn’t have completed one drumbeat powered by these early batteries.
For the most part, these early physicists (they almost
all were physicists) studied electrical phenomena,
quantifying their observations so each one could con-
clude, “A-ha! It really hurts when you stand in a metal
bucket of water and touch the bare ends of hot wires
together!” Each contributor added to a gradually de-
veloping body of knowledge about electricity.
The Pioneers
A number of key players were poking and probing into
electricity, most of them during the eighteenth and
nineteenth centuries. Considering the unsophisticated
equipment these scientists used, their accomplish-
ments are that much more remarkable. It’s not like
they could refer to a textbook—they were writing the
textbooks! You’ll recognize some of these scientists as
the namesakes of some electrical terms we use today.
Ben Franklin Flies a Kite
Ben Franklin, the colonial printer known for pithy
quotes who is now pictured on $100 bills, is famous
for having flown a kite during a lightning storm—a practice not advocated by this au-
thor or your local hospital. Franklin was testing his idea that lightning was a form of
electrical current. A metal key attached to the kite attracted the lightning as its elec-
trical charge traveled down the kite’s cord and into Franklin’s wrist. As a result of his
Positively Shocking
If you’re ever playing a trivia
game and are asked who in-
vented the first electric light
bulb (lamp), do not answer
Thomas Edison! Sir Humphry
Davy (1778–1829) conducted
the earliest experiments in elec-
tric lighting, and the first incan-
descent bulbs were patented in
1840. Thomas Swan, another
British inventor, was working on
a carbon-filament lamp at the
same time as Edison.
04 8964 CH03 2/1/00 8:21 AM Page 28

29
Chapter 3
➤
History Lessons
1752 kite-flying and his follow-up observations, Franklin developed the terms “con-
ductor,” “charge,” “electrician,” and not surprisingly, “electric shock.”
Galvani’s Frog Legs
Luigi Galvani had the perfect name for an East Coast Italian restaurant, but his only
known association with gourmet food was his famous experiment with frog legs in
1786. The professor of medicine in Bologna accidentally produced an electric charge
against the legs of a dead frog. The charge was the result of the wet frog lying on a
metal plate while being probed with a knife made from a different metal. Galvani was
convinced that the twitching legs were the result of electricity already existing in the
frog’s tissues and muscles. He was none too pleased when his friend Alessandro Volta
disagreed and proved him wrong by showing that moisture caught between two dif-
ferent metals can create a small current, frog or no frog.
As a result of his disputatious observations, Volta
went on to invent the first electric battery (called
the voltaic pile) and, more important, to show that
electricity could flow in a current along a wire in-
stead of only in a single spark or shock.
In addition to being named a count in 1801 by
Napoleon, Volta had the term “volt” named after
him. As for Dr. Frog Legs, he walked away with the
consolation prize of having the term “galvanism”
(to have an electric current) named after him.
Watt
James Watt was an engineer at the University of
Glasgow. He was a steam-engine guy who invented
the steam-condensing engine and subsequent im-
provements in the 1700s. Watt was probably very
motivated to work with steam: Scotland is cold in
the winter, even with today’s central heating. It
must have felt like Antarctica back in the eigh-
teenth century.
Edison coupled his own generator with Watt’s
steam engine to produce the first large-scale electricity generation. As you can guess,
the term “watt,” a unit of power, was named after Watt.
The Amp Man
André Marie Ampère, the first notable French electrophile, researched electricity and
magnetism, essentially developing the field of electrodynamics. Not much for
Bright Idea
You can impress your friends and
family and probably drive them
to vegetarianism at the same
time by reproducing Galvani’s
discovery in your own kitchen.
Instead of using a dead frog, try
it with your Thanksgiving turkey
right before you stuff it. You
might have to cheat and wire it
up to a hidden battery, but
watch the fun when those legs
start moving.
04 8964 CH03 2/1/00 8:21 AM Page 29
Part 1
➤
The Basics: Out of the Dark Ages
30
quotable sound bites, Ampère’s most important publication, Memoir on the
Mathematical Theory of Electrodynamic Phenomena, Uniquely Deduced from Experience
(1827), is a book only a physicist could love.
A unit of electric current is called an “ampere” in his honor, but Americans, blatant
and unapologetic in messing with the French language, call it an “amp” instead.
Oompa-Ohm
In 1827, Georg Simon Ohm, a German physicist and mathematician in Cologne,
published The Galvanic Circuit Investigated Mathematically, a tome never destined to
make the New York Times Bestseller list in any category. Lacking acceptance in his na-
tive Germany, Ohm eventually was awarded the Copley Medal in 1841 by The Royal
Society of Great Britain. Ohm discovered one of the most fundamental laws of elec-
tricity: the relationship among resistance, current, and voltage. The resulting law,
V = IR (in which V is voltage, I is the current, and R is resistance), gave him a place in
the electricity hall of fame. A unit of resistance, the ohm, is named after him.
Electrical Elaboration
Being the first kid on your block with a new law of physics didn’t guarantee you stock
options or, in the case of Georg Ohm, a pile of deutsche marks. As a university professor,
Ohm was severely ridiculed when he tried to mathematically explain his theories of elec-
trical resistance. He left his teaching post and lived for years in poverty before his theories
were recognized and accepted. He lived the last years of his life as a full professor at the
University of Munich.
Coulomb Was Très Cool
Charles Augustin de Coulomb was an all-around brilliant eighteenth-century French
scientist who made major contributions in the areas of physics, civil engineering, and
the natural sciences. The unit of electric charge—the coulomb—is named for him.
Who could forget “Chuck” Coulomb’s 1773 address to the Academy of Science in
Paris when he discussed pioneering soil mechanics theory? Coulomb served as
“Ingenieur du Roi” (“Engineer of the King”) until the French Revolution came calling.
He then took a powder and retired to the countryside for a while.
04 8964 CH03 2/1/00 8:21 AM Page 30
31
Chapter 3
➤
History Lessons
Coulomb is known in the electrical world for verifying the law of attraction or elec-
trostatic force. Basically, he confirmed the notion that opposite charges (+ and –)
attract each other and like charges repel. Unlike other observers of this behavior,
Coulomb worked the numbers and came up with a nice, neat theory that no one out-
side the fields of electrical engineering and physics will ever use. Therefore, it’s not
worth mentioning in any detail in a how-to book, although it would have a real place
in The Complete Idiot’s Guide to Physics.
Other Electrical Fellows
The following European scientists also helped pave the way for the electrical comforts
we enjoy today:
➤ Michael Faraday
➤ Heinrich Hertz
➤ Joseph Priestley
Joseph Priestley, in addition to his electrical dab-
bling, also invented soda water (for which the
Coca-Cola Company is eternally grateful).
Michael Faraday is credited with discovering how
to generate an electric current on a usable scale. It
was known that electricity would create a mag-
netic field, but Faraday looked at the reverse no-
tion: Why not produce electricity with magnets?
In 1831, he discovered that moving a magnet in-
side a coiled copper wire produces a small electric
current. If you spin a large enough magnet really
fast inside a larger coil of wire, you’ll have yourself
a usable electric generator. Faraday’s work is the
basis for the electrical generators used today.
Now that we’ve discussed scientists from the Old
World the colonists left behind, let’s leap over to
the American side of the Atlantic, where our usual
combination of good timing, enthusiasm, and an
attitude of “Hey, this will work, what have we got
to lose?” put electricity on the map.
Edison, Mega-Inventor
Thomas Alva Edison was born in Milan, Ohio, on February 11, 1847. According to
some stories, he had a whopping three months of formal education, yet he obtained a
record 1,093 patents in the United States during his lifetime. Who knows how he
Ask an Electrician
The voltage in an alternating
current goes back and forth be-
tween zero and maximum as it
changes direction along a con-
ductor. It then repeats this cycle
60 times per second, or 60 hertz
(Hz), in ordinary house current.
This measurement was named for
the German physicist Heinrich
Hertz.
04 8964 CH03 2/1/00 8:21 AM Page 31

Part 1
➤
The Basics: Out of the Dark Ages
32
would have done without any public schooling! It
seems like Edison had his hand in everything: tele-
graph equipment, movie projectors, phonographs,
storage batteries, and most important, electrical
lighting.
If Edison were alive today, he’d be spending most of
his time in courtrooms defending his far-flung empire
from charges of being a monopoly. Compared to
Edison, Bill Gates is a piker. The list of Edison’s com-
panies and partnerships worldwide goes on for pages
and pages. He not only manufactured electric lamps
(a.k.a. light bulbs) but also motors, dynamos, phono-
graphs and phonograph records, and telephone equip-
ment. Edison helped form the nascent General Electric
Company, one of today’s powerhouse corporations,
when his Edison General Electric Company merged
with the Thomson-Houston Company. Despite his
many inventions and businesses, Edison was only fi-
nancially comfortable. He was nowhere near as
wealthy as some of his contemporaries such as Henry
Ford.
Let There Be Light
The basics of the construction of the electric lamp (or
light bulb, to nonelectricians) were pretty well known
by the 1870s. People knew that if you ran electricity
down certain substances, the resistance produced light
rather than heat. The problem was finding the right
filament. Early versions simply didn’t last long enough
to be useful. The lamp needed a long-lasting filament
that would provide pleasing, easy-on-the-eye lighting
to be practical.
Edison tested thousands of materials before trying a
piece of #70 coarse sewing-machine thread in October
1879. He first baked the thread to carbonize it and ex-
tend its life to withstand the heat of an electric cur-
rent. The rest, as they say, is history. Edison and his
assistants scrambled to improve his lamp and to create
all the myriad components necessary to get it into
peoples’ homes. It was Edison’s invention of a system
to deliver and implement electricity and lighting that
Positively Shocking
On a more gruesome note, Edison
was so adamant about maintaining
direct current as the standard for
electric power that he used the
newly introduced electric chair to
point out the dangers of alter-
nating current. His demonstrations
showed that a relatively small
amount of current (the same cur-
rent Westinghouse wanted to run
inside of homes) could cause
death or severe injury, unlike
Edison’s direct current.
Ask an Electrician
Incandescent refers to heating
something until it is red-hot or
white-hot and is glowing with
heat, thereby giving off light. In
a lamp, a filament with high re-
sistance to an electrical current is
used. Eventually, after being re-
peatedly heated to high temper-
atures, the filament breaks and
the lamp needs replacement.
04 8964 CH03 2/1/00 8:21 AM Page 32
33
Chapter 3
➤
History Lessons
set him apart from other inventors. His labs designed and manufactured switches,
meters, generators, and just about everything else connected with electrification. This
is akin to inventing a computer in a laboratory only to discover that, oops, now we
need software, monitors, a mouse, printers, scanners, and every other peripheral ad-
vertised in the monthly catalogs we all receive from computer suppliers.
Our First Big Power Plant
Edison designed and built his first major power plant in the Big Apple in 1882—a
reported 120-volt system in downtown Manhattan. This also was the world’s first
principal power station. Unfortunately, Edison built it based on direct current, an
approach that would become dated by the next decade, as was proven by one of his
employees. Nikola Tesla, a Yugoslavian immigrant who briefly worked at the Edison
laboratory in New Jersey in 1884, was on to something with his ideas about alter-
nating current.
Con Edison, which started out as the New York Gas Light Company in 1823, is the
current-day result of more than 170 mergers and acquisitions. The nucleus of Con
Edison was the Edison Electric Illuminating Company, formed in 1880.
Tesla Needed a Lawyer
Nikola Tesla was another guy who liked applying
for patents. By the time of his death in 1943, he
held more than 700 patents in the areas of induc-
tion motors, generators, fluorescent lights, and
steam turbines. Tesla supposedly arrived in
America in 1884 with 4¢ in his pocket. (Who
knows, maybe it’s one of those stories that claimed
a little less money every time Tesla retold it.)
America’s tough when you’ve only got 4¢ to your
name. In 1885, Tesla sold his patent rights to his
system of alternating current to George Westing-
house, another inventor and industrialist who
knew a good electrical system when he saw it.
Tesla established his own laboratory in New York
City in 1887. Ever the prankster, he sometimes
would use his own body as an electrical conductor
to light lamps to show that alternating current was
safe. It probably was a great way to impress pro-
spective girlfriends as well. While Westinghouse
raked in the big bucks from his newly acquired
alternating-current system, Tesla eventually
Bright Idea
Prescient investors in promising
industries can reap huge fortunes
as those industries grow. Looking
back at the nascent electrical
and phone industries, it’s easy to
see why computer technology,
software, and telecommunica-
tions are good investments today.
The trick, as always, is to know
which industries and industry
players will succeed.
04 8964 CH03 2/1/00 8:21 AM Page 33

Part 1
➤
The Basics: Out of the Dark Ages
34
became the namesake for a unit of measurement for magnetic fields. A tesla, as every
amateur physicist knows, is equal to one weber (a unit of magnetic flux named after
German physicist Wilhelm E. Weber, not the barbecue manufacturer) per square meter.
Considered both a genius and an eccentric during his lifetime, Nikola Tesla laid much
of the practical and theoretical groundwork for the communications and electrical
systems we have today.
Early Safety Measures
Electrical systems were a brand-spanking-new technology in the late nineteenth cen-
tury, and no small amount of trepidation was associated with them. Wouldn’t there
be fires? Electrical shocks? Government officials, especially fire departments, took
electrification very seriously.
The New York Board of Fire Underwriters, meeting in October 1881, called for stan-
dards such as the following:
➤ “Wires to have 50 percent conductivity above the amount calculated as neces-
sary for the number of lights to be supplied by the wire.”
➤ “Wires to be thoroughly insulated and doubly coated with some approved material.”
➤ “Where electricity is conducted into a building from sources other than the
building in which it is used, a shut off must be placed at the point of entrance
to each building and the supply turned off when the lights are not in use.”
➤ “Application for permission to use electric lights must be accompanied with a
statement of the number and kind of lamps to be used, the estimate of some
known electrician of the quantity of electricity required, and a sample of the
wire at least three feet in length to be used, with a certificate of said electrician
of the carrying capacity of the wire.”
Electrical Elaboration
The first committee meeting for the National Electrical Code (NEC) was held in 1896,
and the first code was published the following year. The NEC has adapted to the times
and changes in electrical equipment, and it is now more than 1,000 pages long. More
than 300 volunteer members of the National Fire Protection Association (NFPA) work on
the code and code changes for new editions of the code.
04 8964 CH03 2/1/00 8:21 AM Page 34

35
Chapter 3
➤
History Lessons
These guys were serious! It’s no wonder: They weren’t about to take chances with a
new technology that was potentially dangerous, despite its useful prospects.
The Standards Change
Once early wiring requirements were established they were stringent, but the size of
an individual home service and the subsequent loads were inadequate by today’s
standards. A 30-amp service with a wood fuse box was typical and sufficient for run-
ning lights. Prior to electrification, many homes had gas lighting. Some wiring actu-
ally was fished through the gas piping in the walls to the new electric lights that
replaced the old gas fixtures.
The turn of the century was a heady time in the field of electricity. Innovators and
scientists were improving all the necessary components and generators as well as
coming up with new gadgets and conveniences that would run on electricity. Even
the newly built New York City subway systems were beholden to this great new
power source.
Fuses to Breakers
All new residential construction uses circuit breakers in its service panels, but fuses
were first used to distribute electricity through individual circuits. These fuses are still
present in older homes where electrical services have not been updated. Although the
first circuit breakers date back to as early as 1904, it wasn’t until the 1950s, with the
introduction of the modern plug-in-type
breaker, that they gained universal usage.
Fuses might be dated and less convenient than
circuit breakers, but they are perfectly usable
under most circumstances. When updating to a
new service panel, of course, fuse systems are
always replaced.
Just One Ceiling Light
Compared to today’s lighting standards, our
grandparents and great-grandparents were al-
most walking around in the dark. A single
ceiling light per room was considered an im-
provement over gas lighting. Can you imagine
having only one overhead light in a kitchen?
We bathe ourselves in light today, and we love
every minute of it. The lighting requirements
today in some kitchens alone would have con-
sumed half of a typical home’s service require-
ments back in the 30-amp days.
Positively Shocking
You would assume with the ad-
vent of electric lighting that
Americans would have beaten a
path to electricity’s door. Not
so! Improved gas-fixture innova-
tions allowed for the continued
use of gas lighting for domestic
use and streetlights until after
World War II. This is the equiva-
lent of using a manual typewriter
in the computer age.
04 8964 CH03 2/1/00 8:21 AM Page 35

Part 1
➤
The Basics: Out of the Dark Ages
36
Knob-and-Tube Wiring
The earliest wiring system was called knob-and-tube wiring, and you’ll still find this in
houses built prior to the early 1950s. This was an inherently safe system in which the
hot wire and the neutral wire ran separate from each other through walls, floors, and
ceilings. Each wire was covered with cloth insulation and ran through ceramic tubes
when passing through floor joist and wall studs or into electrical boxes at lights,
switches, and receptacles. The wires were secured to ceramic knobs when they ran
along a joist or stud.
Electricians were a little anxious about this new electricity stuff, so most original
knob-and-tube work is very neatly done. Wires were twisted together, soldered with
lead, and then taped to make secure connections. The main problem with knob-and-
tube wiring is what happens in the intervening years when homeowners and amateur
electricians hack into it (see Chapter 6, “When You Buy a House”).
Wiring Evolves
Although knob-and-tube wiring prevailed for years, other types of wiring were devel-
oped in attempts to either speed up or simplify installations. If your house was built
prior to the 1950s, you might find one of these not-so-fun types of wire in it. Unfor-
tunately, every innovation doesn’t stand the test of time.
The following two systems were later contemporaries of knob-and-tube wiring:
➤ Armor-clad cable
➤ Multiconductor cable
Armor-clad cable, often called BX, was a trademark of General Electric. It consisted of
a narrow metal sheathing wrapped around the hot and neutral conductors. It was
mainly installed in the 1920s and 1930s in more expensive housing.
Running the wire in a protective metal wrapping sounds like a good idea, right? It
probably was until the metal started rusting and corroding with age. Then the hot
wire could short out to the metal wrapping, and in some cases, the wrapping could
become red-hot but never blow a fuse. This type of wiring should always be thor-
oughly inspected by an experienced electrician.
Multiconductor cable carried both the hot and neutral wires in a cloth insulation that
was coated with either varnish or shellac. Each wire was separately wrapped in its
own insulation as well. As it ages, the insulation becomes very brittle and is almost
impossible to work with in some cases.
Current systems use nonmetallic sheathed cable commonly known as Romex, an-
other trade name. This cable is wrapped in thermoplastic, which probably will last so
long that future anthropologists will be carbon-dating it in the year 14,500
C.E. This
is a very safe wiring system that comes with a grounding wire in addition to the hot
and neutral wires, and it allows for relatively quick and efficient installation.
04 8964 CH03 2/1/00 8:21 AM Page 36

37
Chapter 3
➤
History Lessons
Electrical Elaboration
Some early wiring was installed behind wood molding specifically made to house the
wires. A millwork company would cut grooves on the backside of the wood, one groove
for the hot wire and one for the neutral. This system had some drawbacks, the most ob-
vious one being wire damage from nails driven through the wood. By the 1930s, wood
molding was illegal and no longer was installed.
Creeping Home Power Demands
Early electrical and lighting systems were comparable to our more recent computer,
software, and communications industries:
➤ The first electrical systems offered relatively little power and ran house- and
streetlights. The first desktop computers had almost no memory, slow speed,
and small hard drives.
➤ Innovation came fast and furious among very competitive companies and
individuals.
➤ Our demand for more bandwidth, cable, and phone availability is a repeat of
our increasing demands for more electricity since the turn of the century.
➤ All of these industries have improved our standard of living, despite criticisms to
the contrary from technophobes.
A typical 30-amp home service has increased to 200 amps in the past 100 years.
We’ve gone from one light per room to multiple lights, multiple receptacles, every
appliance imaginable, and entertainment systems all demanding their share of elec-
tricity. This has required building and rebuilding an entire infrastructure of dams,
generators, long-distance power lines, transformers, and miles and miles of utility
poles.
The entire undertaking has been enormous and is entirely taken for granted today.
Historical hubris lets us believe that our time is the most innovative and influential to
date, but we wouldn’t have gotten very far without electrification. Try running your
laptop on some of Volta’s original batteries or even some of Edison’s. You might get
enough power to read “Starting Windows 98” on your screen before it shuts off, with
your battery drained of any direct current.
04 8964 CH03 2/1/00 8:21 AM Page 37

Part 1
➤
The Basics: Out of the Dark Ages
38
The basics of electricity and its delivery systems are pretty well established. Equip-
ment might improve and become more efficient, but until someone rewrites the laws
of physics, electricity will continue to be delivered by wires or other conductors from
a generating force. You’ll still get billed once a month or so for its usage. Nobody said
all those electrons would be free, but it remains quite the bargain based on all it pro-
vides for us.
The Least You Need to Know
➤
The history of electricity and electrification is full of pioneering scientists, each
building on the knowledge of the others.
➤ Thomas Edison’s biggest contribution was building usable wiring and lighting
systems.
➤ Early electrical systems used knob-and-tube wiring and fuses—both still found
in older homes.
➤ A century of innovation has brought us safe, efficient power and power-
delivery systems far beyond the dreams of industry pioneers.
04 8964 CH03 2/1/00 8:21 AM Page 38

Chapter 4
If Your Walls
Could Talk
In This Chapter
➤
National Electrical Code requirements
➤ Inspecting your home for compliance
➤ Understanding wiring systems
➤ Understanding circuit breakers and fuses
➤ Installing plenty of power
Many horror movies feature haunted houses with fiends, evil spirits, or some other
form of calamity lurking behind the walls or under the floors. Bookshelves conceal
hidden passages, and trap doors spring beneath the secondary characters, just missing
the hero or heroine and plunging them to an unknown fate. Your house isn’t any-
where near as fateful—at least it shouldn’t be—but it does have some tales to tell be-
hind the drywall or plaster, the walls you stare at every day.
Houses are built according to the building codes at the time of their construction.
Even an owner-built house has to meet all code requirements including electrical re-
quirements. As codes change so do construction standards. Any remodeling work you
do now has to meet the current code, even if the rest of your house does not.
If your house is old enough, it probably has been remodeled or altered on a number
of occasions. It’s likely that some of this work is, putting it kindly, code-challenged.
You’ve already taken a superficial look at your wiring. Now let’s examine it in more
detail. A good starting point, so you’ll know what all the fuss is about, is the National
Electrical Code.
05 8964 CH04 2/1/00 8:11 AM Page 39

Part 1
➤
The Basics: Out of the Dark Ages
40
The National Electrical Code
The National Electrical Code (NEC) is the guiding light behind most electrical instal-
lations in the United States. As a rule, local regulations include the NEC along with
any specific ordinances imposed by individual building departments. The fact that so
many state and city agencies use the NEC affirms the excellence of this code. As a
culture, we might have our disagreements from one coast to the other, but we do
agree on the National Electrical Code. Interestingly, the NEC is not mandatory and
therefore has no regulatory control. It’s strictly a set of voluntary guidelines, which is
a good thing: If Congress had gotten hold of it and tried to turn it into legislation,
we’d still be using candles and kerosene lamps to light our homes.
The NEC is just over 100 years old, and it has changed with the times. The advent of
electrical power brought with it the need for standards for equipment, installations,
and usage. The initial concerns around electricity were mainly about property protec-
tion. Fire underwriters were especially concerned, because they were taking losses due
to electrical fires.
New York, the late-nineteenth-century center of the universe, wrote the first require-
ments for electrical safeguards in 1881. More codes by different industries followed,
and in 1892, the Underwriters National Electrical Association consolidated these var-
ious codes, although there was still no universal acceptance of one set of rules. Saying
enough was enough, the National Electric Light Association called a conference in
1896 to come up with one standard set of rules. The conference included utility repre-
sentatives, underwriters, inspectors, and just about every key player who was involved
with this new electricity business. They diced, spliced,
and blended the best parts of all the existing American
and European codes. They then tweaked it during a re-
view process, and in 1897, they came up with the
National Electrical Code. There have been 48 editions
of the code, and the next one is due out in 2002.
The National Fire Protection Association (NFPA) has
administered the NEC since 1911. Harking back to the
original NEC, the current code is a product of group
consensus with an even greater variety of contributors
including labor unions, testing laboratories, regulatory
bodies, and consumer groups.
The NEC goes well beyond home electrical systems.
Among other things, it covers the following:
➤ Fiber-optic cables
➤ Antennas
➤ Fire alarms
➤ Marinas
Bright Idea
You don’t necessarily need to
study the NEC itself to do your
electrical work. Most of the rules
that apply to home electrical
work are commonly known and
are discussed in books such as
this one. If you have any ques-
tions or concerns, point them
out in your plans when you
apply for a permit and get a
ruling before you do the work.
05 8964 CH04 2/1/00 8:11 AM Page 40
41
Chapter 4
➤
If Your Walls Could Talk
➤ Carnivals, circuses, and fairs
➤ Mobile homes
➤ Gasoline dispensers
Espresso stands and popcorn wagons might not specifically be named, but they’re
covered, too!
Electrical Elaboration
When I was a kid, my family vacationed at Catawba Island on Lake Erie. (This was Ohio’s
version of a waterfront resort.) Near our hotel, there was an arcade full of hokey games
and amusements that were designed to separate us from our saved weekly allowances. We
discovered that, if you put one hand on the metal plunger of the pinball machine and
the other hand on the metal casing of the mechanized gypsy fortuneteller, you got a
fingertip-to-fingertip shock. This was great fun for endurance contests and for tricking
unsuspecting cousins, but it left something to be desired from a safety standpoint.
You and the Code
The NEC exists for your protection. I know we live in an era of business-guru authors
and self-improvement advisors extolling everyone to “think outside the box,” to de-
velop new paradigms, and to seek out the “wow” in everything we do. That’s fine,
just don’t try it with your electrical work. The code will help keep you and your
family alive and your house from burning down. You can be as imaginative as you
want when it comes to selecting fixtures or adding lights, but they have to be wired
and installed properly.
Just in case you decide to seek your bliss and express yourself with electrical work that
isn’t up to code, your local inspector will be equally expressive, but in a way that
won’t make you very blissful.
Local Rules, Local Inspectors
Ultimately, the NEC isn’t the final judge and jury of your electrical work. This role be-
longs to your local electrical inspector who enforces your local electrical code. How
does your local code differ from the NEC? It depends on where you live. Some munici-
palities stick with and solely enforce the NEC; some have additional rules. Remember,
05 8964 CH04 2/1/00 8:12 AM Page 41

Part 1
➤
The Basics: Out of the Dark Ages
42
your local code determines how you or your electrician will do your electrical work,
so you must know the regulations.
The electrical inspector wears a variety of hats. An inspector …
➤ Interprets the NEC rules and regulations.
➤ Approves or rejects electrical work.
➤ Approves fixtures and materials.
Is an inspector always right? Let me put it this way: If you question a judgment or
ruling, you had better be able to back it up by quoting chapter and verse from the
code. No one is perfect, and an electrical code is an involved and complex document.
Mistakes and misinterpretations are made on both sides, but the inspector has the
final word. Take some tips from Mr. Etiquette:
➤ Do your best work, and do it neatly.
➤ Don’t try to hide anything or take shortcuts.
➤ If your inspector believes you’ve erred in your work, listen politely and see what
you have to do to resolve the problem.
It isn’t the inspector’s job to show you how to do your
work. As a homeowner, you’ll have to establish your
credibility and competence to do the job, even more
so than a trained electrician. An inspection is like the
speed limit—you might not like it, but it’s there to
protect you.
The CEC
Canadians use the Canadian Electrical Code (CEC).
You might wonder what this has to do with electrical
work on this side of the border, but Alaskans (state
motto: It Doesn’t Get Any Colder Than This) have had
problems in the past with Canadian-built outdoor
work modules (portable buildings). Differences in the
two electrical codes have resulted in some modules
being unacceptable without costly upgrades to meet
the NEC. You could probably argue that Alaska should
be part of Canada, but it isn’t, so the CEC isn’t accept-
able there.
Positively Shocking
Your insurance company can
deny any damage claims to your
house caused by uninspected
electrical work. An inspection
proves to your insurance com-
pany that the work was done ac-
cording to the electrical code. If
for any reason you do have an
electrical fire, at least you can
show the workmanship wasn’t to
blame.
05 8964 CH04 2/1/00 8:12 AM Page 42
43
Chapter 4
➤
If Your Walls Could Talk
Underwriters Laboratory
Underwriters Laboratory is the organization that brings us the ubiquitous “UL” tags
on just about everything we plug in or turn on. What does this group do? In the or-
ganization’s own words, UL “is an independent, not-for-profit, product-safety-testing
and -certification organization.” Underwriters Laboratory was established in 1894 to
test products for the emerging electrical industry. It has managed to attach more than
14 billion UL tags to products all over the world.
Electrical Elaboration
A real-life example of a change in the National Electrical Code that has prevented
human fatalities is the requirement to install ground-fault circuit interrupters (GFCIs).
Statistics have shown that the installation of GFCIs in bathrooms, kitchens, the outdoors,
and other potentially damp, hazardous locations has saved lives.
The UL tag is known
’round the world.
UL is the leader in product testing and certification. If a manufacturer wants its new
gadget to gain ready consumer acceptance, it applies for the UL tag, because no retail
outlet in its right mind would sell anything electrical without it. You can find the or-
ganization at www.ul.com on the Web.
05 8964 CH04 2/1/00 8:12 AM Page 43

Part 1
➤
The Basics: Out of the Dark Ages
44
The UL, along with the Consumer Product Safety Commission and the National
Electrical Manufacturer’s Association, helped establish the not-for-profit National
Electrical Safety Foundation (NESF) in 1994. The Foundation’s mission is to improve
our awareness of electrical safety at home, work, and school. The NESF’s Web site,
www.nesf.org, points out the following cheery statistics:
➤ One person is electrocuted in his or her home every 25 hours, and more than
350 people die in over 40,000 residential electrical fires every year (Consumer
Product Safety Commission data).
➤ One worker is electrocuted on the job every day (Occupational Safety and
Health Administration data).
➤ Personal-property damage from fires exceeds $2 billion a year.
These are not-so-subtle hints that you can’t take electrical safety for granted. The
NESF offers tips, Web links, and a safety booklet, and it’s all free for the asking.
Are You Up-to-Date?
Now that you’ve got a hint of the hell-and-brimstone that awaits you if you ignore
electrical safety and code requirements, you can take a fresh look at your own system.
As we’ve already mentioned, a new system can almost be ignored until you’re ready
to add to it. A system meeting the 1996 or 1999 NEC will be grounded, will have
plenty of receptacles including GFCIs, and will have
power properly distributed among a series of circuits
throughout your house.
What if you have an older system or one that’s been
altered? Your home might have had an addition or
two put on by past owners. How can you be sure these
were done according to past building codes? Let’s start
with some basics as you review your electrical system.
There are some basic differences between older and
newer electrical systems, such as …
➤ The presence or absence of a grounding
conductor.
➤ Fuses versus circuit breakers.
➤ Nonpolarized outlets versus polarized outlets.
Two-Wire and Three-Wire Systems
A two-wire system means you don’t have a grounding
conductor. This is the bare copper or green-insulation-
clad wire attached to a grounding electrode outside your
Positively Shocking
It’s not an uncommon practice
to do home remodeling without
permits and inspections. Com-
mon acceptance doesn’t mean
it’s advisable, especially when
doing structural or mechanical
work. I know of one seller who
was later sued when his illegal
remodeling came to light after
the buyer took possession.
Lawsuits aside, you don’t want to
be on the receiving end of un-
safe work.
05 8964 CH04 2/1/00 8:12 AM Page 44

45
Chapter 4
➤
If Your Walls Could Talk
house. Alternatively, the grounding conductor can be attached to a water pipe near your
electrical panel.
Your first clue to determine whether your system has
a grounding conductor comes from your receptacles.
A two-pronged receptacle usually doesn’t have a
ground; a three-pronged outlet should have a ground.
An older house might well have three-pronged out-
lets, but there is no guarantee that they were installed
with grounds (another peril of uninspected remod-
eling work). To be certain, you must either …
➤ Test each outlet with a circuit tester, which
will indicate the presence of a ground wire.
➤ Take the cover plate off each receptacle and
look for the ground wire.
Of the two methods, using a circuit tester is easier
(see Chapter 7, “Caution Signs and Safety Con-
cerns”). If your system isn’t grounded, it doesn’t
mean you’re in grave danger and should refrain
from turning on the lights ever again. It does
mean, however, that it’s a dated system that lacks a
modern safety feature—a safety feature that people
lived without until the 1960s. Unless there’s been a
deep conspiracy to cover up massive electrocutions
of homeowners over the years, you can still live
with an old two-wire system (but it’s always a good
idea to upgrade).
A grounded receptacle connects any exposed metal sections of an appliance or lamp to
the house grounding system. This means an errant current shouldn’t pass through the
metal shell of your washing machine and turn your wash day into something unexpected.
A three-pronged, grounded receptacle is the made-to-fit receiving end for a three-
pronged plug. Remember, electrical systems are nice and logical. If you have a two-
pronged outlet and a three-pronged plug, they don’t go together, no matter how hard
you push on the plug. Before you ask, cutting off the grounding pin from the plug is
a bad idea. Buy an adapter, which is available at any hardware store, instead.
Feeling Polarized
Have you ever noticed how some receptacles (and all new ones) have two different-
size slots? These are polarized receptacles, and they’re the perfect fit for polarized
plugs. In each case, one side (the slot of the outlet and one prong of the plug) is
larger than the other. This is not done to intentionally annoy you, but if you have an
old house, it can be a real inconvenience when plugging in new electrical devices.
Ask an Electrician
A grounding electrode is a
metal pipe or rod, often iron or
steel-galvanized, that is driven at
least eight feet into the ground
outside your house. The material
must be at least
5
/
8
inch in diam-
eter and must offer a resistance
of 25 ohms or less. The ground-
ing conductor carries any ex-
cess voltage to the ground to
prevent injury or damage to
electrical equipment.
05 8964 CH04 2/1/00 8:12 AM Page 45
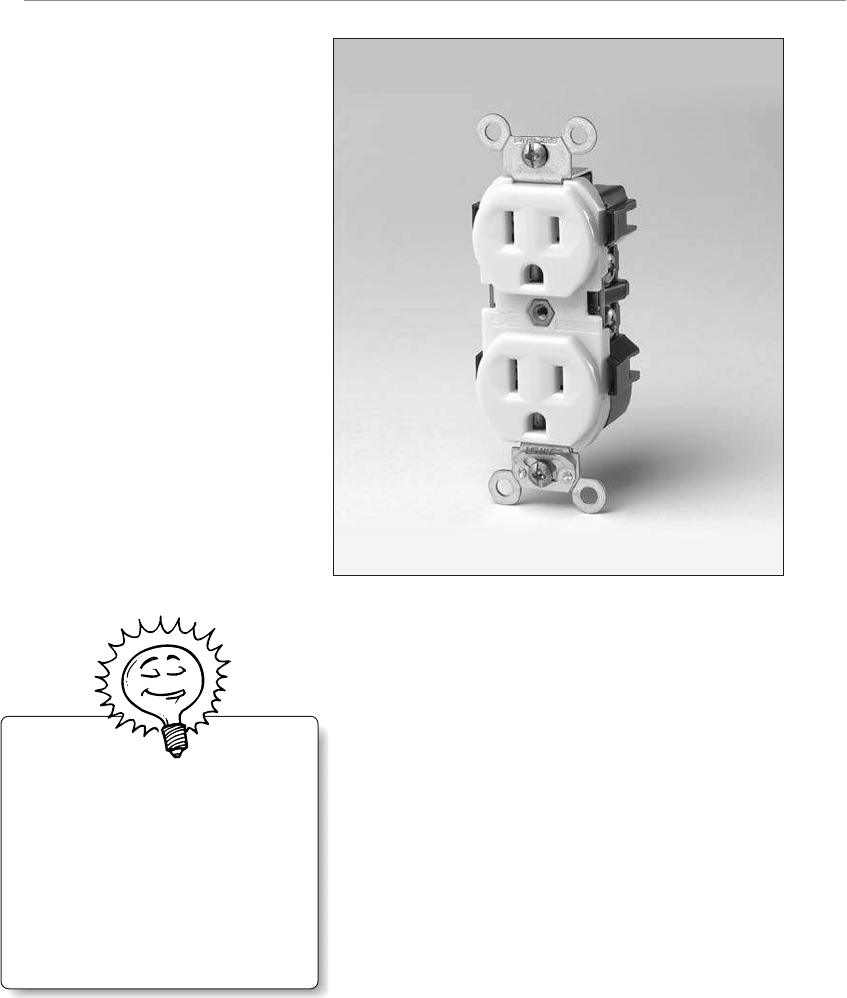
Part 1
➤
The Basics: Out of the Dark Ages
46
A polarized receptacle is constructed so a polarized
plug can be inserted only one way. It also ensures that
the hot leads and the neutral wires line up from outlet
to plug. It might be tempting to file down the larger
prong on a polarized plug, but trust me, this is a bad
idea, too. These are all parts of a system, and they’re
made to work together and be kept intact. This is no
place for quick fixes. Either adapt to the limitations of
your older electrical system, or bring it up to date.
Circuit Breakers vs. Fuses
Circuit breakers and fuses perform the same task: They
interrupt electrical power when the current demand is
too high. If you plug a 2,200-watt personal surfing
pool complete with Oahu-inspired monster waves into
a 15-amp circuit, be prepared to wipe out along with
the power. If the breaker doesn’t trip or the fuse burn out, the wire connecting the re-
ceptacle to the panel could overheat and possibly start a fire. You probably wouldn’t
realize anything was burning because the wiring is concealed inside your walls.
A modern three-pronged,
grounded, and polarized
receptacle.
(Photo courtesy of Leviton
Manufacturing Co., Inc.)
Bright Idea
A two-pronged plug adapter
used to convert three-pronged
plugs for use in older receptacles
also can be used for adapting
polarized plugs. The adapter en-
ables them to be plugged in to
nonpolarized outlets.
05 8964 CH04 2/1/00 8:12 AM Page 46

47
Chapter 4
➤
If Your Walls Could Talk
Circuit breakers have been the mainstay for residential electrical installations for
more than 40 years. They’re convenient, dependable, and reusable. What’s not to like
about them?
This One Blows
Although there’s a variety of fuses, most old residential systems use the glass, screw-in
type called plug fuses. These fuses feature a narrow metal strip, visible through the
glass, that quickly melts when too much current is starting to move through the cir-
cuit. Fuses are rated by amperage and cannot be reused after they burn out or “blow.”
A fuse system generally is safe if it’s used according to its design. This means …
➤ Always using the correct size fuse.
➤ Being sure the fuse is screwed in tightly.
➤ Not listening to your old uncle Bob, who says you can replace a fuse with a
Lincoln-head penny and call it good.
The glass of a blown-out fuse might look smoky, or
more noticeably, the strip will be melted or sepa-
rated. Before replacing it, you should turn off any
electrical load that might have caused the over-
load. Some electricians recommend that you also
turn off the main switch to the fuse box before re-
moving and replacing the old fuse. Whatever you
do, be sure to keep one hand behind your back or in
your pocket! You don’t want both hands near the
box, because if both accidentally touch it, you can
become part of a circuit and electrocute yourself.
This One Trips
Breakers, as previously explained, “trip” when a
metallic strip heats up, bends, and forces spring-
loaded contacts apart. After tripping, they can be
reset by pushing the breaker’s switch all the way
“off” and then back over to the “on” position.
When resetting a circuit breaker, be sure to …
➤ First find out what caused the breaker to trip and shut it off.
➤ Use only one hand and keep the other one away from the service panel.
A circuit map will identify the circuits controlled by each breaker or fuse (see Chapter
5, “More Wall Talk”).
Bright Idea
Always keep spare fuses on hand,
at least for the common 15- and
20-amp sizes. Keep the fuses
stored with a flashlight so you
don’t trip around in the dark
while replacing a burned-out
fuse.
05 8964 CH04 2/1/00 8:12 AM Page 47

Part 1
➤
The Basics: Out of the Dark Ages
48
Plug fuse; circuit breaker.
Circuit breakers, like fuses, are rated by amperage. Don’t even consider installing a
higher-rated breaker in place of a lower one. If you have repeated tripping, you’re over-
loading the circuit and need to change your usage habits or upgrade the circuit.
The Main Shutoff
Fuse boxes and service panels both have some kind of
main shutoff mechanism, and you should know how
to use it. The NEC says that you cannot have more
than six disconnects—no more than six fuses,
breakers, or levers of some kind—to turn off the
service. Fuse boxes usually have either a single pull-
down handle or two 50-amp pullout fuse holders to
disconnect the service.
In a service panel, you will have either a main breaker
or a series of breakers in the top half of some older
panels that, when shut off, will disconnect the service.
Remember, even with the breakers shutoff or the fuses
removed, without the meter removed from the meter
socket, the panel is still hot where the large wires
come in from outside your house.
In case of an emergency in which you must get the
power off quickly and cannot identify the specific fuse
or breaker, the main shutoff will do the job. Keep in
mind that your entire house can go dark. Be sure to have a flashlight close to your
fuse box or service panel.
Bright Idea
If you repeatedly trip a circuit
breaker or burn out a fuse, you
need to decrease your power de-
mands. Examine your usage. You
might be using a high-wattage
appliance such as a hair dryer or
a plug-in heater in addition to
the circuit’s normal load. Do a
load calculation and determine
what you’ll have to change.
05 8964 CH04 2/1/00 8:12 AM Page 48

49
Chapter 4
➤
If Your Walls Could Talk
The More Power the Better
Harry Truman once made a comment about fully equipped armed forces, saying some-
thing like, “If we’ve got ’em, then we won’t have to use ’em.” He figured the more
power the country had, the more of a deterrent it would be to future aggressors (if
only he’d been right). He was on to something about power, though: It’s better to have
plenty of it than to not have enough. The same is true with your electrical system.
There is nothing wasteful or ecologically sinful about having a minimum 200-amp
service in your house. No one says you have to use all that electricity all the time or
even ever. Heed the Boy Scout motto: Be prepared!
Look to Future Needs
None of us knows what the future will bring, except maybe dial-up psychics: They
know your call will bring them $2.95 a minute. Everything else is a roll of the dice.
You might add a second story to your house, set up a woodworking shop in the
basement, or double the size of your kitchen. You even could add a casino extension
off your garage if your state legislature decides that home-based gambling operations
are more in keeping with its ideas about family values.
Any and all of these possibilities require electric power. If you’re replacing your current
system, think more rather than less because, in this case, less is definitely not more.
Cost Comparisons
Trying to provide local price comparisons in a nationally sold book is like judging a
national chili contest: What works in Massachusetts isn’t going to cut it in Texas. In
other words, there are a lot of variables, including …
➤ Local labor prices.
➤ The brand of service being installed.
➤ The difficulty of an individual installation.
➤ Permit and utility fees.
That said, we can make some generalizations based on the size of the service alone.
The most common sizes of services are 100-, 125-, and 200-amp single-phase, three-
wire systems. The approximate difference in cost—and you should always check with
your local supplier or electrician—between installing a 100-amp service and a 125-
amp service is around $100 plus permit and utility fees. The difference between a
125-amp service and a 200-amp service is around $150. The difference will increase
depending on the length of conduit and wire required for the installation.
Based on a $150,000 house, the extra $150 equals one tenth of 1 percent of your
home’s value, or an espresso a week for one year. If it’s a budget consideration, skip
the coffee and go with the bigger service.
05 8964 CH04 2/1/00 8:12 AM Page 49

Part 1
➤
The Basics: Out of the Dark Ages
50
Panels and More Panels
Every electrician has favorite electrical components to
recommend, and this includes service panels. Electri-
cians also have panels that they avoid and existing,
older panels that they recommend tearing out yes-
terday if not sooner. This is touchy ground, and
anything I or the electricians I have worked with rec-
ommend will be subject to criticism in some quarters.
With that caveat, I can recommend the following
guidelines for choosing a panel:
➤ You get what you pay for, so skip the low-end
panels.
➤ Ask as many electricians, electrical suppliers, and
builders of high-end homes as you can what
panel they recommend; one or two names should
keep coming up.
➤ Buy the best panels made by your manufacturer
of choice rather than lower-end units made to
compete with similar low-end units from chain
discount stores.
Consider what a panel does: It acts as the major line
of defense in the event of an electrical problem. You
want the best panel possible rather than the most
basic. They all will be UL-approved, but it’s better to
go with a panel that will meet higher standards than
the bare minimum. You wouldn’t buy the cheapest
brakes for the family minivan, and this is the same at-
titude you should take with your electrical panel.
What does my electrician recommend? He uses the
Square D QO panel. Others recommend Cutler-
Hammer or Siemens. All of these are reliable brand
names that will serve you well.
Ask an Electrician
A single-phase system or line
provided by your utility can carry
electrical loads suitable to meet
the needs of residential cus-
tomers and smaller commercial
clients. A phase describes the
voltage or current relationship of
two alternating waveforms as the
electricity travels down a con-
ductor or, in this case, a wire.
Positively Shocking
If you have an older service
panel, it should be checked by a
licensed electrician to make sure
it’s safe. Some panels have shown
regular safety problems and are
not considered reliable by many
electricians.
05 8964 CH04 2/1/00 8:12 AM Page 50

51
Chapter 4
➤
If Your Walls Could Talk
The Least You Need to Know
➤
The National Electrical Code (NEC) is a set of guidelines for electrical instal-
lations.
➤ The final judge of your electrical work is your local electrical inspector.
➤ The safety features in a newer, three-wire electrical system include circuit
breakers, a grounding conductor, and three-pronged, polarized receptacles.
➤ For a small difference in cost, you can install a larger electrical service that will
more easily take care of future needs and remodeling.
05 8964 CH04 2/1/00 8:12 AM Page 51
05 8964 CH04 2/1/00 8:12 AM Page 52

Chapter 5
More Wall Talk
In This Chapter
➤
Understanding how circuits work
➤ Ground-fault circuit interrupters
➤ One house, different conductors
➤ Living with old wiring
➤ Wiring hazards
➤ An old-house checklist
Now that you know about fuses and circuit breakers, it’s time to familiarize yourself
with the circuits they control. A circuit is a continuous loop of electrical current. It
travels from a power source (your utility through your service panel or fuse box) along
a“hot” conductor (the black or red wire) as a load demands it. The electricity then
travels back to the panel along the white or neutral wire. When you activate a load by
flipping a light switch or turning on a food processor, you allow the circuit to pass
through and light up the room or grind up basil leaves to make pesto.
Circuits aren’t just random pathways for a bunch of juvenile-delinquent electrons out
to cause trouble. They are determined by voltage or electromotive force (EMF). Amper-
age is the rate at which these electrons flow, and it’s held in check by the size of your
circuit breaker or fuse and the gauge of the wire. The size of the wire used in an indi-
vidual circuit is influenced by the loads it must supply and even the distance the elec-
tricity must travel. Some circuits are dedicated. That is, they only control a single load
such as a clothes dryer.
06 8964 CH05 2/1/00 8:15 AM Page 53
Part 1
➤
The Basics: Out of the Dark Ages
54
Your circuits run along conductors or wire, which usually is made from copper. Over the
years, different wiring systems have been used. An older home that’s been remodeled
might have more than one type of wire or cable, and these can be a problem if they are
not properly connected or are overloaded. This chapter will give you a better idea of
what shape your electrical system is in and what you need to consider before altering it.
Branching Out to Break Up the Load
You could connect all of your 120-volt electrical loads—lights, bedroom receptacles,
the refrigerator, and so on—to one big circuit breaker, and they would still function.
Replacing a broken switch or installing a new light fixture then would mean turning
off all the power to the house rather than just the
power to one particular room. If your housecleaning
service trips this giant breaker with a new 55-horse-
power industrial vacuum cleaner while you are out of
town and is afraid to reset it, you can kiss that frozen
Copper River salmon in the freezer good-bye.
Electrical current is broken down into individual
circuits—called branch circuits—for safety and conven-
ience. You don’t want the entire house to go dark be-
cause a GFCI in the kitchen tripped due to a faulty
appliance. Each circuit is designed to carry a certain
amperage and to provide enough current to meet the
wattage demands of receptacles, lights, and appliances.
The following figure shows a standard residential distri-
bution of circuits.
A circuit is laid out logically, or at least it should be.
This means that a 15-amp lighting circuit will control
lights in, say, three continuous rooms rather than in
three rooms at opposite corners and on different floors
of the house. Several forces work together to help a
circuit do its job safely.
Amps, Watts, and Wire Gauge
Working Together
You remember that amps, or amperes, are a measure of
an electrical current’s strength or flow. A watt meas-
ures the electrical power itself. That is, it measures the
amount of electricity consumed by an appliance or an-
other fixture as it converts the electricity into some-
thing useful to us. A circuit is sized to allow a certain
amount of electricity to run to a given number of
Bright Idea
It’s usually better to have more
circuits than to have fewer, even if
some of them seem underused.
This way, you have extra capacity
for future expansion without
having to run entirely new circuits.
Ask an Electrician
A branch circuit is separate
and independent from any other
circuit. It has its own circuit
breaker or fuse, wiring, and
loads. Your service panel has a
number of branch circuits for
both 120- and 240-volt loads.
06 8964 CH05 2/1/00 8:16 AM Page 54
55
Chapter 5
➤
More Wall Talk
loads. The loads are measured in watts, which is why you can only have a certain
number of receptacles and lights on a circuit. Too many running at once demands
more juice than the circuit can safely provide before a protective device in the form
of a circuit breaker or fuse steps in like a responsible bartender and cuts you off.
Typical branch circuits.
The amount of current carried to the various loads also is determined by the size of the
wire running between the service panel and the loads. If your wire is too small for the
amount of current the load is demanding, it will have a high resistance and will over-
heat. This is okay for the heating element in your toaster but not for your house
wiring. The Wire Gauge Rating table in Chapter 2, “What Is Electricity Anyway?”
shows the ampacity rating for various gauges of wire. A 20-amp circuit, which usually
runs small appliances, requires No.12 wire. Many electricians recommend No.12 wire
as the minimum size wire for residential use, even though the code accepts No.14 wire
as the minimum-size conductor for branch circuit wiring.
06 8964 CH05 2/1/00 8:16 AM Page 55

Part 1
➤
The Basics: Out of the Dark Ages
56
Circuits and Runs
Circuits can be divided by type:
➤ General-purpose or lighting circuits
➤ Dedicated circuits
➤ Small-appliance circuits
Lighting circuits include most receptacles in living areas other than the kitchen, bath-
rooms, and workrooms. This is appropriate for most receptacles because we generally
use them for small loads such as floor and table lamps or clock radios. Some recepta-
cles will only be used for night-lights; others might rarely or never be used. Even
light fixtures have varying loads depending on the wattage of their lamps. They can
vary from 25 watts to 150 watts.
What happens when you plug in something larger such as a room air conditioner?
What if you have a water heater or an electric range that also requires large amounts
of current? These loads call for dedicated circuits, which are so-named because they
only supply power to one specific load.
Dedicated circuits include those for …
➤ Major appliances.
➤ Refrigerators.
➤ Computers.
It’s easy to understand why a major appliance needs
a dedicated circuit, but what about refrigerators and
computers? Even a large refrigerator-freezer combina-
tion is rated at about 500 to 700 watts, and a com-
puter is far less. (My notebook PC is a minuscule 36
watts.) These fall into a different category of dedicated
circuits that aren’t based on a demand for electrical
current but on their specific activity. It isn’t critical
for your refrigerator to be on its own circuit from a
power-demand standpoint, but if another load some-
where else on the circuit’s run trips the entire circuit,
your refrigerator will shut down, and you will be
looking at a lot of spoiled food. Some jurisdictions’
codes require that the refrigerator be on a dedicated
circuit.
Computers don’t store food, but they do store your data. Most people readily agree
that we should back up and save our documents and spreadsheets while we’re work-
ing on them, but then we cheerfully continue working without doing either.
Bright Idea
Loads that demand large, inter-
mittent amounts of power, such
as a table saw in a workshop,
also should be run on dedicated
circuits. Power tools can easily
trip a circuit breaker when
they’re first switched on if the
circuit already is in full use from
other loads.
06 8964 CH05 2/1/00 8:16 AM Page 56
57
Chapter 5
➤
More Wall Talk
If a breaker trips because that lamp you keep meaning to rewire finally shorts, it’s
good-bye to the last chapter of the Great American Novel you’ve been working on for
the last five years. Whenever practical, it’s a good idea to install a dedicated 20-amp
circuit for your computer and its peripherals.
Know Your Circuits with a Circuit Map
Electricians follow the minimalist school of writing: They write as little as possible
when listing the circuits on the form inside the service panel door. An electrician will
write “Lighting circuits,” for example, across the space designating one or two specific
breakers. That’s all well and good, but a more useful description would say, “Ceiling
lights in master bedroom and north bedroom, in second-floor hallway, and at top of
stairs.” These written descriptions need more room than most factory-supplied lists
provide, unless the writing is very small.
Electrical Elaboration
Developing a circuit map is more than simply an exercise in knowing which fuse or circuit
breaker controls which loads. It also can make you aware of overloaded circuits that have
had too many loads added to them by misinformed homeowners. If a circuit appears to
be overloaded, do a load calculation and determine if a load should be removed. Most
likely, the problem will be an add-on done after the system was installed and probably
done without an inspection or permit.
In a new house, the electrician’s list usually is adequate because the wiring is so
straightforward. In an old house, however, the list needs to be more specific, espe-
cially if past homeowners have added their own electrical marks when they lived in
your home. Every owner has different needs, and they manifest themselves with re-
ceptacles, lights, and switches in places that will make no apparent sense to you but
are perfectly logical for someone else. These include lights in crawl spaces, switches
on attic rafters, and receptacles in closets. You don’t need to know their history, but
you should know which fuse or circuit breaker controls them, especially if they are
tied in to the middle of a circuit and can potentially cause problems.
06 8964 CH05 2/1/00 8:16 AM Page 57

Part 1
➤
The Basics: Out of the Dark Ages
58
Drawing your own circuit map can be done alone, but it is best done with some
helping hands. To come up with your map, you’ll need the following:
➤ Paper and pen for recording
➤ Lights and radios to plug into receptacles
➤ Extra people spread around your house
What Are Friends For?
You’ll be testing your circuits one at a time. It’s just a matter of flipping a breaker or
removing a fuse, observing what goes out, and writing it down. This means every
light will have to be turned on, and every receptacle will need something plugged
into it. This is where the lights and radios come in. It’s important that you know
where every receptacle and odd light is located and that you account for all of them.
As previously mentioned, this job is easier to do if you
can fill up your house with some friends. As you turn
the power off one circuit at a time, they can yell out
what went off, and you can write it down in your
notebook. This can be a fun project in a big house
with people running and shouting as lights go off all
over the place. Carefully write down everything as
specifically as possible and redo the list later on your
computer. Print a list to attach to your service panel or
fuse box, and maintain the file on a disk to record
new circuits as they are added or old ones as they are
changed.
GFCIs—Ground-Fault Circuit
Interrupters
The code requirement to install GFCIs has been a real
lifesaver for homeowners. One government statistic
suggests that a GFCI installed in every home in
America could prevent more than two thirds of all res-
idential electrocutions. A GFCI measures the current
flowing into the outlet through the black or hot wire
and the current outflow through the neutral or white
wire (see the following figure). If the GFCI detects any difference greater than 7 mil-
liamps, it shuts off the current. Why? Because any difference in the current is an indi-
cation that the current is somehow shorting or “leaking”—maybe through you! It
might be a short in an appliance such as a hair dryer or an electric mixer. These are
dangerous situations, and a GFCI will shut down far faster (in as little as
1
/
40
of a
second) than a standard circuit breaker or fuse.
Positively Shocking
In older homes, homeowners and
do-it-yourselfers sometimes play
fast and loose with good wiring
practices and connect a new wire
to the nearest convenient old
wire. This can result in some odd
circuits that might take longer to
figure out when you make up
your circuit map. Don’t leave any
receptacle or light unaccounted
for just because it doesn’t turn
off when other loads in the
room do.
06 8964 CH05 2/1/00 8:16 AM Page 58
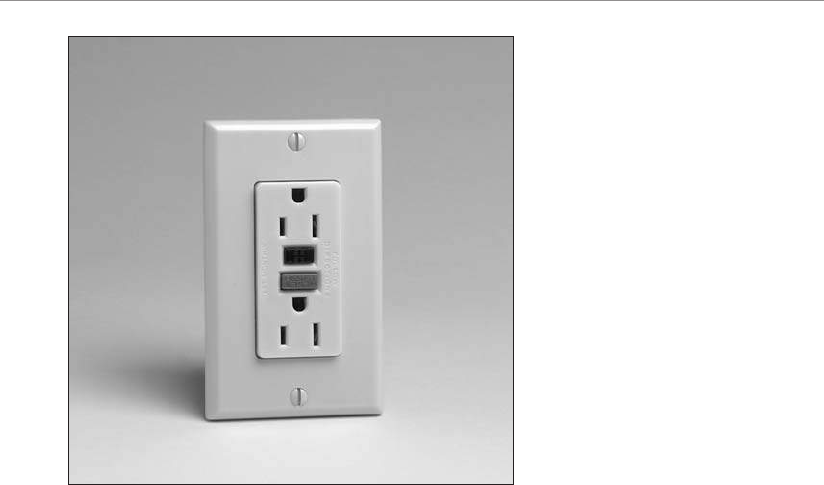
59
Chapter 5
➤
More Wall Talk
An older home may or may not have GFCIs, but it can be retrofitted with them (see
Chapters 19, “Kitchen Power,” or 20, “Bathroom Wiring”).
A GFCI won’t always prevent an initial shock, but it does prevent a lethal one. The
current NEC calls for GFCIs to be installed in a number of locations, including …
➤ Bathrooms.
➤ Kitchen counters.
➤ Outdoors.
➤ Garage walls.
➤ Unfinished basements and crawl spaces.
Why have these areas been singled out? They all have something in common: water
or water pipes, both of which are good at seducing a current away from its righteous
path back to your panel or fuse box to take a trip through your body instead. There’s
a reason why various cads in the movies get knocked off while in the bathtub when
an irked female character throws a plugged-in curling iron into the water. If you use a
defective hair dryer when touching the water faucet in your own bathroom, you’ll be
glad you have a GFCI installed.
A modern electrical system will have GFCIs in the form of either outlets or breakers,
although the latter are more expensive. The presence of a GFCI in an old system is a
demonstration that a past owner was concerned enough to attempt at least a partial
modernization of the system. GFCIs are covered more completely in Chapter 11,
“Switches and Receptacles.”
A GFCI.
(Photo courtesy of Leviton
Manufacturing Co., Inc.)
06 8964 CH05 2/1/00 8:16 AM Page 59
Part 1
➤
The Basics: Out of the Dark Ages
60
Wire Systems Old and New
A main difference between old electrical systems and
new ones is the presence of a grounding conductor in
contemporary wiring. Modern cable contains all three
wires—hot, neutral, and ground—wrapped in protec-
tive thermoplastic insulation. Your house might have
cable running through it rather than the old knob-
and-tube or metal-wrapped BX cable systems, but this
is no guarantee that it’s got a grounding conductor.
Cable installed in the 1950s only contained a hot wire
and a neutral wire. The only way you’ll know for sure
with your own cable is to check your electrical panel
(see Chapter 17, “Service with an Attitude”).
You’ve already read that old wiring isn’t necessarily
bad wiring, with the (sometimes) exception of BX
cable, which can become damaged and be conducive
to short circuits. The abuse usually occurs later as it
gets hacked into. Replacing an entire system is expen-
sive. New services installed in older homes usually in-
corporate some of the existing wiring into the new
panel (unless it’s judged to be too corroded or unsafe).
You and your electrician need to decide …
➤ If you can add any loads to your existing system.
➤ The compatibility of your current wiring with a
new service panel.
➤
Whether your system is safe given its current usage.
➤ The practicality of completely rewiring your house.
➤ The cost versus the benefits.
Bright Idea
Test all your GFCIs monthly. It’s
simple and quick, and it ensures
that the outlets are working
properly. Plug a small night-light
into the outlet and press the
“Test” button. The light should
turn off, and the “Reset” button
should pop out. This trips or dis-
engages the outlet. Press the
“Reset” button to complete the
test. If the “Reset” button does
not pop out, you might have a
defective GFCI, and it should be
inspected or replaced. Note that
a GFCI installed on an un-
grounded circuit will not trip
when the “Test” button is pres-
sed. The “Test” button will only
work if the GFCI receptacle is
grounded.
Electrical Elaboration
If you decide to rewire your house and update your electrical system, remember one car-
dinal rule about electricians: They don’t do wall repair! Electricians will cut into walls and
ceilings, but you or another contractor will have to repair the plaster or plasterboard. The
best electricians make the fewest possible openings to pull wires.
06 8964 CH05 2/1/00 8:16 AM Page 60

61
Chapter 5
➤
More Wall Talk
Do You Need to Replace?
Installing a new 200-amp service panel in an older, two-story house, replacing all the
existing circuits, and adding new ones to bring the entire system up to code—all this
is an expensive proposition. The service alone can cost roughly $1,800 to $2,000. You
can easily spend four times that amount wiring the house, depending on its size and
the complexity of the new system. I hesitate to quote figures because every house is
different, as are local labor rates, but an electrician can give you a ballpark figure,
which is subject to change when an actual estimate is drawn up.
Some people will replace and upgrade just to be on the safe side, while others should
replace and upgrade. The following are signs that you should consider changing your
electrical system:
➤ An undersized service (60 to 100 amps for a large, two-story, all-electric house)
➤ An insufficient number of circuits
➤ Too few receptacles and switch-controlled lights
➤ A lack of GFCIs
➤ Overloaded circuits with fuses that burn out regularly
➤ Frayed or deteriorated insulation on your current wiring
Too often, homeowners ignore the basic mechanics of a house (electrical, plumbing,
and heating/air conditioning) when remodeling and pay too much attention to aes-
thetics, such as cabinetry, painting, and floor finishes. It’s easy to understand why:
These are characteristics we see day after day. No one sees the new, modern, sheathed
cable running through the walls to equally new grounded outlets, all of which are
nicely distributed on properly sized circuits. I can’t begin to count the number of
older homes I’ve been in that were beautifully redecorated but still only had one or
two receptacles—and old receptacles at that—per room. There’s no excuse for living
in an underpowered house as we begin the twenty-first century.
Jump Up to 200 Amps
If you’ve got a small service, say up to 100 amps with a fuse box, in a two-story house
and you’re thinking of upgrading to circuit breakers, replace it with a 200-amp panel.
Don’t argue about it or debate its need, just do it. The last house we owned was a
1924, three-bedroom, one-story bungalow on a street of one-story bungalows. You
could easily maintain that it only needed a 125-amp service, but a funny thing hap-
pened as Seattle real-estate prices headed toward the stratosphere: These one-story
homes started becoming two stories. Owners decided it was more cost-effective to stay
put and add on rather than to move. Five of our former neighbors on one block did
this very remodeling to their homes. My point is that you cannot predict future
needs. Given the relatively small cost difference between a 125-amp service and a
200-amp panel, there’s no point in installing the smaller service in a two-story house.
06 8964 CH05 2/1/00 8:16 AM Page 61

Part 1
➤
The Basics: Out of the Dark Ages
62
One exception to my 200-amp rule is the presence of
gas appliances. Our first house, for example, was ade-
quately serviced by a 125-amp panel because we had a
gas furnace, water heater, stove, and clothes dryer. As a
result, the biggest single electrical loads in the house
were the refrigerator and the washing machine, nei-
ther of which were huge draws on the system.
Good Wire, Bad Wiring
An original service of knob-and-tube wiring, if prop-
erly installed, is and can remain a safe electrical
system. Left alone, it would satisfy the electrical de-
mand for which it was designed without any prob-
lems. When it isn’t left alone, or when the loads
increase and stretch the system’s capacity, the prob
lems and hazards begin. Add-ons are pretty easy to
spot, especially those done by homeowners. Dead
giveaways include …
➤ Sloppy installation.
➤ Loose, unsecured wires.
➤ Wires running across the edge of floor joist
rather than passing through them in unfinished
basements.
➤ Improper taping at connections through the use
of unapproved materials such as masking or ad-
hesive tape.
➤ Mixing two different gauges of wire on the same
circuit.
Other issues include worn and frayed insulation and
brittle wire ends where they are attached to loads or
switches. This problem is exacerbated as the wire ends
get bent and unbent when switches, receptacles, and
light fixtures are replaced over the years due to general
wear and tear or the desire for something new.
When New and Old Collide
Old electrical systems can be safely added onto if the
following considerations are followed:
➤ You have room in your service panel or fuse box
for additional circuits.
Positively Shocking
Even new electrical equipment
can be potentially hazardous. In
April 1999, the Consumer
Product Safety Commission
(CPSC), which can be found at
www.cpsc.gov, announced a re-
call of more than 12,000 service
entrance devices from a major
manufacturer. These boxes con-
tained the electric meter and
breaker panel and were reported
to have potential electrical
arcing problems after one re-
ported incident during a residen-
tial installation. Always have
suspect service panels inspected
by an electrician.
Bright Idea
It’s best to avoid disturbing elab-
orate plasterwork in older homes
when rewiring. Carefully re-
moving baseboards enables you
to cut holes in your walls where
they will go unnoticed while still
allowing you to drill through
wall studs and place your recep-
tacles where you want them.
06 8964 CH05 2/1/00 8:16 AM Page 62

63
Chapter 5
➤
More Wall Talk
➤ Individual existing circuits aren’t fully utilized and can carry an additional load.
➤ The wiring and insulation of these circuits are intact and not worn.
➤ You properly join new wire to old.
Electrical Elaboration
Humans aren’t the only ones who cause problems with old wiring—think rats! These rodents
must gnaw to keep their teeth filed down, and electrical wire makes a dandy chew toy. Rats
live inside insulation near hot-water heaters and furnaces. Mice aren’t much better, settling
down inside large appliances such as dryers or stoves and chewing on the wiring. Orkin Pest
Control suggests that many fires of “unknown cause” might have been caused by rodents
chewing through electrical wires. Cable television and phone wires also are targets. In New
York City, rats have been known to gnaw through concrete—but that’s New York for you.
You can’t see inside your walls and observe how
every receptacle, switch, and light has been
wired, but you can get an idea if an addition has
been made to the original system. Look for the
following telltale signs:
➤ A receptacle or switch style that doesn’t
match the others in your house (The cover
plates also might be a different style.)
➤ A fixture located in an odd place such as a
crawl space
➤ A receptacle that isn’t as evenly spaced as
others
➤ A receptacle that is cut into a plaster wall
while all the others are cut into the base-
boards—a common feature in turn-of-the-
century homes
➤ Any switch or receptacle that is surface-
mounted on a wall rather than cut into the
wall
Bright Idea
Replacing your current system of-
fers the opportunity to relocate
your service panel to a safer or
more convenient location. It also
might be a fitting time to bury
your service entrance conductors
or supply leads (the wires from
the utility pole to your service
panel) underground rather than
having them suspended overhead
where they are exposed to the
weather and possible falling tree
branches during windy weather.
06 8964 CH05 2/1/00 8:16 AM Page 63

Part 1
➤
The Basics: Out of the Dark Ages
64
Do you have unfinished attic or basement space? These are prime areas for added fix-
tures to be tied into existing wiring and should be checked thoroughly.
Location, Location
One consideration with old systems is the location of your fuse box. It’s often located
outside the rear or kitchen door, which isn’t too convenient if you have to change a fuse
on a cold winter night. Modern service panels with circuit breakers are located inside
and are protected from the weather. Locations vary depending on the type and cost of
the house, but typically the panels are found in basements, garages, or utility rooms.
Your Checklist
By now, you’ve got a better idea how fuses, circuit breakers, circuits, wires, and fix-
tures all come together as your house’s electrical system. The older your house, the
more important this knowledge will be as you evaluate your system’s safety and con-
sider future remodeling. The following checklist summarizes what you should be
looking for in your system.
Electrical Checklist
Type of service
❏ Fuses
❏ Circuit breakers
Size of service
❏ 60 amps
❏ 100 amps
❏ 125 amps
❏ 150 amps
❏ 200 amps
Type of wiring
❏ Knob-and-tube
❏ BX
❏ Ungrounded cable
❏ Grounded cable
Dedicated circuits
❏ Major appliances
❏ Refrigerator
❏ Workshop
❏ Office computer
06 8964 CH05 2/1/00 8:16 AM Page 64

65
Chapter 5
➤
More Wall Talk
GFCIs
❏ Kitchen
❏ Bathroom
❏ Basement
❏ Garage
❏ Outside
Sufficient circuits?
❏ Yes
❏ No
Do any circuits regularly trip?
❏ Yes
❏ No
Number of receptacles
___ Kitchen
___ Bathroom
___ Bedrooms
___ Living room
___ Dining room
___ Hallways
Wall switches for all lights?
❏ Yes
❏ No
Are all outlets polarized?
❏ Yes
❏ No
Are all outlets grounded?
❏ Yes
❏ No
Has the system been altered?
❏ Yes
❏ No
Does the work look professional?
❏ Yes
❏ No
Has your system been evaluated by an electrician?
❏ Yes
❏ No
Electrical Checklist
06 8964 CH05 2/1/00 8:16 AM Page 65

Part 1
➤
The Basics: Out of the Dark Ages
66
Remember to follow all the safety recommendations in this book, especially if you
have an old system.
The Least You Need to Know
➤
Branch circuits ensure an even and safe distribution of electricity throughout
your house.
➤ A circuit map will tell you exactly which fuse or circuit breaker controls each
load in your system.
➤ GFCIs should be installed in every kitchen and bathroom and next to any
laundry or bar sinks, especially if you have an old electrical system.
➤ The main problem with old wiring is questionable work that was done after
the system was installed.
➤ If you’re installing a new service panel with circuit breakers, think larger rather
than a minimal service size.
06 8964 CH05 2/1/00 8:16 AM Page 66

Chapter 6
When You Buy a
House
In This Chapter
➤
House plans and inspections
➤ Some simple tests
➤ Aluminum wiring problems and issues
➤ Checking outdoor wiring
➤ Testing everything
➤ Keeping upgrade costs in mind
Your electrical inspection and checklist don’t just apply to your current home but also
to a prospective residence. Despite the diligence of inspectors, they still can make errors
when checking and approving newly constructed homes and remodeled additions. Any
home purchase, regardless of the age of the house, should include a general inspection
and an electrical inspection. This inspection will be more exacting than one in your
own home because you will have no familiarity with a house that’s new to you,
whereas you already know that your kitchen lights start flickering an SOS in Morse
code every time you turn on your food processor and that they need to be corrected.
An inspection will tell you more than simply the condition of the system. It will en-
able you to consider changes and additions and their possible costs before you buy.
These factors can affect your purchase negotiations, especially if major work is called
for such as installing a new service panel.
07 8964 CH06 2/1/00 7:57 AM Page 67

Part 1
➤
The Basics: Out of the Dark Ages
68
New homes, both those of your own design and those under construction by devel-
opers, deserve special attention with regard to your electrical needs. The planning and
construction phases are certainly the ideal times to wire for as many light fixtures, re-
ceptacles, dedicated circuits for your computers, and specialized cable for phones and
media as you desire. If you’re not sure about future TV or phone locations, wire every
room for them and don’t worry about it. The labor cost to install wiring is far cheaper
when the walls are open to the framing studs than after they’re finished.
Grab your checklist from Chapter 5, “More Wall Talk,” and your Sunday newspaper’s
real-estate section and hit those open houses!
Caveat Emptor or Buyer Beware!
Whether it’s new, old, or in its teenage years, you’re taking a certain chance when
you buy a house. All the warranties and assurances in the world won’t prevent leaks,
squeaks, and lawsuits over roofing or siding materials, for example. I can speak from
experience on the last one, because our house—purchased new in 1994—features the
infamous Louisiana-Pacific LP Siding, the subject of a massive class-action suit and a
multi-million-dollar settlement. The same scrutiny applies to electrical work.
You have the law on your side with seller disclosure Form 17 and builder warranties,
but you want to preclude any problems after you move in by ferreting them out be-
fore signing the final papers. An inspection and a disclosure form keep a seller honest
and can bring up unseen problems that were unknown even to the seller.
Who Does the Inspection?
Professional house inspectors are very much a mixed
bag. Some are extremely thorough and produce very
detailed reports; others are less-impressive and depend
too much on checklists and filling in the blanks. The
very best person to inspect your electrical system is a
licensed electrician, but you don’t want to be dragging
one along every time you look at a prospective house.
Save that for final candidates. Meanwhile, you can do
a preliminary inspection yourself.
The Preliminaries
Following the checklist in Chapter 5 will give you an
overall view of an electrical system. Note whether the
house has fuses or circuit breakers and the size of the
service. Look for an overall impression of the condi-
tion of the wiring and the number of loads. A sure
Ask an Electrician
Form 17 is a legal document
that sellers are required to fill
out unless the buyer takes the
property as-is. The seller must
disclose any known material is-
sues that will affect the pur-
chaser including structural and
mechanical issues. The seller must
disclose any remodeling work
and state whether the work was
or was not done under a permit
and inspection.
07 8964 CH06 2/1/00 7:57 AM Page 68
69
Chapter 6
➤
When You Buy a House
sign of a shortage of receptacles is the presence of
multiple-outlet plug strips or multiple outlet plug-
ins, especially in the kitchen.
Are there enough ceiling lights? Do rooms seem
too dark? Keep in mind that every room should
have a switch-controlled light fixture. This doesn’t
mean the fixture has to be installed in the ceiling
or on the wall. A switch-controlled receptacle, a
common feature in new homes, meets this code
requirement because a floor or table lamp can be
plugged into the receptacle and turned on from a
wall switch.
Testing! Testing!
With a couple of simple testing devices, you can
check for wiring problems including …
➤ Whether power is present at a device or fixture.
➤ Grounding continuity.
➤ Defective receptacles, switches, and fixtures.
➤ Whether outlets are properly wired.
A voltage tester should be in every electrical do-it-yourselfer’s toolbox. Consisting of
two probes connected at a plastic housing that contains a small neon bulb, a voltage
tester lights up when it detects an electrical current. It also can detect which in-
coming wire is the hot wire and the presence of a grounding conductor.
Positively Shocking
When examining a fuse box, note
the number of 15-amp circuits. If
you don’t see any, someone prob-
ably messed with the box and in-
stalled 20-amp fuses instead—never
a recommended practice. Lighting
circuits almost always are 15 amps.
An inexpensive voltage
tester.
07 8964 CH06 2/1/00 7:57 AM Page 69
Part 1
➤
The Basics: Out of the Dark Ages
70
The probes of the tester either are inserted into a receptacle’s slots or are held against
the terminal screws that secure the wire to the receptacle. If the probes do not detect
a current when inside the slots but do detect one when held against the terminal
screws, this indicates that the receptacle itself needs replacement. If there’s no current
at the screws, there’s a problem with the circuit.
Note: With back-wired devices, the probes are inserted in the slots next to the wires.
The receptacle will have to be removed from the box. To safely remove the receptacle,
turn the power off at the panel first, then remove the screws securing the receptacle,
pull it out, and, finally, test it.
Electrical Elaboration
There are two different means of attaching wires to receptacles and switches: back wiring
and side wiring. The hot and neutral wires can either be inserted into two push-in termi-
nals (also called terminal apertures or wire wells) on the back of the device (back-wired)
or be secured with terminal screws on the sides (side-wired). Side wiring is considered by
some electricians to be more secure, and it makes the wires accessible for testing. Back
wiring is a faster installation, however. Test a back-wired device by inserting the probes
into the release slots (which are next to the push-in terminals).
The same holds true for switches and fixtures. There are two tests for electrical
switches.
After removing the cover plate, be sure the switch is in the “Off” position. Place one
probe on the metal box that holds the switch; if the box is plastic or nonmetallic,
place the probe on the white or neutral wire. You’ll have to remove the switch from
the box in order to reach the neutral wire; be sure to turn the power off first and then
turn it on again for your test. Place the second probe on each of the black wires, or
on the terminal screws holding the wires if they’re side wired. One of them—the line
side or black wire supplying power from the circuit—should light up. If neither of
them does, there is a problem with the circuit.
After you find the line side, turn the switch to “On” and place the probe on the other
black wire, which is the load side, while keeping the other probe on the neutral wire. In
the “On” position, the switch completes the circuit and the load side carries power to the
light fixture. If the tester doesn’t light up, the switch is faulty and needs to be replaced.
You test a fixture by holding the probes against each of the terminal screws with the
light switch “On.” If your test shows a current, but the light isn’t working, you need
either a new fixture or new light bulbs.
07 8964 CH06 2/1/00 7:57 AM Page 70
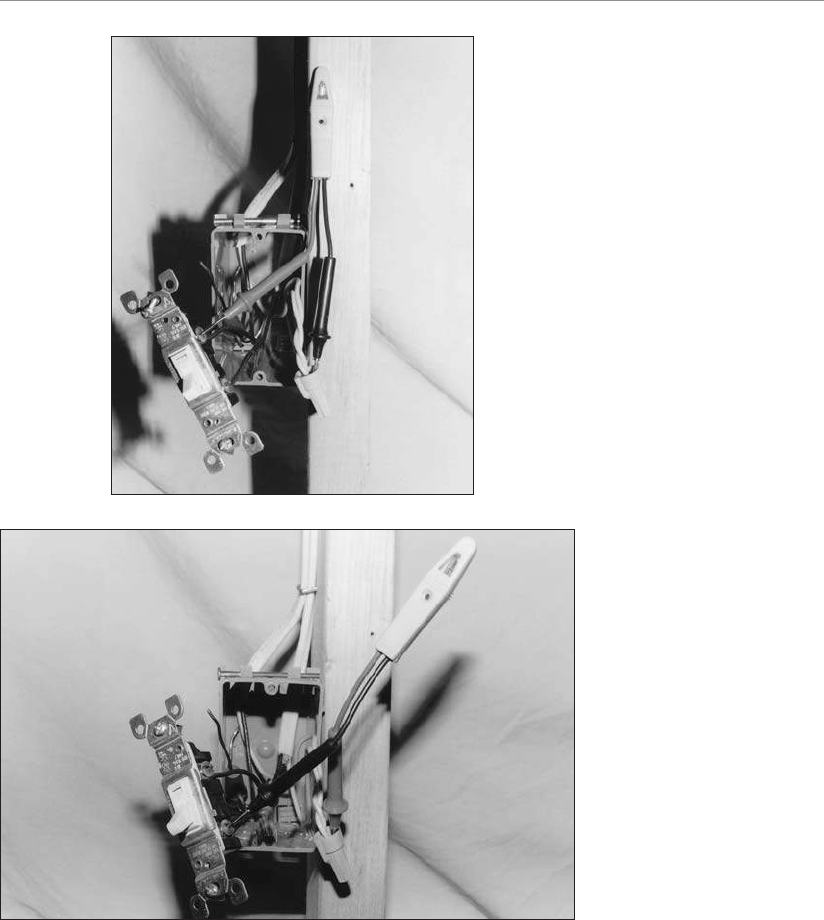
71
Chapter 6
➤
When You Buy a House
The Other Tool You Need
Second to the voltage tester in your box of tricks is a receptacle analyzer. This is a
plug-in tester that analyzes different wiring problems after being plugged into a live
circuit. Three lights on the bottom of the terminal light up in different combinations
to show you what the tester detects. A printed guide on the analyzer points out the
various electrical foibles a receptacle can suffer from.
How to test a switch: line
side terminal.
How to test a switch: load
side terminal.
07 8964 CH06 2/1/00 7:58 AM Page 71

Part 1
➤
The Basics: Out of the Dark Ages
72
A receptacle analyzer.
Smoke Alarms
The best smoke-alarm systems are connected to your
house’s wiring and have a battery backup. A stand-
alone, battery-powered alarm is better than nothing at
all, but a wired/battery system is preferred. Check the
house for smoke detectors and then check the detec-
tors themselves. Press the test button on each smoke
detector. If you don’t hear the annoying screech de-
signed to just about wake the dead, you have a dead
battery, a dead circuit, or a dead detector.
Aluminum Wiring
Human beings always are looking to substitute new,
less-expensive versions of successful products that
have been tried and true for years. Sometimes this
works well (a cheap, hand-held hair dryer versus a
full-size, hair salon, sit-in-the-chair-and-put-your-head-
inside hair dryer); sometimes it doesn’t (Yugos and Vegas versus most other automo-
biles). In the electrical world, the use of aluminum wire for running branch circuits
falls into the latter category of substitutes gone bad.
Bright Idea
You should change the batteries
in your smoke detectors once a
year to make sure they’ll still be
working in case of an electrical
outage. Mark your calendar using
a yearly event such as your
birthday (or maybe October 8,
the anniversary of the Great
Chicago Fire).
07 8964 CH06 2/1/00 7:58 AM Page 72

73
Chapter 6
➤
When You Buy a House
Aluminum wire was installed in at least 1.5 million homes between 1965 and 1973.
The material cost was as little as 50 percent of the price of copper wire, which made it
a hit with homebuilders, even if it ended up being a false bargain for homebuyers.
Unforeseen problems with the connections of the wire to devices lead to it being la-
beled a potential fire hazard and ultimately banned from most residential use.
Although I could find no figures as to the actual number of homes that burned down
due to electrical fires from aluminum wiring, there were enough to initiate studies,
accusations, lawsuits, and not-so-veiled warnings regarding its use. The problem
wasn’t immediately apparent because aluminum-wired circuits can take years to reach
a failure point while still remaining functional. According to Dr. Jesse Aronstein (in
his report “Reducing the Fire Hazard in Aluminum-Wired Homes,” prepared for the
Electrical Safety Conference-Electrical Fires at the University of Wisconsin-Extension
in March 1982 and revised May 10, 1996), a seemingly indefatigable researcher in this
area, “The probability of an aluminum-wired connection overheating in a home
varies considerably according to the types of connections, the installation methods
used, and the circuit usage, along with many other factors. Without detailed knowl-
edge of the installation in a particular home, it is not possible to provide specific ad-
vice on corrective measures.”
Is aluminum wiring a red flag in your house-purchasing adventure? Yes, but there are
ways to deal with it intelligently.
What’s the Story?
According to the U.S. Consumer Product Safety
Commission (CPSC), problems with aluminum
wiring manufactured prior to 1972 include …
➤ Expansion and contraction of wires.
➤ Easily damaged during installation,
because it’s a soft metal.
➤ Corrosion.
Aluminum wiring heats up more easily than
copper wire from electrical currents passing
through it because it has a higher resistance. As a
result, aluminum wire must be one gauge size
larger for a given circuit than if copper were
used. Thus, a 15-amp circuit could use No.14
copper wire but would require No.12 aluminum.
As a conductor, aluminum heats up when a cur-
rent passes through it. Like any heated wire, it
expands and contracts as it heats and cools, but
Positively Shocking
CPSC research indicates that
homes containing aluminum wire
manufactured before 1972 are
55 times more likely to have one
or more connections reach “fire-
hazard condition” than homes
wired with copper. These condi-
tions are defined as receptacle
cover-plate screws reaching a
temperature of 300°F, the pres-
ence of sparking, or charred ma-
terial around the receptacle.
Wiring produced after 1972
solved some, but not most, of
the material’s failings.
07 8964 CH06 2/1/00 7:58 AM Page 73

Part 1
➤
The Basics: Out of the Dark Ages
74
aluminum is damaged more than copper by this cycle of temperature changes.
Adding to this problem are the connections (or terminations) at devices and fixtures.
Aluminum tends to oxidize when it comes in contact with some other types of
metals—the same ones that often compose the termination material (such as brass
terminal screws). Now we’ve got a metal that’s already touchy about heating and
cooling, and it’s also corroding and offering even more resistance to the current. The
corrosion adds to aluminum’s natural resistance, making that resistance even worse.
As a result …
➤ The connections deteriorate and loosen at the terminals.
➤ There is arcing or a discharge of electricity across the gap between the end of
the wire and the terminal.
➤ There is possibly enough heat to melt the insulation and cause a fire.
Aluminum wiring can easily be damaged because it’s so soft. If a piece gets nicked
while the insulation is being stripped during installation, the nicked area is weakened
and can deteriorate faster than the rest of the wire as it heats up. So much for that 50
percent savings in material cost when this stuff was installed!
What You Should Look For
Aluminum wiring primarily affects housing built from 1965 to 1973, but it also can
be present in additions and remodeled sections of older homes if the work was done
during these years. The first thing to look for during your snooping is the word “alu-
minum” printed or embossed on the plastic sheathing of the electrical cable. If the
cable isn’t observable in an attic space or a basement ceiling, look in the service
panel. Remove the cover plates and look at individual switches and receptacles to see
whether the wire ends are copper- or silver-colored.
Electrical Elaboration
Despite its dangerous reputation for branch circuits, aluminum wire is a good choice for
conducting large currents such as the main service line to your house. It’s lighter weight,
so it’s less affected by strong winds or added weight from winter ice. It’s also less expensive
than copper. Because there are fewer termination points (only those at your service head,
where the service conductors enter your house, and at the service panel), they are tightly
connected and easy to monitor.
07 8964 CH06 2/1/00 7:58 AM Page 74

75
Chapter 6
➤
When You Buy a House
Warning: Aluminum Wiring Ahead
Not every house with aluminum wiring is an automatic time bomb waiting to burst
into flames like a vampire caught outside at dawn. The warning signs used to check
for overheating problems and loose connections include …
➤ Warm cover plates.
➤ Flickering lights.
➤ No power in a circuit.
➤ Sparks and arcing.
These signs are discounted by Dr. Aronstein, who states that they are not entirely reli-
able, do not always take place, or occur at a late stage in the failure of the wiring. He
does, however, suggest turning the power off and examining individual devices and
loads with a flashlight for the following:
➤ Charred or discolored plastic
➤ Back-wired devices
➤ Excessive tarnishing at the ends of the wires
➤ Damage to the thermoplastic sheathing including melting and bubbling
Some wiring might not show any signs of deterioration because a particular circuit
might never have had enough loads on it to cause overheating. If you plug a portable
heater in, however, the status quo might change rapidly. The best defense is to mon-
itor these circuits if their usage changes.
Any of these defects is cause for action. Are they enough of a reason for you to walk
away from a potential property purchase? No, because even though technology
caused the problems, it also can resolve them.
Solutions
The obvious answer to any aluminum-wiring problems or potential problems is to re-
place it all with copper. How practical is this, however, if you have limited unfinished
areas such as crawl spaces to run new wire or if you live in a condominium? You also
would have to patch and repaint everywhere. Fortunately, there are other solutions.
Aluminum wiring is most dangerous at the connections and termination points. The
accepted remedy is to use a short piece of copper wire (usually referred to as a “pig-
tail”) to connect the aluminum wire to the switch, receptacle, or appliance after
treating the exposed ends of the aluminum wire with antioxidizing paste (see the fol-
lowing figure). The best method, which is CPSC-approved as the only permanent re-
pair, is done with the use of a special power crimping tool manufactured by AMP
Incorporated (P.O. Box 3608, Harrisburg, PA 17105; 1-800-522-7652). This tool installs
07 8964 CH06 2/1/00 7:58 AM Page 75
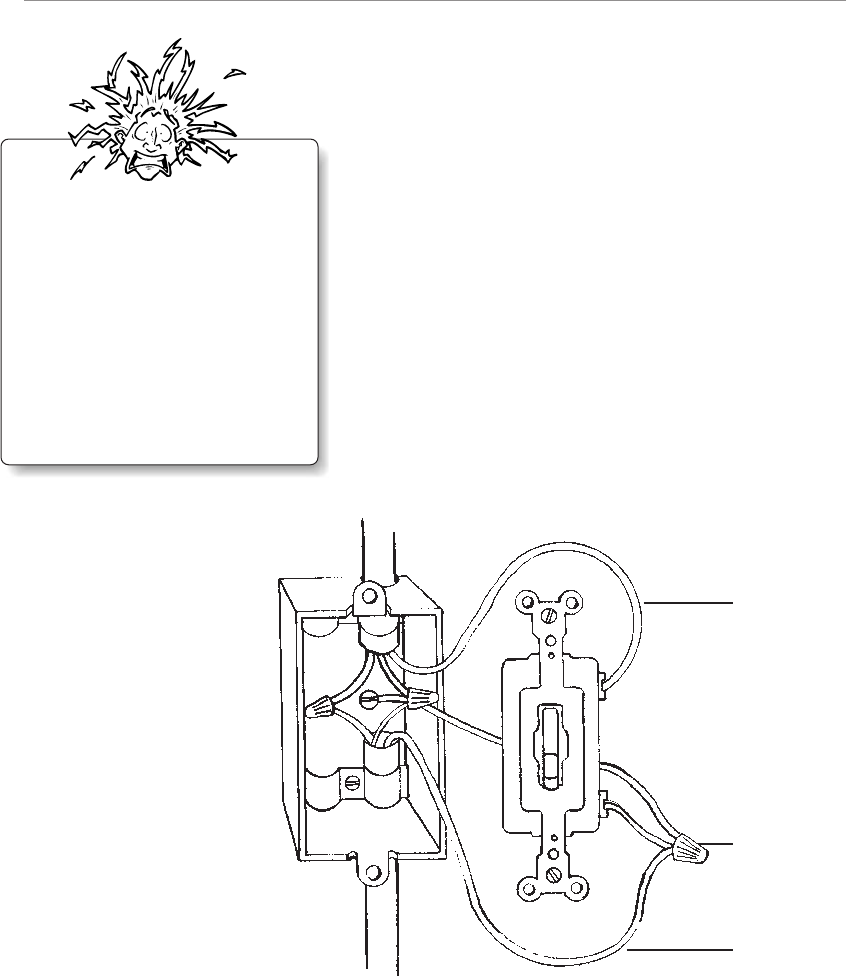
Part 1
➤
The Basics: Out of the Dark Ages
76
a metal sleeve called a COP/ALUM parallel splice con-
nector. This handy tool, which you’ll never find in a
hardware store, permanently attaches a piece of
copper wire to the existing aluminum wire along with
the sleeve. The connection is then covered with heat-
shrunk insulation. This work should be done by pro-
fessional electricians, not homeowners, so forget about
trying it yourself with a cheaper crimping tool or
another means of connecting the wires together. This
is a specialized procedure that requires training pro-
vided by the manufacturer.
Note that some electrical boxes—the enclosures
around switches, receptacles, and other devices—
might not be big enough to house the additional pig-
tailed connectors and wire. It might be necessary to
replace the box with a larger size, which will involve
cutting into the wall and doing some patchwork to
the plaster or plasterboard.
Positively Shocking
When repairing aluminum circuit
wiring, it’s important that all de-
vices be addressed and all wires
be spliced and crimped rather
than only the most noticeable
problems. Every switch, recep-
tacle, and fixture is a potential
fire hazard and should be re-
paired by a licensed electrician.
A typical pigtail with
NMB copper cable.
black
typical pigtail
black
A partial repair can be made by replacing all standard outlets and switches with UL-
approved devices marked “CU/AL,” which indicates that they can be used with either
copper or aluminum wiring. The CPSC does not recommend these devices as a com-
plete repair. Under no circumstances should any device connected to aluminum wire
be back-wired. (If there are problems, you won’t see them.)
07 8964 CH06 2/1/00 7:58 AM Page 76

77
Chapter 6
➤
When You Buy a House
The consumer booklet “Repairing Aluminum Wiring” (Publication 516) is available by
writing the CPSC at U.S. Consumer Product Safety Commission, Washington, DC 20207.
The Great Outdoors
Look closely at any outdoor lighting and receptacles. Bad wiring practices outdoors
are especially unsafe because of the exposure to weather, especially moisture. All out-
door receptacles should be GFCI protected and should be enclosed by weatherproof
boxes. Electrical cable must either be buried in plastic or rigid metal conduit or be the
UF (underground feeder) type, which has a very heavy plastic sheathing.
Cable rated for outdoor use must be buried at
specified depths (see Chapter 21, “The Great
Outdoors”). Anything buried too shallow for its
particular type and circumstances is in violation
of the code. Digging is a lot of work. I know one
homeowner who did only a minimal burying,
and the cable resurfaced from time to time during
gardening chores. At another house, the roots of a
growing tree gradually yanked a shallowly buried
(and poorly located) cable to the surface.
Old, corroded switches and receptacles with
broken covers are a sure sign of needed electrical
repairs. Check the service panel or fuse box and
see if the outdoor fixtures are running on their
own circuit. You might find that they are tied
into another branch circuit inside the house,
which isn’t a terrific idea.
Garages are another center for do-it-yourself add-
ons run amok. The wiring here should be equal to
any circuit inside your house and should not be a
disarray of wires and extension cords stapled to the
walls. Be sure to take note of any questionable work.
Check the power lines as well for obstructions or worn cables. These are the utility
company’s responsibility, but you need to report the problems so it can repair them.
Attic Insulation Problems
Modern nonmetallic electrical cable is tough stuff, and it doesn’t require the open-air
environment of older knob-and-tube wiring for heat dissipation. Even if you pack it
up against insulation, it just laughs as long as cable-nibbling rodents don’t take up
residence. Knob-and-tube wiring, on the other hand, can have a dysfunctional rela-
tionship with insulation due to heat buildup. It isn’t unusual to find knob-and-tube
Bright Idea
Digging trenches for outdoor
wiring is a lot of work, so com-
bine it with another task such as
bringing in a new gas line or
service line for your plumbing. As
long as you follow the local code
requirements for maintaining a
safe distance between pipes and
wires, they all can share the same
trench.
07 8964 CH06 2/1/00 7:58 AM Page 77

Part 1
➤
The Basics: Out of the Dark Ages
78
wiring buried under the blow-in type of insulation, so check your local code to see if
this is allowed.
Older light fixtures also need clearance from insulation because they really build up
heat, especially if they have more than one light bulb. Although newer zero-clearance
fixtures are now sold, never assume they have been installed in an older house until
you examine the fixture itself.
A Breath of Fresh Air
Modern homes are tightly insulated, but they have plenty of mechanized ventilation
in the form of kitchen and bathroom fans as well as whole-house fans on timers.
These forms of ventilation try to ensure a regular exchange of fresh air, which is par-
ticularly helpful the first year after construction because carpets, plastic laminates,
and paints give off all kinds of fun fumes, thanks to
the wonderful world of chemistry. An old house is nat-
urally ventilated through gaps in the windows, doors,
and walls. Even so, you still should have fans in the
kitchen and bathrooms. If these rooms remain unven-
tilated, moisture hangs around and throws a party for
its friends mildew and mold. This means more fre-
quent cleaning and painting as well as a reminder that
you burned the pancakes at breakfast because you can
still smell them during dinner. Check for fans and
make sure they’re working. Small fans (those with a
low CFM or cubic feet per minute), whose main activity
is making noise instead of getting the moisture and
odors out, are next to useless and should be noted for
replacement.
More Testing
Turn on all the lights in each room. Next turn on various appliances, even hair dryers
in the bathroom, and watch the lights for flickering. A slight flicker isn’t unusual, but
a permanent dimming is a sign of an overloaded system. The same is true if an appli-
ance repeatedly causes a circuit to trip.
If a switch doesn’t appear to control anything when you flip it on, it can be a sign of
an old disconnected load or circuit. A do-it-yourselfer might leave the switch in place,
but an electrician would remove it and cover the box with a blank cover plate. You
want to check for signs that work was done properly, not slipshod.
Ask an Electrician
CFM (cubic feet per minute)
is a measure of how much air a
fan can move. A good fan can
move—and remove—a lot of air
quickly.
07 8964 CH06 2/1/00 7:58 AM Page 78
79
Chapter 6
➤
When You Buy a House
Some Final Points
Does the prospective home have a security system? If you want one, make a note re-
garding its installation and approximate cost. Modern systems have battery-powered
motion detectors that don’t require hard wiring, but the basic unit itself is wired,
which means you need to supply power to it. This might not be a big deal, but it’s
one more thing to add to your electrical wish list.
Do all the rooms have heat, either from a central heating system or electric room
heaters? Some older homes have ancient heating systems and might only have one
heating vent in an upstairs landing rather than heating for each individual bedroom.
This means you’ll have the expense of supplying heat either with new ductwork (and
probably a new furnace) or by running circuits for electric heating.
Electrical Elaboration
Check your local code while you consider installing individual electric room heaters. Some
cities and municipalities don’t like to increase electrical demand any more than they have
to, and they might require you to upgrade your house to higher insulation standards, in-
cluding insulated windows, if you install electric heat. They would much rather you use
gas or oil heat, which does not affect their utility loads.
Old homes offer a certain charm and comfort that are difficult to duplicate in most
modern housing. Leaded windows, wide oak entry doors, and crown molding run-
ning along the ceilings aren’t common features in new construction. Neither are fuse
boxes, tacky wiring repairs, and a shortage of receptacles and lights. Updating an old
system will have to be figured into your budget (and ultimately your purchasing con-
siderations) when you start house hunting. Throw in a new roof, plumbing, floor re-
finishing, and a kitchen addition, and Old World charm takes on an expanded
definition—bring money!
A complete house inspection will make you a more knowledgeable homebuyer and
will prepare you for the true cost of purchase.
07 8964 CH06 2/1/00 7:58 AM Page 79

Part 1
➤
The Basics: Out of the Dark Ages
80
The Least You Need to Know
➤
Always do a thorough electrical inspection of any prospective house purchase.
➤ A voltage tester and a receptacle analyzer are two inexpensive but indispen-
sable tools for testing your circuits and electrical devices.
➤ Learning to live comfortably with aluminum wiring usually requires the services
of an electrician.
➤ Kitchens and bathrooms need ventilation fans—usually the bigger the better.
07 8964 CH06 2/1/00 7:58 AM Page 80

Part 2
Safety, Tools, and Contractors
A modern electrical system should be both safe and convenient. All of its components,
from the transformer on the utility pole to your imported espresso machine, are sup-
posed to work together in quiet, Buddhist harmony as electrons zip through branch
circuits. When you introduce bad karma in the form of overloaded circuits, wiring
that doesn’t meet code, or unsafe work practices, you can forget about reaching elec-
trical enlightenment anytime soon. You need to maintain a safe environment in your
day-to-day dealings with electricity and when doing your own work on the system.
There’s a saying that you can tell the quality of a worker by the quality of the tools
used on the job and the way they’re stored and maintained. This is a little too sim-
plistic (a Wall Street Journal article, for instance, featured homeowners with a lot
more money than skills buying tools that were clearly beyond their abilities), but good
tools will make your job easier. Consider the value of your time when you work up a
tool budget. How do you measure the frustration factor and the lost time from using an
underpowered drill because it cost $30 less than a more appropriate one? You don’t
need the very best tools because you won’t be doing electrical work for a living, but you
also don’t want to try and slide by using your kids’ “Building Trades for Tots Toolbox.”
Safety has been an issue with electricity since the days of Thomas Edison and the first
large electrification projects. It’s still an issue despite the multitude of advances we’ve
made since the first light bulb was invented. Every year, there are thousands of in-
juries and electrical fires in the United States, and you don’t want to add to the statis-
tics. I will emphasize over and over throughout this book that you need to work safely
and follow the local code requirements. Electrical safety also applies to everything you
plug in and turn on, so I’ll discuss those items, too.
08 8964 Part 2 2/1/00 8:14 AM Page 81

08 8964 Part 2 2/1/00 8:14 AM Page 82
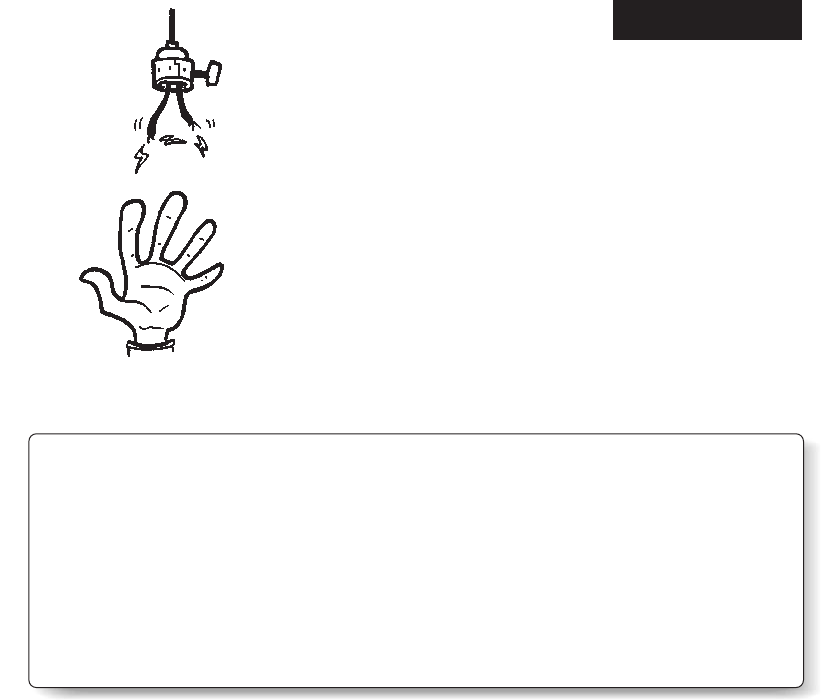
Chapter 7
Caution Signs and
Safety Concerns
In This Chapter
➤
Skip the shocks
➤ Common electrical problems
➤ Safe work practices
➤ Fire, a major possibility
➤ The best practice is vigilance
At different times in our childhood, well-meaning parents, teachers, and other unin-
vited authority figures decided we needed a lesson on what they viewed as one of life’s
serious dangers. These lessons usually consisted of terse descriptions of the horrors and
grave consequences that would befall us if we ignored the lessons, which most of us
did. I can confidently say that I didn’t go blind from sitting too close to the television,
nor did I ever catch pneumonia from going outside with my coat unbuttoned in the
dead of Ohio’s winters.
Electricity is a different matter, however, and here I must become parental for your
own good. (I’m sure that phrase brings back a few memories.) One wrong electrical
move can result in injury or even death for you or your loved ones, not to mention
fire damage to your home. No one is immune to accidents, including experienced
electricians. As a homeowner and do-it-yourselfer, you should keep yourself safe and
be even more cautious than a professional.
09 8964 CH07 2/1/00 8:13 AM Page 83

Part 2
➤
Safety, Tools, and Contractors
84
A brand-new electrical system doesn’t give you license to abuse it or to test its limits
just for the fun of it. Sticking your house key into a ground-fault circuit interrupter
(GFCI) receptacle while grabbing hold of your bathroom sink’s faucet isn’t recom-
mended, even if the GFCI should shut down when it detects your act of lunacy.
There’s always a chance it won’t shut down because it’s defective. Of course, if you’ve
been following safe electrical practices, you would know this because you would test
your GFCIs every month.
With a little common sense (another childhood admonition), you’ll be able to safely
inhabit and work on your electrical system and fill your home with lighting, recepta-
cles, and multimedia features from top to bottom.
Shocks Galore
Every time we use electricity or are near it, there’s a
chance we could get shocked. Sometimes the chance is
remote, such as when turning on a living room ceiling
light. Other times, the chance is very good, such as
when plugging in a string of worn, patched, and
taped-together Christmas tree lights left over from the
days of the Harry Truman administration. We talk
about shock and its big brother, electrocution, but
what exactly are they? Why are they so hazardous to
our health?
Electricity basically is lazy and is not always interested
in staying on the straight and narrow path of an alter-
nating current. Given the choice of making the return
trip along the neutral wire or taking a shortcut, it will
opt for the shortcut every time, even if it means trav-
eling through your extremities. Electricity seeks the eas-
iest path to the ground, and any available conductor—
metal, water, you—will do the job. Because our bodies
are 70 percent water, we make it easy for errant elec-
tricity to hitch a ride, and it does so without any hesi-
tation. When our skin is dry, it blocks electricity pretty
well but not when there’s water around or the current is sizable. The size of the cur-
rent and the duration of our exposure to it are the real health issues.
When You Can’t Let Go
When an electrical current starts passing through your body, it doesn’t take much for
you to become energized and very attached to that current. The “can’t let go” level
(or freezing current) for adults is small, around 10 milliamps. Young children can get
Positively Shocking
It’s the salt in water that makes it
so conductive. When the salts dis-
solve, they form electrically
charged ions that attract the
charges of an electric current. Even
the purest water in a scientific lab-
oratory will conduct a minute
amount of current. If you’re stand-
ing in water or a damp area,
you’re more likely to conduct cur-
rent. Our own body salts, carried
through the sweat glands, also
make us more conductive.
09 8964 CH07 2/1/00 8:13 AM Page 84

85
Chapter 7
➤
Caution Signs and Safety Concerns
stuck at half that level. The path of the current is of critical importance as well. A
hand-to-foot pathway will involve vital organs, especially the heart, and this can have
serious consequences.
The following are some effects of an electrical shock:
➤ Knocking someone down or away from the source of the shock
➤ Respiration disruption
➤ Unconsciousness
➤ Muscle spasms
➤ Seizures
➤ Interrupting the heartbeat
➤ Severe burns
➤ Cardiac arrest
The longer the contact and the greater the current, the greater the injuries. A young
adult in good health will be less affected by an electrical shock than a very young
child or an elderly person, but you still don’t want to take any chances.
If the current is great enough, third-degree body burns can result at the points of
entry and exit. Burns damage and destroy the skin, further breaking down its resist-
ance to the current.
How Much Can You Take?
Once again, we run into Ohm’s Law of electrical resistance. In the case of a shock or
an electrocution, the amount of current zapping its way through the body is deter-
mined by the following formula:
I = E/R
I = Electrical current
E = Voltage
R = Resistance of the body
Every body offers a different degree of resistance, but that doesn’t mean you want to
challenge the averages. The National Electric Code (NEC) figures five milliamps to be
the safe upper limit of exposure for children and adults. Even at this level, you still
can be injured by your reaction to the shock such as jumping back and tripping over
the rim of a bathtub.
09 8964 CH07 2/1/00 8:13 AM Page 85

Part 2
➤
Safety, Tools, and Contractors
86
Timing Is Everything
The longer a victim is exposed to an electric current,
the greater the chance of critical injury. In addition to
burns, there is also the loss of muscular control,
breathing difficulties as the chest contracts involun-
tarily, and ventricular fibrillation of the heart. This last
effect comes up repeatedly in any discussion of severe
electric shock. It refers to rapid, irregular heartbeats
and equally irregular fluttering of the heart muscle.
It’s one thing to have your heart skip a beat or two be-
cause you’re head-over-heels in love, but it’s quite an-
other to have its pumping activity disrupted because
of a faulty circuit. The former usually is a lot of fun,
but the latter can do you in if it goes on for too long.
Know Your First Aid
Chances are, you’ll never have to rescue anyone on the receiving end of a severe elec-
tric shock unless you work in certain construction specialties. Any of us can be
caught in a lightning storm, but the chances of being struck by lightning are remote.
Nevertheless, it’s worth being prepared in the event of an unforeseen accident.
There are a few cardinal rules to remember when helping electrocution victims:
➤ Assume that the victim is still in contact with the current.
➤ Never touch the victim until you’re certain the current has been shut off or the
victim has been removed from the current. (Otherwise, you can be electrocuted,
too.)
➤ If you can safely do so, shut off the power source at the fuse box or service
panel. If it’s more practical, pull the plug from the receptacle.
➤ Push or pull the person from the power source using something nonconductive
such as a wooden broom, a rubber mat, or a plastic chair. Don’t use anything
made of metal.
➤ Never directly touch the source of the current.
➤ If the victim has stopped breathing, call 911 and begin CPR. (If the situation
warrants, call 911 before attempting any rescue.)
In the event of a high-voltage electrocution such as an industrial situation or contact
with power lines, do not attempt any direct rescue. Currents this strong can jump be-
yond the victim and hit the rescuer as well. Call the fire department and keep others
at a safe distance.
Ask an Electrician
A milliamp is a measure of elec-
trical current. It’s very small,
equal to one thousandth of an
amp or ampere. Its abbreviation
is ma.
09 8964 CH07 2/1/00 8:13 AM Page 86

87
Chapter 7
➤
Caution Signs and Safety Concerns
Summer lightning storms bring their share of elec-
trocutions as well. A bolt of lightning can carry
millions of volts of electricity, far more than a mis-
behaving kitchen receptacle. When you assist a
lightning victim, the current already has passed
through, so you don’t have to worry about being
electrocuted as well (unless lightning decides to
strike twice, of course).
The Source of the Problem
Most electrical injuries are preventable. They typi-
cally result from …
➤ Work that isn’t done to code and is not
inspected.
➤ Defective fixtures, devices, or appliances.
➤ Human error.
The major purpose of the NEC and your local codes is to prevent injury and property
damage from the use of electricity. Even when all the electrical ducks are lined up in a
nice, neat row, human error or ignorance comes into play because we regularly ignore
good safety practices. Grade yourself by taking our first Complete Idiot’s Guide electrical
quiz and see how you do.
Quiz #1
When you see a worn electrical cord on a lamp or an appliance, do you …
A. Tell yourself it adds to the ambiance of your home?
B. Wrap it with lots and lots of electrical tape?
C. Replace it with a new, same-size cord?
When you turn on an electrical appliance, do you …
A. Make sure your hands are dripping wet?
B. Grab on to a water faucet for balance?
C. Dry your hands and stand away from the sink?
Before cleaning the bread crumbs from your toaster, do you …
A. Grab the cord and give it a yank?
B. Not even bother to unplug it?
C. Grasp the plug and pull?
Positively Shocking
If you ever suddenly find yourself
near a downed power line, keep
yourself grounded by shuffling
away to safety. Running will
break contact with the ground
and set you up for a shock.
09 8964 CH07 2/1/00 8:13 AM Page 87

Part 2
➤
Safety, Tools, and Contractors
88
Before working on an electrical circuit, do you …
A. Stick a screwdriver in a receptacle to check the current?
B. Make sure you’re standing on a very wet surface?
C. Turn the power off at the breaker or fuse and stand on a dry board if the floor is
damp?
To power the garage door opener in your detached garage, should you …
A. String a series of extension cords together and run them between your house
and the garage, leaving them out in all kinds of weather?
B. Try to run a wire off your washing machine’s receptacle?
C. Run a separate circuit with properly buried cable?
Okay, it’s a trick quiz. If you answered anything other than “C” for any question, go
back and start reading this book again. It isn’t just major electrical work that requires
vigilance; everyday stuff is dangerous, too. Problems can be prevented with even the
simplest practices such as …
➤ Installing childproof safety caps on all receptacles.
➤ Avoiding overloading circuits with too many loads.
➤ Keeping ladders and tree branches away from power lines.
➤ Unplugging all small appliances when not in use.
➤ Turning off the power to any receptacle or switch that feels excessively warm to
the touch. Follow up by having the circuit checked. (Note that dimmers are an
exception: Often the heat created by the dimming function is dissipated
through the screws holding the cover plate on.)
➤ Not tucking in an electric blanket or covering it with another blanket to avoid
excess heat buildup.
➤ Keeping extension cord use to a minimum and never running cords under
carpets or rugs.
➤ Replacing broken cover plates on switches and receptacles so wiring isn’t
exposed.
➤ Never leaving a lamp socket without a light bulb in it by replacing burned-out
lamps immediately. Only replace them with lamps of the same wattage or lower,
never exceeding the manufacturer’s recommendation.
09 8964 CH07 2/1/00 8:13 AM Page 88
89
Chapter 7
➤
Caution Signs and Safety Concerns
Safe Work Practices
The mundane world of GFCIs and using the proper-size light bulb in your light fix-
tures just scratches the surface of electrical safety. Its importance is heightened when
you do any repairs or alterations to your system. It’s like the difference between
swimming in the shallow end of the pool and jumping into the deep end with the
big kids. Unlike the big kids, who literally sink or swim based on their skill level, you
can stack the deck in your favor with a few preemptive moves.
The number-one, top-of-the-list safety rule in elec-
trical work is this: Make sure the current is off, and
if it isn’t, shut it off! After the power is off, any
fumbling with the wires will be a forgiving experi-
ence instead of a highly charged one. An inexpen-
sive voltage tester can tell you in seconds whether
a current is hot.
Plugging a tool or a light into a receptacle is not an
adequate way to test whether a circuit is on. The re-
ceptacle might be defective. Always test the con-
ducting wires themselves with your voltage tester.
Turn It Off!
Shut the power off by either removing the fuse or
flipping the circuit breaker. After the power is off,
hang a sign on the service panel stating that you are
working and that the power should remain off! You
don’t want someone flipping the breaker on
thinking that it tripped.
Electrical Elaboration
Some electrical engineers have gone into the consulting business as forensic engineers.
Their services are regularly used in lawsuits involving electrical mishaps. Forensic engineers
investigate electrocutions, electrical failures, and pain and suffering as the result of elec-
trical problems. They also conduct accident reconstruction. They testify and consult on
anything from problem infant monitors that injure a child to massive industrial accidents.
Positively Shocking
Remove any rings or jewelry be-
fore doing any electrical work.
These are dandy little conductors
when they come in contact with
a live circuit. Can’t get your
wedding ring off? Wrapping it
with multiple layers of electrical
tape will help, but this is no
guarantee against shock. Wearing
a work glove will give you addi-
tional insulation, but it gives you
less flexibility to do the work.
09 8964 CH07 2/1/00 8:13 AM Page 89

Part 2
➤
Safety, Tools, and Contractors
90
One Hand Behind Your Back
An electrical current needs to travel from point to point to complete a circuit. If you
grab the end of a hot wire with one hand and touch a water pipe with the other, you
provide the current with a path as it travels through you. The same is true if you’re
standing on wet ground; the current will travel toward your feet. For this reason,
whenever you change a fuse or flip a circuit breaker, you should use only one hand.
The other hand should be behind your back or in your pocket. In other words, your
other hand should be away from the service panel or fuse box. You don’t want it to
accidentally come into contact with any metal surfaces in the box because that com-
pletes a pathway for the current.
Test, Test, Test
Even if you’ve turned off the power to a particular circuit, check every device and fix-
ture along the way before you do any work on them. You should take this precaution
in case a light switch or receptacle is wired into a different circuit than the one you’re
working on. Industrial and construction electrical accidents happen regularly because
workers find equipment or circuits to be energized when they believed the power was
shut off.
On Dry Ground
When it comes to electricity, dry is good and wet is bad (unless you’re the U.S. Army
trying to electrocute some prehistoric swamp creature in a cheesy, 1950s monster
movie). Never stand in a puddle or on damp ground when working on your electrical
system. Always find a dry piece of wood or another insulating material to stand on
while working. If you must work during wet weather, wear thick-soled rubber boots.
Better yet, wait for a dry day (always an iffy situation here in the Northwest, unfortu-
nately).
Watch That Ladder
Metal ladders and overhead power lines are a bad combination. Every year, painters
and tree trimmers learn this the hard way, resulting in injuries and electrocutions.
Using power tools while working off a metal ladder also can be hazardous, especially
during wet weather.
Electricians use wood or fiberglass stepladders and fiberglass extension ladders when
they work. Fiberglass is nonconductive; wood also is an excellent insulator as long as
it’s dry. Most extension ladders aimed at the homeowner market are inexpensive
metal ladders. If you’re doing any serious overhead electrical work, however, a wood
or fiberglass ladder is the better choice.
09 8964 CH07 2/1/00 8:13 AM Page 90

91
Chapter 7
➤
Caution Signs and Safety Concerns
Tool Health
Modern tools either are double-insulated or come
with a ground pin in a three-pronged plug. Power
tools greatly speed up just about any job, but you
can’t take them for granted. Tools with frayed
cords, cracked casings, or incidents of sparking
should be repaired or replaced. This is especially
important with heavier-duty tools if they have
metal casings. The casings can become energized if
there’s a short in the wiring.
Vigilance, as always, pays. Inspect your tools before
starting a job. It’s far easier—and safer—to catch
and tape a small tear in a drill’s power cord than to
chance an injury.
A Lesson from Your Kids
As adults, we’re supposed to exude maturity and re-
sponsibility and set an example for our children.
We try to make sure they’re fed, warm, and in bed
on time. We don’t always apply this same concern
to ourselves, however, and this can be dangerous
when we’re working on our homes.
If you’re cold, hungry, or tired, you could start
making mistakes, so pay attention to your comfort
level. Shaking hands, a growling stomach, and flut-
tering eyelids are signposts on the road telling you
to pull over, put your tools down, have some lunch,
and maybe catch a quick nap. We’re viewed as a
sleep-deprived nation, and there are plenty of acci-
dent statistics to affirm this view. You’re not going
to save any time or keep to a schedule if you have
to redo some of your work later because it’s faulty.
Speaking of Kids …
Children also use electricity and need to use it
safely. You, as a parent (or an adult friend), need
to instruct them about the hazards of yanking
electrical cords out of receptacles instead of holding the plug and pulling, using a hair
dryer near water or with wet hands even if you have a GFCI in the bathroom, and
sticking pens into receptacles to watch them melt. In addition to your always-
welcome lecturing, a number of audiovisual helpers are available that could be shown
at your children’s school.
Positively Shocking
A flooded basement can be dan-
gerous if the water comes into
contact with any wiring, exten-
sion cords, or appliances. Don’t
enter your basement to start
pumping the water out before
the power is shut off. If you must
go in, wear thick-soled rubber
boots or call your local utility for
assistance.
Ask an Electrician
A double-insulated tool doesn’t
have a ground pin in the plug.
Instead, the wire conductor is sur-
rounded by additional noncon-
ductive material such as plastic.
This does not guarantee against
shock in the event of frayed
wiring or damage to the tool.
Metal casings also can be lined
with nonconductive material.
09 8964 CH07 2/1/00 8:13 AM Page 91

Part 2
➤
Safety, Tools, and Contractors
92
Some of these films include …
➤ I’m No Fool with Electricity, by Disney Educa-
tional Productions. This film, according to its
catalog description, somewhat implausibly
shows Pinocchio and Geppetto exploring elec-
trical safety both indoors and outdoors. Because
he was made from wood, Pinocchio has the
built-in advantage of being an insulator instead
of an electrical conductor, at least as long as he
remains dry.
➤ Electrical Safety from A to Zap, from Perennial
Education, Inc. In this film, a mouse shows a cat
how to use electricity safely, their lack of oppos-
able thumbs notwithstanding.
➤ Play It Safe from HECO. This video features two
children who learn safe practices around elec-
tricity. The film’s big plus so far in our list of au-
diovisuals is the fact that it features human
beings who actually do use electricity.
➤ The Electric Dreams of Thomas Edison: A Guide to Indoor Electrical Safety/A Guide to
Outdoor Electrical Safety, produced by the Southern California Edison utility com-
pany. In this film, students defy all the rules of logic and physics by somehow
communicating with the long-dead Thomas Edison, who informs them about
grounding, insulators, and conductors. They also look for outdoor electrical
hazards.
➤ Zap Rap, from Pacific Learning Systems, Inc. Sure to appeal to the contemporary
youngster, this film uses rap-style language to convey the wonders and dangers
of electricity. As with most attempts to maintain students’ interest through the
use of entertainment as a teaching tool, you might give your kids a quiz to see if
they learned anything at all about electricity other than a few tunes.
➤ Fire in the Kitchen, from Film Communicators. This video is aimed at grades 7
through 12. There are no wooden puppets or rappin’ electrons here. This video
teaches kitchen safety, including proper use of a microwave oven.
➤ Our Invisible Friend—Electricity. This 17-minute feature from Marcom Marketing
Group also was made for grades 7 through 12. One has to wonder, of course, if
any video made for seventh graders could be even remotely interesting to high
school seniors.
Bright Idea
A good fire-awareness project for
your kids is to make a fire pail
using a coffee can and baking
soda. Send a self-addressed,
stamped envelope to Arm and
Hammer fire pail Brochures, P.O.
Box 7468, Princeton, NJ 08543
for instructions and a label.
Baking soda is perfect to use
against small grease and electrical
fires in the kitchen.
09 8964 CH07 2/1/00 8:13 AM Page 92

93
Chapter 7
➤
Caution Signs and Safety Concerns
➤ Safety at Home: Electricity, from AIMS Media. Geared for grades 9 through 12, a
utility inspector shows careless use of electricity and the inevitable results. The
inevitable results in grades 9 through 12 will be hooting and applause as actors
are shocked and fried while doing things with appliances, receptacles, and plugs
that a three-year-old wouldn’t consider doing.
If my experience with audiovisual presentations when I was in school is still typical
of students today (some things really don’t change), I’d suggest that you take your
children’s electrical education into your own hands. Take them around the house,
show them how the circuit breakers and GFCIs work, even show them how to prop-
erly insert and remove a plug from a receptacle. If they’re old enough, turn the power
off to a circuit, remove a switch or receptacle, and show them how it’s wired. By the
time they start getting bored, you’ll have gotten the basics across.
Some Statistics
Mark Twain once said that there are three kinds of lies: lies, damn lies, and statistics.
Trying to track down accurate figures about residential electrical fires produced quite
a range of numbers. Everyone from the U.S. Consumer Product Safety Commission to
various fire marshals across the country has a different figure to get the same point
across: Misuse of electricity is a bad idea with sometimes incendiary results.
Based on my reading, the following figures are well inside the ballpark when it comes
to fires caused by electrical problems:
➤ Approximately 45,000 to 50,000 fires each year occur in homes because of faulty
wiring, appliances, and extension cords.
➤ The National Center for Health estimates that approximately 760 electrocutions
take place from all causes each year including 310 occurrences involving con-
sumer products.
➤ More than 3,000 children under the age of 10 are treated in emergency rooms
each year after inserting objects into electrical receptacles. Another 3,000 are
treated for injuries associated with extension cords.
➤ According to the CPSC, plugs and cords are involved in close to 20 percent of all
residential electrical fires each year.
➤ Electrical fires kill hundreds of people in their homes every year, injure thou-
sands more, and destroy hundreds of millions of dollars in property.
➤ December is the most dangerous month, electrically speaking, because of hol-
iday lighting and portable-heater use.
➤ Older homes are more likely to have a fire than homes built in the last 20 years.
09 8964 CH07 2/1/00 8:13 AM Page 93

Part 2
➤
Safety, Tools, and Contractors
94
Some figures overlap, some are subject to various interpretations, and others, such as
figures regarding electrocutions, may include industrial accidents. Sweeping all these
distinctions aside, you don’t want to be part of anyone’s statistical table unless it’s for
happy, content homeowners with up-to-date electrical systems, cheerful children, and
pets who do their business outside when nature calls.
Every holiday season, just about everyone’s local news shows photos or a film clip of
a family dispossessed and standing out in the cold because of a faulty space heater. It
shouldn’t happen to you if you follow the usual rules:
➤ Don’t overload your circuits.
➤ Never replace a fuse or a circuit breaker with one of a greater amp rating.
➤ Don’t run electrical cords under rugs or carpets.
➤ Carefully examine any wattage-hungry appliance, such as a portable heater,
before using it, and then carefully monitor it while it’s in use.
Electro Kindling
It’s bad enough that a faulty electrical connection
overheats inside a small appliance or device. What
might even be worse is the fact that the wiring is sur-
rounded by flammable materials, often plastic casings
that have replaced the metal casings from years ago.
Dr. Jesse Aronstein (of aluminum wire repute) came up
with the term “electro kindling” to describe the mate-
rial that ignites and burns after the failure of an elec-
trical connection. A plastic toaster will be only too
happy to burn if there’s a wiring problem, while a
metal one will just hang tight until you unplug it or
until the wiring fries to a crisp. There have even been
reports of multiple-outlet strips, icemakers, and plastic
thermostats failing and subsequently igniting.
Such is the price of a society that embraces plastic in
all its forms. The possibility of electro kindling should
reinforce the practice of unplugging your small appli-
ances when they’re not in use.
Bright Idea
Ontario Hydro (a Canadian
power company) promotes the
month of May as Electrical Safety
Month, reminding people to
keep a “safety first” attitude
during outdoor activities. The
company’s tips include avoiding
kite-flying near power lines, in-
specting electric lawn mowers and
power tools before each use, and
avoiding mowing wet grass with
an electric mower. Call the power
company before you dig, it warns,
so you don’t hit any wires.
09 8964 CH07 2/1/00 8:13 AM Page 94
95
Chapter 7
➤
Caution Signs and Safety Concerns
New Service Doesn’t Let You Off the Hook
I’m a big believer in new electrical services, but that doesn’t mean you can ignore
them completely, especially if they’re tied into older, existing wiring. Breakers should
trip if a circuit is overloaded, and GFCIs should shut down in the event of a ground
fault, but there’s always the chance you have a piece of defective equipment.
Unlikely? Sure, but it’s certainly possible.
Test your GFCIs monthly and pay attention to outlet and switch cover plates that
seem too warm to the touch. If you ever smell anything burning around a receptacle,
and it isn’t an individual appliance or load, shut down the circuit immediately and
call an electrician. It’s worth the price of a service call for your peace of mind.
Electrical Elaboration
According to CFRA News Radio’s Web site, a fire at the home of Dallas Cowboys quarter-
back Troy Aikman in March 1998 was attributed to faulty wiring. This wouldn’t be an ex-
ceptional news item except for the fact that the $3.2 million home, which took more
than two years to build, was brand new! The three-alarm fire at the Plano, Texas, home
caused almost $200,000 in damages to the attic and the garage. It took 50 firefighters to
extinguish the fire in the house where Aikman, who was away at the time, had lived for a
total of three weeks.
More Information
For more information about electrical safety, contact one of the following agencies for
printed material:
National Electrical Safety Foundation
1300 North 17th St., Suite 1847
Rosslyn, VA 22209
Phone: 703-841-3211
Fax: 703-841-3311
Send a self-addressed, business-size envelope with 55¢ postage for a copy of the Home
Electrical Safety Check booklet.
09 8964 CH07 2/1/00 8:13 AM Page 95

Part 2
➤
Safety, Tools, and Contractors
96
The Least You Need to Know
➤
Preventing electrical shocks and electrocution should be a top priority with
any electrical system.
➤ The most common causes of shock are bad wiring practices and human error.
➤ The number-one safety rule when working on an electrical system is to shut
the power off.
➤ Children should be educated about electricity and how to use it safely.
The United States Fire Administration
Office of Fire Management Programs
16825 South Seton Ave.
Emmitsburg, MD 21727
09 8964 CH07 2/1/00 8:13 AM Page 96

Chapter 8
Call Me Sparky
In This Chapter
➤
Thinking like an electrician
➤ Getting a permit
➤ Understanding your inspector’s viewpoint
➤ The tools you’ll need
➤ Picking your suppliers
Wiring is a nice, logical process. You want to get power from point A to point B in the
most efficient way possible. Running wire or “roping” a house is mostly a matter of
drilling access holes through the house’s framing (the wall studs, plates, and floor
joist) and pulling electrical cable through those holes. How you carry out this nice,
logical process is another matter altogether.
Like just any task in life, you can do your own electrical work the hard way or the
easy way. The hard way means tearing open more walls than necessary, undoing and
then redoing part of the job due to poor planning, and trying to drill holes, cut wire,
and strip insulation with cheap tools. The easy way calls for planning and econo-
mizing your moves and using good tools to give you a better job and to move you
through it faster. You won’t be as fast as an experienced electrician, but you’ll have
the satisfaction of doing your own work and doing it well.
If you’re going to be your own electrician, you need to take your role as seriously as a
professional would. This means presenting any required plans to your building depart-
ment when you take out a permit, knowing the code issues, using the right tools, and
10 8964 CH08 2/1/00 8:07 AM Page 97

Part 2
➤
Safety, Tools, and Contractors
98
finding suitable suppliers for your materials and fixtures. You don’t need to invest in
the same level of equipment as an electrical contractor does. After all, you’re not
going to be making your living at this. You can, however, become a talented amateur
whose work can be respected, even by a professional!
An Electrician’s Mindset
An electrical contractor has the following goals in mind when bidding, planning, and
actually doing a job:
➤ The job must meet the customer’s requirements.
➤ The work must be safe, meet code, pass inspection, and be finished in a timely
manner.
➤ The final result should be a satisfied customer and a profit for the contractor.
Your goals as a do-it-yourselfer shouldn’t be any different. You want your work to be
of satisfactory quality so you can live comfortably with it rather than going crazy
every time you look at a crooked light switch or receptacle. It goes without saying
that your work must pass inspection, but you also want to get it finished sometime
before you reach retirement age. Money-wise, you want to realize a savings from
doing your own work. This can be measured in different ways. Some people keep an
exact accounting of their hours and assign an hourly rate to the job versus an electri-
cian’s labor bid. Others see it as using their off-hours productively, and anything they
save is pure profit. However you measure your savings, you will have faced some
challenges and learned from them, and you can’t put a dollar value on that.
By now, you’ll have drawn up a plan, calculated the
loads, and gotten your permits. A plan on paper will
show you where to locate a receptacle or a light fix-
ture, but it won’t show you how to do so. For ex-
ample, will you …
➤ Run your cable through the attic and drop it
down between the wall studs?
➤ Consider using the basement or a crawl space for
access?
➤ Use wire molding and run it along the surface of
your baseboards?
➤ Remove some of the wood trim and cut into the
walls behind it to avoid patching more notice-
able sections of the walls?
Bright Idea
Arrange to look at a house under
construction so you can examine
the electrical work, especially the
service panel. This will give you a
better idea of the minimum stan-
dards you’ll have to meet when
you do your own work.
10 8964 CH08 2/1/00 8:07 AM Page 98
99
Chapter 8
➤
Call Me Sparky
A half-hour of forethought and planning can save you hours of patching. If there’s
more than one solution to the job, look at them all and decide on the best approach.
Think Before You Drill
Drilling an unnecessary hole or two through a wall stud or a floor joist isn’t a big
deal. Visitors will never see it, and you’re not weakening your house’s framing. This
won’t help you get the job done any faster, however, especially if you drill a whole se-
ries of holes in the wrong places. Drilling the wrong hole in plaster or drywall is an-
other matter because it requires a repair. In the worst-case scenario, let’s say you cut a
four-inch-diameter hole in the ceiling with a hole saw only to discover it was in the
wrong location. You would have to …
➤ Patch in new drywall or plaster.
➤ Coat the patch with finish plaster or drywall compound until it’s smooth. (In
the case of a textured surface, the texturing would have to be matched.)
➤ Prime and paint the patch.
➤ Possibly paint the entire ceiling to match the patched area.
What if you’re not sure where you want to locate a
light fixture? Attach some blue painter’s masking
tape (this type doesn’t dry out as quickly as regular
masking tape) to the proposed location and leave it
up for a day or two. Apply the tape in roughly the
same shape as the fixture. If it’s a hanging fixture,
also attach a string the same length as the chain or
light cord. You might decide you don’t want hang-
ing lights, or you might want to relocate them.
When you’re satisfied you’ve found the right loca-
tion, you can start cutting into the ceiling.
Minimum Damage,
Minimum Repairs
Hole saws and other tools of the trade do more than
make pretty holes for your electrical work. They also
keep damage and subsequent repairs to a minimum.
This is especially true when you’re cutting through
plaster and lath. Lath is the wood or metal backing
that acts as a form for wet plaster. The plaster is
forced into the lath where it eventually dries into a
wall or ceiling. It’s almost impossible to cut a clean
hole through lath using hand tools. A hole saw or
Ask an Electrician
A hole saw is a circular saw at-
tachment for electric drills. It is
used to cut through walls and
ceilings instead of using a hand
tool, usually a small keyhole
saw. A hole saw renders a
smooth, neat opening for a
round electrical box used for
most light fixtures. It’s important
to keep the hole saw straight
when in use so it doesn’t bind
and cause the drill to turn and
possibly slip.
10 8964 CH08 2/1/00 8:07 AM Page 99

Part 2
➤
Safety, Tools, and Contractors
100
a reciprocating saw will do the job quickly and cleanly. Believe me, you’ll never catch an
electrician using hand tools when a power tool is the better choice.
You might think you have limited use for a hole saw, and you might not want to
spend the money on one, but there’s another way to look at it. A four-inch hole saw
costs around $20. If you have to install five light fixtures, the hole saw is costing you
$4 a light. It’s also greatly reducing your labor time, and you can avoid the frustra-
tion of trying to cut a clean circle with hand tools. Besides, you can always find a fu-
ture use for it, especially if you have more remodeling projects in mind.
Permits
I’m not going to pretend that a permit is taken out for every electrical job, even if the
local building regulations call for it. It’s tough to justify the time and expense to ob-
tain a permit when you’re only adding a single receptacle to a circuit that can easily
support the addition. Nevertheless, I would be remiss as an author if I ever advocated
anything less than playing by the rules, especially given the possibility of harm and
damage from wayward electrical work. As a case in point, our own electrician recently
was telling me about some receptacles added in a residence—by another electrician—
without a permit, and none of them were grounded correctly.
You need a permit any time you alter the existing
system. This includes …
➤ Adding additional receptacles or fixtures.
➤ Adding new circuits.
➤ Installing a new service or a subpanel.
You usually do not need permits for repairs or updates
that do not extend the existing system. This includes …
➤ Replacing existing lights with new fixtures.
➤ Replacing broken switches or receptacles.
➤ Replacing defective circuit breakers.
Always consult your local code to confirm whether
you need to take out a permit before you do your
work.
Keeping the Inspector in Mind
An electrician has some built-in advantages when dealing with an electrical inspector.
He or she can speak knowledgeably about code issues and can justify the manner in
which the work is being carried out if there are any questions or objections. It’s
Bright Idea
You can always discuss your plans
with your local building depart-
ment before you take out a
permit. It might point out any
deficiencies and guide you
through the permit process. Your
application is more likely to go
through with fewer hitches.
10 8964 CH08 2/1/00 8:07 AM Page 100
101
Chapter 8
➤
Call Me Sparky
assumed that an electrician will be basically competent. As a do-it-yourselfer, your
work should be neater, cleaner, and on the conservative side. You don’t want to be
pushing the electrical-code creativity envelope.
The Code Calls the Shots
This bears repeating: Your local code lays out the rules you must follow when doing
electrical work. It might seem very logical to you, for example, to add a bathroom re-
ceptacle by extending your underused bedroom circuit. After all, there’s a bedroom
outlet right on the other side of the bathroom wall. What could be simpler than run-
ning a few wires and calling it good? Simpler or not, the code states the receptacles in
bathrooms must be dedicated to the bathroom, be GFCI protected, and have a mini-
mum ampacity of 15 amps. Safety, not simplicity, is the main concern of the code.
Electrical Elaboration
Remember, the inspector has the final word, whether you’re a do-it-yourselfer or a been-
in-the-business-forever electrician. This doesn’t mean an inspector can’t make a wrong
call, but the call must be changed in your favor, or you must resolve the problem as the
inspector sees it. Some inspectors have reputations for simply being disputatious; others
are more reasonable. In the worst cases, disputes over work are taken to an inspector’s
supervisor.
Insurance Issues
If safety and legality aren’t compelling enough reasons for you to follow your local
electrical code and have your work inspected, a chat with your insurance agent might
be more convincing. Any damage to your house as the result of faulty, uninspected
electrical work (no matter whether it’s done by you or an electrician) probably will
not be covered by your insurance company (read your policy carefully). This can
range from something relatively simple such as cleaning up after smoke damage to
losing your entire home in a fire.
Let this sink in for a moment. You could lose a $200,000 house if a kitchen circuit
isn’t installed properly, becomes overloaded, and starts a fire in your walls—all due to
the lack of a permit and inspection. Why take the chance? Some electricians might
tell you not to bother with a permit for some jobs, but you have to wonder why a
10 8964 CH08 2/1/00 8:07 AM Page 101

Part 2
➤
Safety, Tools, and Contractors
102
contractor would put his business reputation or even license on the line like that.
Gambling is more fun in Las Vegas. At least you can get a cheap steak dinner and
24-hour lounge acts out of it.
Tools of the Trade
Neanderthals first used stone tools around 70,000 B.C.E., and life has never been the
same since. What started out with a guy named Og making a few simple carving and
cutting implements has grown into a multibillion-dollar manufacturing behemoth. From
fine Japanese woodworking saws to portable cement mixers, there isn’t a single tool we
cannot buy or rent. If you walk into any Home Depot or other large home-improvement
chain store, you’ll find an absolute cornucopia of both hand and power tools.
Every remodeler needs some of both. The notion that the builders of yesteryear felt
greater personal accomplishment because they did everything by hand is an absolute
myth. Workers in the trades grabbed just about every labor-saving power tool they
could as they were invented.
You don’t need the very best tools. Some professionals
even shy away from top-of-the-line products because
they have more opportunities to damage them on a
job site or to lose them, sometimes through theft, as
they move around to different locations. On some
very large jobs, contractor bids might include the price
of new tools. Ironically, a homeowner, who will use
tools far less often than a professional, probably would
get more use out of expensive, top-quality tools.
Electrical work calls for some specialized tools as well
as some multiple-purpose power tools.
Hand Tools
You’ll already be familiar with some of these tools;
others are limited to the electrical trade. These tools
will cut, strip, and twist wires and will secure electrical
boxes, light fixtures, switches, and receptacles. You
could strip away insulation with a pocketknife and cut
wire by bending it back and forth until it breaks, but
you’ll end up with sloppy results and damaged cable.
Good cutting and stripping tools prevent wires and in-
sulation from getting nicked and enable you to work with wire in tight areas such as
small boxes. The following tables list the basic hand tools for electrical work and
some more specialized tools, too.
Bright Idea
Yard and estate sales can be
good sources for used tools. Look
for tools in the best condition,
especially hand tools. The cutting
edges should be sharp, and the
ends of the screwdriver blades
should not be worn or rounded.
Turn on electrical tools and look
inside the vented section. You
don’t want to see any excessive
sparking or smell a “burning”
motor.
10 8964 CH08 2/1/00 8:07 AM Page 102

103
Chapter 8
➤
Call Me Sparky
Basic Hand Tools for Electrical Work
Tool Purpose
Claw hammer Securing boxes to studs and joist
Long-nose pliers Bending wires
Lineman’s pliers Pulling wires and cutting
Diagonal pliers Cutting in tight spaces
Slotted screwdriver Securing switches and receptacles
Phillips screwdriver Securing switches and receptacles
25-inch measuring tape Setting box heights and so on
Keyhole saw Cutting through walls and ceilings
Hacksaw Cutting flexible, armored cable
Wire stripper Stripping wire insulation
Cable stripper Stripping cable insulation
Flashlight Working in dark spaces
Ladders Accessing overhead work
Voltage tester Testing for current
Receptacle analyzer Testing for electrical faults
Continuity tester Testing for interruptions in the path of a current
Specialized Hand Tools for Electrical Work
Tool Purpose
Fish tape Pulling wires through enclosed areas
Conduit bender Bending metal conduit around corners
Level Ensuring that equipment is installed straight and true
Masonry chisels Working on exterior installations
Adjustable wrench Tightening rigid conduit connectors
Your task will determine the tools you’ll need.
Power Tools
During the dawn of electrification at the end of the nineteenth century, electric tools
had yet to be invented. Knob-and-tube wiring passed through wall plates (the hori-
zontal 2×4s at the bottom of a wall) but ran along the surface of the wall studs, so
electricians had little drilling to do. These days, it all passes through studs, plates, and
joist, and no one in their right mind would hand-drill the necessary holes. The elec-
tric drill is probably the most ubiquitous power tool around.
10 8964 CH08 2/1/00 8:07 AM Page 103
Part 2
➤
Safety, Tools, and Contractors
104
Drills are manufactured according to chuck size. The
chuck holds the drill bit or another attachment such
as a grinding wheel or a buffer pad. The larger the
chuck, the bigger the drill motor (because more power
is required to drive larger drill bits and attachments).
A manufacturer’s usual line of drills includes
1
/
4
-inch,
3
/
8
-inch, and
1
/
2
-inch models.
Drills come in both corded and cordless models.
A cordless model runs on a rechargeable battery.
Cordless tools are really convenient. The drawback, of
course, is battery life. The tougher the task, such as
drilling through wood joist, the more demand on the
battery and the shorter its work life before needing a
charge. A high-end model such as a Makita
1
/
2
-inch,
18-volt cordless will hold up longer under more de-
manding drilling, but it isn’t cheap (around $245). For
repetitive, serious drilling, a corded model often is the
best choice.
fish tape
pliersscrewdrivers
continuity testermulti-purpose wire stripper
Positively Shocking
Cutting tools must be kept sharp;
otherwise they can slip and injure
you or damage the work. Screw-
drivers also can slip and should be
examined for dulled or rounded
blade ends. Pliers can turn smooth
and can lose their gripping capa-
bility. Any tool that cannot be re-
paired should be replaced.
These are some of the hand tools you’ll need for electrical work.
(Photos courtesy of Craftsman)
10 8964 CH08 2/1/00 8:07 AM Page 104

105
Chapter 8
➤
Call Me Sparky
A cordless drill usually costs more than a corded model of equal size. Sales and close-
outs can narrow the gap. Power is the key here, so stick to at least a 12-volt model.
Also compare charging times for the batteries (the shorter the better).
A decent
1
/
2
-inch drill will get you through most
electrical drilling chores and just about any other
job around the house. It will last for years and
years doing occasional residential work without
breaking your remodeling budget. Prices for an ac-
ceptable
1
/
2
-inch electric drill start at around $70
and up. You’ll find a few other power tools and ac-
cessories to be useful as well including …
➤ A reciprocating saw for sawing large holes in
walls and ceilings.
➤ A circular saw for framing work.
➤ 12/2 extension cords.
Extension cords are manufactured according to
wire gauge, just like electrical cable. A 12/2 cord is
made from 12-gauge wire and contains hot, neu-
tral, and grounding conductors.
Bright Idea
Buy a second battery along with
your cordless tool if you expect
to be using it extensively. This
way, you always have a battery
charged and ready to go while
the other battery is being used.
Professionals almost always have
two batteries on hand and rotate
them.
Corded and cordless drills.
(Images courtesy of Makita USA, Inc.)
10 8964 CH08 2/1/00 8:07 AM Page 105

Part 2
➤
Safety, Tools, and Contractors
106
Reciprocating saws.
(Photos courtesy of Makita
USA, Inc.)
Care and Feeding of Power Tools
Power tools are great timesavers and are more fun to use than hand tools. These tools
won’t be fun for long, however, if they’re misused and abused. Be sure to avoid the
following:
➤ Lifting the tool by pulling on the power cord instead of the handle or body of
the tool
➤ Dropping the tool, especially from the second floor to the first
➤ Applying too much pressure while using the tool and ignoring warning signs
such as the blade or drill bit slowing down and straining or the motor giving off
a burning smell
10 8964 CH08 2/1/00 8:07 AM Page 106
107
Chapter 8
➤
Call Me Sparky
➤ Ignoring damaged cords
➤ Leaving the tool out in the rain
Tools don’t ask for much. They’re like huskies and dogsleds. If you treat huskies well
and keep them fed, they’ll pull your sled until they drop. A power tool will keep
going and going if you take care of it. I’ve run across homeowners with 40-year-old
electric drills that still run like the day they came out of the box.
Taking care of your tools also will protect you. A frayed cord can lead to an electrical
short, which is not good for your health. A dull blade or drill bit can cause the tool to
slip and cut you instead of the wood you’re aiming at.
Electrical Elaboration
It’s best to recharge your drill batteries as soon as the drill begins to slow down. It used to
be recommended that the battery be completely run down to get a full charge, but this
no longer is the case and in fact can ruin the batteries.
Bits
Drill bits come in every shape and size for all types of jobs, from drilling through ma-
sonry to fine craftwork. The most common bits most of us have seen are twist bits
that are sold both individually and in sets based on gradation. Twist bits are fine for
small holes, but they’re not much use in electrical work except for running small,
low-voltage wires.
Electricians run more than one cable through a hole whenever possible, and larger
holes (one inch in diameter) are drilled with another type of drill bit. The following
are the most common bits for drilling larger holes:
➤ A spade bit
➤ An auger bit
➤ A power bore bit
When running a single cable through a wall stud or joist, a
5
/
8
-inch hole usually is
drilled.
10 8964 CH08 2/1/00 8:08 AM Page 107
Part 2
➤
Safety, Tools, and Contractors
108
A drill bit and hole saw for everything.
(Images courtesy of Makita USA, Inc.)
Rent or Buy?
Tools might come with some of the same speci-
fications, but one
1
/
2
-inch drill isn’t necessarily
the same as the next. One of the main differ-
ences is the size of the motor. Professional,
heavy-duty models have large motors and can
reduce your drilling time through wood and
masonry. Hand tools have their differences as
well, usually in the quality of the metal com-
ponents and the sharpness of the cutting
edges. Price is a good determinant here, and
you really do get what you pay for. That’s why
those 99¢ screwdrivers lose their square edge
quickly.
Bright Idea
Be sure to check online prices
for power tools. You’ll at least
get some idea of whether a local
price is reasonable. Tool prices
generally are pretty competitive,
but check a few different sources
before making your purchase.
10 8964 CH08 2/1/00 8:08 AM Page 108

109
Chapter 8
➤
Call Me Sparky
If your framework is exposed and you’re ready to do a lot of drilling at once, you
might be better off renting a drill with a large motor. An electrician will use a heavy-
duty drill regularly and can justify the expense of owning one. The larger the motor,
the weightier the drill, so these tools aren’t appropriate for all drilling jobs unless
you’re on steroids. As a cost comparison, a Makita 7.5 amp,
1
/
2
-inch angle drill (a large
right-angle drill) runs about $290. Local rental prices vary, but I’d be surprised if it
cost more than $20 or so a day to rent one of these. A right-angle drill is convenient
for drilling in tight spaces.
Before you rent a tool, handle it and get a feel for it. A heavy tool can be uncomfort-
able to hold for an extended period of time. You might be better off with a smaller
drill that you can handle more safely. When I had nothing else available, I drilled
through old, hardened floor joist with a
3
/
8
-inch drill without the sharpest of drill bits,
and I still got the job done (not that I recommend this approach—it took time).
UL-Approved Parts for You
It would be unusual to run across an electrical component that isn’t UL (Underwriters
Laboratories) approved, but always check for this tag or stamp of approval on any-
thing you buy, whether it’s a flashlight, power tool, or electrical device. A UL listing is
your assurance that the product has been tested for safety. Receptacles, light switches,
light fixtures, and appliances all should have UL approval.
Keep in mind that UL approval doesn’t imply longevity or ease of installation. A
cheaper, lower-end product will never be the equivalent of a more expensive product.
Home-Improvement Stores vs.
Electrical Wholesalers
Electricians usually do their shopping with suppliers whose stock and trade are elec-
trical components. Large commercial companies always shop at these establishments.
They don’t share their space with paint, kitchen cabinets, or coupon specials. They
also don’t operate quite the same as a retail establishment. This means …
➤ Don’t expect them to explain how to do your wiring or use the tools.
➤ Very little will be on display, so you’ll need to have a clear idea of what you
want when you go in.
➤ If a store is wholesale only, it might sell only to contractors.
10 8964 CH08 2/1/00 8:08 AM Page 109

Part 2
➤
Safety, Tools, and Contractors
110
The advantage of shopping at a wholesale supplier used to be the range of supplies and
devices available, but in recent years, the large homeowner-oriented building-supply
stores such as Home Base and Home Depot have narrowed this gap in the residential
categories. A trip to our local Home Base found Square D, Cutler-Hammer, and West-
inghouse service panels available as well as a huge variety of boxes, conduit, cable,
connectors—you name it. These stores are geared toward do-it-yourselfers who need to
see the components and fixtures instead of trying to order them blind at a wholesaler.
They also order merchandise by the trainload and usually have competitive prices.
Electrical Elaboration
I was in one Seattle electrical wholesaler’s store some years ago when a lot of electricians
began streaming in on their lunch hour. A homeowner was next in line, and he came in
to buy an entire electrical service. He wanted to know what he needed, explaining that
he had called earlier and was told they would “fix him right up.” The clerk was not
amused as he peppered the customer with questions about the service size he required,
the type of meter, whether the cable was coming in overhead or buried, and so on.
Answers were not forthcoming, and the line of electricians, who knew what they wanted,
just kept growing ….
The Least You Need to Know
➤
As a do-it-yourselfer, you want to handle your electrical work at least as neatly
and as safely as a professional electrician.
➤ Careful planning always saves cleanup and patch-up time.
➤ The very best tools might be out of your budget range, but the cheapest will
cost you more. Find a happy medium when you go tool shopping.
➤ It’s easier to take care of your tools than to replace them.
10 8964 CH08 2/1/00 8:08 AM Page 110

Chapter 9
Extension Cords
and Multiple
Strips
In This Chapter
➤
Differences among extension cords
➤ Choosing the right cord
➤ Avoiding overloads and problems
➤ Protection from surge suppressors
During large construction and remodeling jobs, it’s common to see extension cords
snaking throughout the work site. In fact, the condition of individual extension cords
is a common safety violation on these sites. Cracked insulation, loose plugs, and
broken or missing grounding pins are the most common problems.
A safety inspector isn’t going to ring your doorbell and check out your use of exten-
sion cords or multiple-outlet strips. Despite their common use, many people don’t
understand extension cord protocol. Something as simple as the placement of an ex-
tension-cord can make it a safety hazard. Some manufacturers don’t help much, ei-
ther. Thousands of potentially defective cords have been recalled in recent years.
Surge suppressors offer more than just a few extra outlets at the end of an electrical
cord. They can protect the valuable electronic equipment (such as computers, sound
systems, and fax machines) that we increasingly can’t live without from voltage jumps
in our electrical systems. Think of a surge suppressor as the sacrificial lamb that takes
the hit from a voltage spike so your computer can live to frustrate you another day.
Unfortunately, a suppressor cannot work without a grounding conductor, so if you
have an old two-wire system, you’re out of luck.
11 8964 CH09 2/1/00 8:19 AM Page 111

Part 2
➤
Safety, Tools, and Contractors
112
Every manufacturer of this protective equipment seems to believe its suppressors
could soak up a bolt of lightning thrown by Thor himself. A little information and a
few figures will help you choose the best suppressor for your home needs.
Extension-Cord Protocol
Think of an extension cord as a portable, impermanent form of wiring. It’s subject to
the same laws and limitations as any other electrical conductor, which means it can
be overloaded, it can short out, and its insulation can melt. On top of that, they’re
easy to trip over when they’re left lying around a work site.
Extension cords are handy and necessary, but they need to be used carefully and in-
spected before each job. According to the Consumer Product Safety Commission …
➤ More than 3,000 residential fires each year are attributed to extension cords.
Most of the problems are the result of short circuits, excessive loads, and misuse
of the cords.
➤ Hospital emergency rooms treat more than 2,000 injuries each year associated
with extension cords. These injuries include fractures, lacerations, and sprains
from tripping over the cords. About half of the injuries to children are caused
by electrical burns to the mouth.
➤ Tens of millions of dollars in fire damage occur yearly as the result of misuse of
extension cords.
You might never look at an extension cord in the same way again!
What the NEC Says
Extension cords aren’t permanent wiring, so the
National Electrical Code doesn’t apply to them per se,
but it does lay out some guidelines. The NEC would
prefer that you use a close-by receptacle, but that’s a
little unrealistic if you’re running an electric lawn-
mower, for example. The code recognizes that exten-
sion cords are meant only for temporary use for
portable loads that aren’t fixed to one specific
location.
What about a table lamp and clock radio by your bed-
side connected to a small-gauge extension cord be-
cause the only receptacle on the wall is beyond the
length of their appliance cords? The NEC would like
you to install a new receptacle, but sometimes this
isn’t practical. If you’re renting, you would have to
Bright Idea
Unplug and put cords away after
each use. This happens on most
commercial job sites as part of the
daily cleanup before everyone
goes home. It’s a good practice
for a do-it-yourselfer as well.
11 8964 CH09 2/1/00 8:19 AM Page 112

113
Chapter 9
➤
Extension Cords and Multiple Strips
convince your landlord/landlady to accept this additional expense. For such a small
load, the use of an extension cord on a regular basis isn’t a big deal. Problems occur,
however, when extension cords are used to run large loads on a more or less perma-
nent basis. Small extension cords become a bigger problem when they are installed
under a rug or are in any way covered over so they retain heat.
One Size Doesn’t Fit All
Extension cords are measured by their wire gauge
size just like the wires running inside your walls.
Their ampacity rating uses the same American Wire
Gauge (AW G ) standards: the smaller the number,
the thicker the wire (which means it can carry a
larger current because it offers less resistance). This
is especially important with longer cords because a
current loses some voltage as it travels over a con-
ductor, and this can affect the performance of a de-
vice (such as a power tool) on the other end. When
the voltage drops, any electrical equipment on the
cord will pull more current to compensate for the
lost voltage. This generates more heat, which
causes damage to the tool. The longer the con-
ductor, the greater the voltage drop. Contractors
usually use a 12/2 extension cord to run their
tools, and you should, too.
Typically, extension cords are available in 10, 12,
14, 16, and 18 gauges. An 18-gauge cord is the size
normally used for very small loads such as lamps
or clock radios.
The following table shows typical extension-cord
lengths and gauge combinations.
Positively Shocking
You don’t want to overload an
extension cord by plugging in an
electrical load too large for its
ampacity. One sure sign is a cord
that’s warm or hot to the touch.
If this happens, turn the devices
off or use a larger cord. And
never use an extension cord to
run a portable heater!
Ask an Electrician
AWG stands for American
Wire Gauge. You can always
use a larger-gauge wire than a
load calls for, but you cannot
safely use a smaller gauge. You
can’t go wrong with a 12-gauge
extension cord for your remod-
eling work.
11 8964 CH09 2/1/00 8:19 AM Page 113

Part 2
➤
Safety, Tools, and Contractors
114
Extension Cord Gauges (AWG), Lengths, and Amp Ratings
Cord Length
Amp Rating 50 Foot 100 Foot 200 Foot
8 to 10 amps 18 AWG 14 AWG 12 AWG
10 to 12 amps 16 14 10
12 to 14 amps 16 12 10
14 to 16 amps 16 12 10
16 to 18 amps 14 12 8
When Cords Go Bad
In the 1960s, the first recalls of defective or assumed-defective automobiles began, and
we’ve been recalling consumer products ever since. Surprisingly, there have been a
number of extension-cord recalls, although they don’t get quite the same publicity as,
say, recalling the family minivan because the wheels have a tendency to fall off. The fol-
lowing is a list of recent recalls, courtesy of the Consumer Product Safety Commission:
➤ Approximately 230,000 extension cords manufactured in China and distributed
by a Texas firm were recalled due to undersized wires and improper plugs, ac-
cording to a September 20, 1994, announcement.
➤ In a May 29, 1997, press release, the General Cable Corp. announced the recall
of 2,700 outdoor extension cords sold under the Carol and Ace brand names
due to an exposed wire near the receptacle. No injuries had been reported from
the use of these cords.
➤ A Miami, Florida, firm recalled almost 6,600 extension cords and power strips in
1998 due to undersized wires that could not carry the advertised load, improp-
erly polarized plugs, and no overcurrent protection in the surge protectors.
➤ A February 24, 1999, press release warned consumers about two million faulty
extension cords, power strips, and surge protectors involved in 25 recalls since
1994. An ongoing investigation started in 1997 found that most of the faulty
cords were made in China, were sold at discount stores, and in some cases, had
counterfeit UL certification labels.
This doesn’t exactly inspire confidence, but it’s useful because it provides the motiva-
tion to inspect and check your extension cords on a regular basis. On large construc-
tion sites, monthly testing of extension cords for grounding is mandatory, as is
recording the test results. Cords that pass inspection are marked with a piece of col-
ored tape. (The color changes monthly.)
11 8964 CH09 2/1/00 8:19 AM Page 114

115
Chapter 9
➤
Extension Cords and Multiple Strips
Know the Rules
Extension cords come with warnings and usage guidelines just like every other con-
sumer product. Some of the best advice comes from fire departments and the
Consumer Product Safety Council, both of which have experience with the injuries
and destruction caused by misuse of extension cords and power strips. Here’s a list of
extension cord do’s and don’ts:
➤ Use extension cords for temporary use only.
➤ Unplug extension cords when they’re not in use.
➤ Only use cords having gauges that are properly matched to the load and the cur-
rent to be drawn.
➤ Only use cords outside that are specifically marked for this type of use.
➤ Only use polarized receptacles with polarized cords.
➤ Never remove the grounding prong from the plug of an extension cord to fit it
into an ungrounded receptacle.
➤ Regularly inspect your cords for damage.
➤ Never splice a damaged extension cord or one cord to another.
➤ Do not run cords across or through wet areas or puddles.
➤ Hang cords high off the floor to avoid tripping hazards on work sites. Don’t
allow cords to hang from counter- or tabletops where children can pull on them.
➤ Cover any unused sections of the cord’s outlet end with safety caps to keep chil-
dren from inserting objects.
➤ Replace damaged or worn cords.
➤ Always stretch out the cord, and never cover it with rugs, carpets, clothing, or
heavy objects. Cords can build up heat if they are used when coiled or looped.
Electrical Elaboration
One of the main problems with extension-cord use in a residence is forgetting that you’re
using cords! I’ve been on a number of jobs where extension cords had been tacked up in
basements for years to run lights or power tools. The owner might have intended a tem-
porary installation. If you’ve purchased an old house, you might find extension cords that
have blended into the background. Remove them!
11 8964 CH09 2/1/00 8:19 AM Page 115

Part 2
➤
Safety, Tools, and Contractors
116
➤ Extension cords are temporary wiring. Don’t at-
tach them to walls or woodwork with staples or
nails that can damage the cord and present a fire
hazard.
➤ Don’t plug extension cords together. Instead, use a
single cord long enough to do the job on its own.
➤ Buy cords that have been tested by an approved
testing lab such as Underwriters Laboratory (UL)
or Electrical Testing Laboratories (ETL).
Homemade Cords
Once in a while, I run across a home in which a con-
tractor used extension cords made from nonmetalic
cable with a plug spliced on to one end and a pair of
receptacles in a box on the other. You would never see
this on a large commercial job because it would be considered a safety hazard. The
more creative guys attach the receptacles to a wood stand with a plywood base so a
work light can be mounted. I don’t see any clear advantage to messing around with
made-on-the-job cords like this when an approved 100-foot, 12/2 extension cord can
be purchased for a modest amount of money and will last for years.
Multiple-Outlet Devices
If you’ve got a computer and its peripherals (a printer,
scanner, and ZIP drive), you probably have a power
strip of some kind unless you specifically wire a room
of your house as you would an office and give your-
self plenty of receptacles. Power strips usually are
rectangular-shaped with four or more individual out-
lets and a built-in circuit breaker.
Most power strips in hardware and discount stores are
an all-purpose type and are not appropriate for com-
puter use. Leviton, for example, makes computer-grade
strips that, according to the catalog, feature “EMI/RFI
noise attenuation for microprocessor-driven electronic
equipment.” They also provide surge suppression.
Bright Idea
Keep your extension cords free
of kinks and knots. The easiest
way to straighten out longer
cords is to hang them out a
second- or third-story window
and let them untwist.
Ask an Electrician
EMI and RFI stand for electro-
magnetic interference and
radio frequency interfer-
ence, respectively. This is “noise”
on the power line that can in-
terfere with sensitive electronic
equipment. The word atten-
uate refers to a reduction in
power or energy (or, in surge
suppressors, noise).
11 8964 CH09 2/1/00 8:19 AM Page 116

117
Chapter 9
➤
Extension Cords and Multiple Strips
A Leviton power strip.
A Leviton suppression
strip.
11 8964 CH09 2/1/00 8:19 AM Page 117
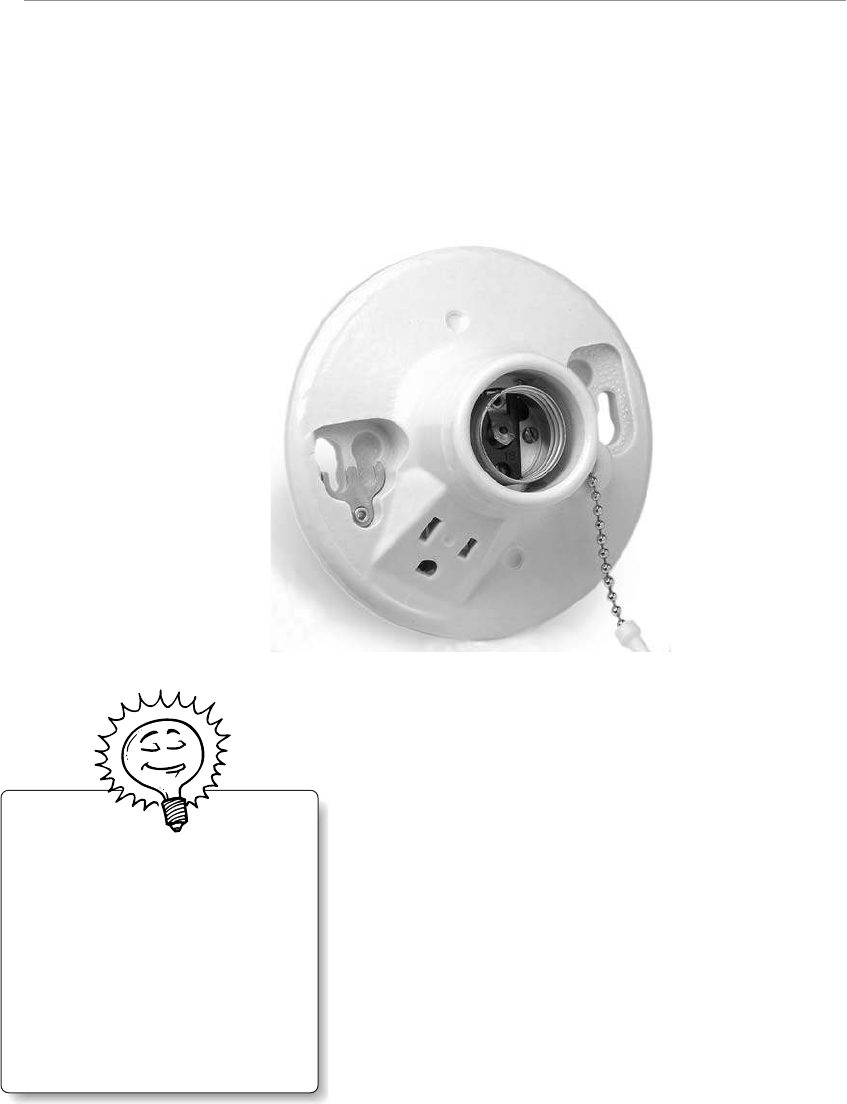
Part 2
➤
Safety, Tools, and Contractors
118
You can add receptacles by using outlet box lampholders. These typically are porce-
lain light fixtures with pull chains to control the lights (instead of a switch). Some of
these lampholders, often found in unfinished spaces in a house, come with built-in
outlets. These really are meant as a temporary power source, not for running multiple
power tools. Remember, as a lighting circuit, it’s most likely running on only 15
amps. Note that in a crawl space, the receptacle on a porcelain lampholder must be
GFCI-protected.
A Leviton lampholder.
Surge-Suppression Devices
Electricity is like human relationships: It has its peaks,
its low points, and a lot of time in between when it
just muddles through without causing much excite-
ment. Left to its own devices, it probably would
muddle through day in and day out, but we (and a
lightning storm or two) interfere and cause surges and
spikes. What are they? Simply put, they are increases,
usually sudden, in electrical voltage.
Surges differ from spikes in part by how they occur.
Surges can result from …
➤ The energy demand when a large appliance is
first turned on.
Bright Idea
Consider using a plug-in GFCI
outlet that can protect old two-
wire systems. These units simply
plug into existing receptacles for
standard ground-fault protection
and can easily be removed and
installed in another receptacle as
needed.
11 8964 CH09 2/1/00 8:20 AM Page 118
119
Chapter 9
➤
Extension Cords and Multiple Strips
➤ Routine maintenance and switching by your utility company.
➤ The rush of current to your house after power that was cut off is turned on again.
Spikes, on the other hand, most often are caused by lightning or by cars running into
power poles. Spikes can send as much as 6,000 volts down your line.
A surge is apparent when you turn on a garbage disposer or a laundry-room appli-
ance. The appliance requires a surge of power to get rolling. This is the same principle
behind moving a stationary body: The initial force or power required is greater than
the amount needed to sustain movement. The first few pushes you give your kids on
a swing require more energy than later ones after momentum has been established.
Electrical Elaboration
Another problem, the opposite of a surge or a spike, is a sag. Sags are brief decreases in
voltage level, and they usually result from too much demand for power on the electrical
system. This sudden loss can cause computer crashes and possible loss or corruption of
data. A sag is the same as undervoltage. Brownouts and blackouts are huge undervoltage
situations.
Both surges and spikes are fairly short in duration, but they differ in their voltage
consequences. A spike often brings thousands of volts with it but only lasts for a few
microseconds (millionths of seconds). A surge lasts longer but has much lower voltage
as a rule. Your electrical system isn’t quick enough to protect your relatively fragile
electronic equipment from surges and spikes, but a surge suppressor will do the trick.
What Do They Do?
In addition to making surge-suppressor salespeople happy when they sell them, a
surge suppressor protects all the electronic equipment we seem to have around our
homes these days, from computers to VCRs. A suppressor, which typically goes be-
tween your electronic equipment and a receptacle, detects a voltage increase and pre-
vents it from continuing into the equipment.
11 8964 CH09 2/1/00 8:20 AM Page 119

Part 2
➤
Safety, Tools, and Contractors
120
What should you consider protecting? Anything with
a microchip such as …
➤ Computers.
➤ Televisions, VCRs, and stereos.
➤ Telephones and answering machines.
➤ Microwave ovens.
Why telephones? Phone lines and cable lines run in
close proximity to power lines. An electrical surge
could travel down the phone or TV line instead of the
power line. Not only your phones but also your com-
puter could be damaged if it has a modem and is con-
nected to your phone line.
Computers Aren’t Very Tough
We can replace a television or an answering machine
quite easily, but it’s not so easy to retrieve lost data
on a hard drive after a surge or spike hits the old PC.
The worst-case scenarios, at least as presented by var-
ious surge-suppressor manufacturers, include …
➤ Losing any data in memory.
➤ Possible damage to the file allocation table be-
cause the computer would not have been shut
down properly.
➤ The stress of regular, unnoticed surges gradually
deteriorating your computer’s components.
➤ Sags causing a system crash and the possible loss
of data.
➤ A strong spike frying your PC.
If you live in an area of frequent storms or windy
weather that might cause your power to go out, a
surge suppressor should be higher up on your birthday
wish list than if storms are infrequent. Nevertheless,
given our creeping dependence on computers and
stored data, a surge suppressor is a good idea wherever you are. (Sorting through all
the competing claims by different manufacturers is another issue altogether.)
Bright Idea
You can’t predict when a spike
will occur, but a lightning storm
rolling in serves as a warning. If
you don’t need to use your elec-
tronic equipment at the time,
simply unplug it until the storm
is over. If you’re leaving town for
an extended trip, unplug every-
thing electronic and you won’t
have to worry about it.
Positively Shocking
A surge suppressor can only go so
far in protecting your equip-
ment. It won’t stop a lightning
strike to your power lines, but a
lightning rod might. Another
legacy of Ben Franklin, a light-
ning rod redirects lightning away
from your house and into the
ground.
11 8964 CH09 2/1/00 8:20 AM Page 120

121
Chapter 9
➤
Extension Cords and Multiple Strips
Suppressors for Everyone
If you search the Web for surge suppressors or go
into a computer store, you’ll be surprised at how
many manufacturers have the absolutely best
product available. They can’t even agree on the
best criteria to judge suppressors. What’s a con-
sumer to do? Simple: Pick the suppressor with the
best warranty. Such a warranty will guarantee the
following:
➤ Repair or replacement of the suppressor and
any connected equipment for life if the sup-
pressor fails to protect against surges
➤ Payment for the retrieval of lost data
➤ A high maximum dollar amount for damages
This kind of guarantee doesn’t come as cheaply as
a less-inclusive one, but it does make choosing a
suppressor a lot easier than wading through the
claims and manufacturers’ specifications. If you
must wade, here are some considerations before
you purchase:
➤ The suppressor should have at least a UL 1449-330-volt let-through rating (the
lowest amount of voltage the suppressor allows to pass through). This is basi-
cally a safety rating. A higher rating, UL Adjunct Endurance Testing, meets
tougher government Commercial Item Description (CID) Class, Grade, and
Mode specifications.
➤ Telephone line, fax line, and coaxial cable line protection should be provided.
➤ It should have a high joule rating. (This measures your suppressor’s capability to
absorb energy, which is measured in joules.)
➤ It should have high surge amp ratings.
➤ The suppressor should have an indicator light to show that the device is
working.
➤ It should provide protection in all three modes (surges between hot, neutral,
and ground lines).
➤ It should have instantaneous response time.
➤ The unit should shut off power to all of its outlets once the unit has reached its
capacity to protect.
➤ It should offer a broad degree of EMI/RFI noise reduction.
Bright Idea
Don’t take a chance on losing any
of your computer data, even if
you have a top-quality surge sup-
pressor. Follow the golden rules of
computing by regularly saving your
data and making backup copies.
No lightning bolt is going to jump
out of your wall receptacle and
cook a ZIP disk after it’s been re-
moved from its drive.
11 8964 CH09 2/1/00 8:20 AM Page 121

Part 2
➤
Safety, Tools, and Contractors
122
Competing claims among surge-suppressor manufac-
turers start sounding like taunts between opposing
cliques in the schoolyard. It begins to sound like the
Macintosh versus PC battle. My advice? I’d still buy
the suppressor with the best guarantee for my price
range. Any damage to your equipment or data then
becomes the manufacturer’s problem. (Read the guar-
antee carefully.)
Speaking About Computers
A couple other tech toys you might not have known
you desperately needed are line conditioners and an
uninterrupted power supply (UPS). A line conditioner
adjusts the line voltage to a norm, getting rid of highs
and lows. This is a good piece of equipment to have if
your home electrical system has a regular case of the
sags. A UPS is basically a sophisticated battery pack
with various filtering properties that kick in when you
have a power outage. The key word here is “battery.” You don’t want to be running
your laser printer or copying machine off of this if you lose power. Use it for your
computer, not the peripherals.
More Rules
Surge suppressors come with a few guidelines as well, just like extension cords. These
guidelines include …
➤ Don’t go beyond the electrical rating of the suppressor.
➤ Surge suppressors are designed for indoor use in dry areas.
➤ Don’t plug the suppressor into an extension cord.
➤ Keep children and pets away from the suppressor’s power cord.
➤ Suppressors are not designed to be used with aquariums.
Going Whole Hog
Some available systems offer protection starting at your home’s meter. A suppressor is
installed near the electric meter, and it protects major appliances from surges and
lightning strikes. Standard plug-in suppressors are installed inside your home for
more sensitive equipment. The Square D company manufactures an inexpensive
surge suppressor that mounts directly in the service panel like a two-pole breaker.
Talk with your utility company to inquire about these whole-house systems.
Positively Shocking
Most surge suppressors require a
grounded receptacle. Replacing
an old two-wire receptacle with
a GFCI will protect you, but it
will not ground any equipment
plugged into it. In addition, a
grounded receptacle will help
protect equipment from static
electricity.
11 8964 CH09 2/1/00 8:20 AM Page 122

123
Chapter 9
➤
Extension Cords and Multiple Strips
The Least You Need to Know
➤
Extension cords are widely used, but they are not always used appropriately.
➤ For most jobs, a heavy-gauge extension cord is a safe choice.
➤ Give your extension cord a quick inspection before, during, and after a job.
➤ Sorting out competing surge-suppressor claims can be confusing. Always look
for a solid guarantee against damage and data loss.
11 8964 CH09 2/1/00 8:20 AM Page 123
11 8964 CH09 2/1/00 8:20 AM Page 124

Chapter 10
Electing for
Electricians
In This Chapter
➤
You and your contractor
➤ Working on the plans
➤ Understanding your contract
➤ Knowing who does what
➤ Choice materials, choice results
Few homeowners do all the necessary electrical work on an old house. Upgrading a
service, tying into old circuits, and rewiring existing ceiling lights can be intimidating
tasks (of course, that’s why you bought this book). Even if you choose to do more lim-
ited electrical work and hire the rest out, a good working knowledge of electricity and
your home’s electrical system will enable you to discuss the job intelligently with your
electrician and to compare bids more critically.
When you hire a contractor, you each have your respective responsibilities and expec-
tations. You need to clearly communicate what you want done and the time frame in
which it must be completed. The contractor must be equally clear in stating the work
as he or she understands it from your plans, the cost for labor and materials, and a
reasonable completion date. Any changes by either party must be negotiated.
This might be a new experience for you. You’ll find this stranger and perhaps a crew
of one or two people wandering around your house in work boots, punching holes in
the walls, and shutting your power off from time to time. Who are these people and
12 8964 CH10 2/1/00 8:11 AM Page 125

Part 2
➤
Safety, Tools, and Contractors
126
how do you deal with them? Suddenly you’re an employer of sorts, hoping these new
employees are going to work out before you write them a check.
You and your contractor should have the same goal: an efficient job done as agreed
to in advance with a minimum of disruption. Don’t worry, clear communications
with a carefully selected electrician—and maybe a box of doughnuts in the
morning—will smooth the way for everyone involved.
Hiring It Out
The most meaningful compliment I received about my last book, The Complete Idiot’s
Guide to Remodeling Your Home, came from the production editor. She read the book
while in the process of buying her first house and hiring a home inspector to give the
place a once-over. He told her he was impressed with how much she knew. Her
knowledge allowed her to intelligently scrutinize her potential new home and more
clearly understand the inspector’s comments and observations.
You’ll want to be knowledgeable as well, not only about your electrical system but
also about contractors. A contract, whether it’s oral or written, is a legally binding
agreement. You need to know your rights, the contractor’s rights, the bidding process,
and payment schedules. There also are intangibles such as your personal reactions to
individual electricians bidding the job. If red flags start popping up in front of your
eyes, you should start looking for another electrician.
First, however, you have to find an electrician.
Contracting for a Contractor
If you skim the Yellow Pages, you’ll find lots of listings
for electrical contractors, but that’s not the best way to
choose one for your job. You probably didn’t find your
physician, dentist, or auto mechanic this way, so why
choose an electrician blindly? Do what you did with
all the other professionals in your life—get some
referrals.
Start with other homeowners. They will be your most
obvious resource, particularly if they’ve done any re-
modeling. Ask your friends, family, co-workers, even
your dentist! There is no guarantee that a contractor
will give you the same results in your home, but
there’s a good chance you’ll be satisfied with the re-
sults of a referral. Most small contractors survive on
referrals and will want yours as well.
Bright Idea
In prosperous times, contractors
tend to be booked solid weeks
and months in advance. Even
getting an estimate can be diffi-
cult, especially during the sum-
mer months. Plan ahead as far as
possible.
12 8964 CH10 2/1/00 8:11 AM Page 126
127
Chapter 10
➤
Electing for Electricians
A contractor’s time is valuable, so don’t call a dozen of them to give you a price for
adding one circuit to your house. A larger job (such as a service change or a total
rewire) is another matter, and three or four bids would not be inappropriate. First,
however, there are a few legalities to consider.
License and Bonding Spoken Here
Unless you live buried away in the extreme northeast corner of Montana in an area
so remote that no one, not even the IRS or junk mailers, knows it exists, you should
expect an electrician to be licensed, bonded, and insured in accordance with local
and state laws. These requirements are fairly standard across the country. They pro-
tect you and the contractor from each other if problems arise.
A license is simply permission from a governing authority to do a specific business. It
shows that a contractor is registered, often with both the city and the state, and has
met certain standards. This enables a contractor to hang a shingle out and say, “I’m
an electrician.” It also means the local government has collected a registration fee
and will be collecting taxes from the licensee.
Two requirements usually have to be met before a
contractor’s license is issued:
➤ The individual must be bonded.
➤ The business must be insured.
The Name’s Bond, Surety Bond
A contractor’s bond (surety bond) is required in
many states before a contractor will be issued a li-
cense to operate. The bond helps guarantee that a
contractor will perform according to the terms of a
contract. I suppose it’s not much different in prin-
ciple from a jail bond, which is an attempt to
guarantee a defendant’s appearance in court, but
with a more wholesome connotation.
A bond is registered with a governing authority in
one of two ways:
➤ The contractor can establish a special ac-
count with a cash deposit equivalent to the amount of the bond.
➤ A bonding company can be engaged for a fee.
Positively Shocking
Make sure your electrician’s li-
cense, bond, and insurance are
current. All three should be re-
newed on a yearly basis. If you
have any questions at all, call
your city or state department of
licensing and do a credentials
check. You don’t want any prob-
lems from hiring an unlicensed
individual.
12 8964 CH10 2/1/00 8:11 AM Page 127
Part 2
➤
Safety, Tools, and Contractors
128
The amount of the bond varies from state to state. In
Washington, for example, the bonding rates are rela-
tively low. A general contractor only has to post a
$6,000 bond, and a specialty contractor or subcon-
tractor (electricians, plumbers, painters, and so on)
must post only a $4,000 bond. If you are not satisfied
with a contractor’s work, you can put in a claim
against the bond, although you’re limited to its dollar
amount. This isn’t much consolation if all you can
collect is a fraction of the value of the work, and you
must pursue additional financial relief through the
courts or arbitration.
Any claim against a contractor must be legitimate. You
have to prove that the work was not done to the spec-
ifications agreed to in your contract. Just as a bond
gives you some leverage in the event of faulty work, a
lien (sounds like “lean,” appropriately enough) gives a
contractor some protection against a customer’s spu-
rious claims. Sometimes called a mechanic’s lien, this
handy piece of legal work enables a contractor to file a claim against your home until
your debt is paid. This doesn’t mean your contractor is going to take up residence in
your spare bedroom if you don’t pay, but the lien must be satisfied before the prop-
erty can be sold. In some cases, a forced sale of the property can occur.
Ask an Electrician
Webster’s Dictionary defines
surety as “a guarantee, assur-
ance, or certainty” and dates the
origins of the word back to the
fourteenth century. The term
surety bond dates back to the
early twentieth century as “a
bond guaranteeing performance
of a contract or obligation.”
Electrical Elaboration
A contractor’s bond is the minimum amount needed to establish a business and become
licensed. For large jobs, especially commercial work, the client usually requires a perform-
ance bond in an amount equal to the entire value of the job. Performance bonds typi-
cally are taken out through a bonding company. (Otherwise, they would tie up too much
capital for most contractors.)
Insurance Is a Must
I once did an Internet search for insurance jokes, and I couldn’t find any. There
were plenty of jokes about lawyers, doctors, and even some about accountants, but
12 8964 CH10 2/1/00 8:11 AM Page 128

129
Chapter 10
➤
Electing for Electricians
insurance seems to have escaped the comical wrath of joke writers. This is the bottom
line: You want your contractor to be fully insured.
Proof of insurance usually is a requirement for a contractor to obtain a license. Insur-
ance protects you if there’s an accident or damage during the course of the work. In
addition to a general liability policy, contractors must cover their employees with
government-mandated policies such as workers’ compensation.
Three in One
A legitimate contractor will be licensed, bonded, and insured. Without all three of
these qualifications, you’re putting yourself and your home at risk. If a cash-only, un-
licensed, we-don’t-need-no-stinkin’-contract electrician works on your house and falls
off a ladder, shorts out an appliance, or incorrectly wires a circuit that causes a fire,
you might never receive compensation for damages. When a licensed electrician causes
a problem, you have some legal assurances the problem can eventually be paid for.
Plans and Specifications—Always!
You can’t expect someone to bid on a job if you don’t specify exactly what you want
done. It’s not enough to say, “Just add some receptacles and lights wherever you
think we need them.” You have to specify where you want them, the types of fixtures
you want, and even the styles of light bulbs. You don’t need detailed plans and speci-
fications for everything. Adding a clothes-dryer circuit, for example, is pretty straight-
forward once you’ve designated where the laundry will be located.
Details increase as the scope of the job increases. Installing a new service panel might
mean a different location than an existing box. (This obviously is true when an old
fuse box located off a back porch is replaced.) A complete update of your existing
system, including running all new wire, would have to be detailed, especially when it
comes to fixtures and their locations. The following list outlines a very basic plan:
Sample House Plan
Main service: 200-amp Square D QO service panel
Location: NE corner of basement
Existing fuse box will serve as a junction box for any existing circuits to be re-
tained. The door will be screwed shut.
New circuits to be added: Washing machine, dryer
Kitchen: Add two 20-amp small-appliance circuits with GFCIs, white Leviton re-
ceptacles, and cover plates. Install nine recessed cans (white trim) with dimmer
switch (white) and two 18-inch fluorescent fixtures over counters. Run outlet for
range and separate circuits for microwave, refrigerator, and disposer.
12 8964 CH10 2/1/00 8:11 AM Page 129

Part 2
➤
Safety, Tools, and Contractors
130
Lighting: Add sufficient 15-amp circuits to bring bedrooms, living and dining
room, and hallway up to code for receptacles (six-foot rule).
Office: Run dedicated 15-amp computer circuit.
Master bathroom: Run GFCI. Install six-light fixture over mirror and recessed can
over toilet (white trim). Install Nutone QT-200 fan.
First-floor bath: Run GFCI. Install four-light fixture over mirror. Install Nutone
QT-100 fan.
Living room: Install four wall sconces and one recessed can over fireplace.
Dining: Use existing chandelier. Check wiring for safety.
Bedroom hallway: Use existing fixture and check wiring.
Use existing bedroom ceiling lights and check wiring.
Basement: Run 20-amp circuit for workshop. Install four-foot fluorescent fixtures.
Install six ceramic light fixtures in basement ceiling, locations to be marked.
Garage: Run GFCI and one light over each car bay. Run wiring for two garage-
door openers (to be installed by others).
Front porch: Install new porch light (Nautilus style). Install GFCI for outdoor use.
Rear porch: Use existing light and check wiring. Install GFCI for outdoor use.
Contractor will supply all labor and materials and
will remove any refuse from job site. Job will be
kept broom-clean daily. Billing will be done in two
installments with a 10-percent down payment to
be applied toward materials.
Who Draws Them Up?
You, your designer, or your electrician will draw up or
sketch any plans for the electrical work. Written de-
scriptions (“locate panel in NE corner of basement”)
usually are adequate for most residential jobs. Specific
light locations, however, should be noted on a sketch
or plan of the room. It’s not a bad idea to put some
kind of marker on the wall, such as blue masking tape,
to confirm the location. An architect’s or designer’s
plans for a general remodel should note any electrical
requirements.
Bright Idea
Large home-improvement cen-
ters and specialty retailers are
great places to visit to see cur-
rent types of fixtures and lighting
systems. Visit a number of estab-
lishments before making your
final decisions. Check out dis-
posers, fans, and other small-
electrical items you might be
installing as well.
12 8964 CH10 2/1/00 8:11 AM Page 130

131
Chapter 10
➤
Electing for Electricians
Allowing Substitutions
As remodeling bids come in and budgets get stretched, your imported marble coun-
tertop might suddenly become plastic laminate and your oak floor might become vinyl.
The same is true with electrical work. Lights, appliances, and garage-door openers are
available in a range of models and prices. Sometimes your electrician can come up with
an equivalent-model fixture at a lower price with no appreciable difference in quality or
appearance. Your bids and specifications should allow for such substitutions.
Comparing Bids
A clear set of plans and specifications enables all the bidding electricians to play by
the same set of ground rules. It also helps you fairly compare their prices. You’ll find,
as you put a job out to bid, that each electrician has a slightly different take on how
to do the work and what materials to use. Keep these suggestions in mind as you
scrutinize the bids so you can adjust for specific differences in cost.
Let’s say you want a standard, switch-controlled light to be installed outside your
garage. One of your bidders might suggest that you put in a motion detector instead,
which will automatically turn on the light when it detects someone moving nearby.
Another bidder might suggest that you install a larger ventilation fan in your kitchen.
The service panel is the big item. If you specify one brand and an electrician recom-
mends another, find out why and compare the differences in cost by calling an elec-
trical wholesaler.
About Those Contracts
Some contractors—and homeowners—want a written contract for everything. This is
unnecessary for small jobs, but there’s no harm in writing up a short letter of intent.
You could say, for example, “Contractor will supply all labor and materials for one
new bathroom circuit with GFCI receptacle for the sum of ______ dollars plus appli-
cable tax. Homeowner will take care of any wall repair or patching.” For that matter,
your contractor might supply a contract form for small jobs with a written descrip-
tion of the work and ask for your signature to confirm your acceptance.
Larger jobs usually require a written contract. If your electrician is hesitant to provide
one or to sign yours, find someone else to do the work. No legitimate contractor will
shy away from a valid contract.
Write It Down
A contract should include everything you want done. Don’t assume that your electri-
cian can read your mind and will install cream-colored receptacles when white is
more common. If you have any questions, ask before you sign.
12 8964 CH10 2/1/00 8:11 AM Page 131
Part 2
➤
Safety, Tools, and Contractors
132
Change Orders
A change order is a modification to a contract. It can be initiated by either you or your
contractor, but it must be agreed to by both. You might decide to add more lights, for
example, or a different type of fixture. Your electrician might run across unforeseen
problems such as an existing circuit that must be replaced (when you assumed it
could still be used). A change order usually means an increase in the price of the job,
but this is not always the case. You might decide to eliminate some fixtures or to go
for less-expensive ones, thus lowering your overall cost.
The best change order, ideally, is no change order. Change orders can delay a job and
might cause your electrician to have to undo work completed under your original
specifications to accommodate the requested change. No plan is perfect. Remodeling
is a fluid experience. As it progresses, you might see things you did not see during the
planning stages. A skylight in the bedroom might become more desirable than the
track lighting that just went in this morning. Don’t laugh, I had a client with more
money than sense who did just that. Out came the new drywall and lights; in went
new skylights and windows into newly finished rooms. At least he kept the carpen-
ters employed and happy.
A Deal’s a Deal
After you’ve agreed to the job and have signed on the dotted line, you have to hold
up your end of things, too. This means …
➤ Clearing furniture and household items out of the way so your electrician can
work.
Electrical Elaboration
In addition to describing the job and the materials to be installed, a contract also should
state the terms of payment. Some contractors will want a percentage in advance (de-
pending on the size of the job). Some states limit this percentage. You also might be
asked to pay to order materials in advance. If the demand for prepayment seems unrea-
sonable (it’s easy enough to find out the cost of the materials by calling a wholesaler),
find another electrician. You’ll know after you get a couple of competing bids if someone
is way out of line or not.
12 8964 CH10 2/1/00 8:11 AM Page 132
133
Chapter 10
➤
Electing for Electricians
➤ Keeping your children at a safe distance from
the work activity.
➤ Controlling your pets.
➤ Providing access to your house, either with a
key or by being home at the start of the
workday.
➤ Understanding that your contractor and any
crew will need access to a bathroom and
somewhere to take their breaks.
➤ Paying your bill in a timely manner. Small
contractors are especially dependent on reg-
ular cash flow, and you shouldn’t unneces-
sarily delay payment.
Being a good customer is just as important as
being a good contractor—all good contractors
have stories about customers from hell.
Cleanup and Wall-Repair Woes
In an existing house, any extensive rewiring will require opening up some walls and
ceilings by cutting into the drywall or plaster. Electricians have two conflicting issues
here: One voice—yours—says keep the holes small; the other voice—the electrician’s—
says a larger hole makes the job easier and faster. Guess which one wins out? I’m not
against electricians, and no, it doesn’t mean they’re going to knock a three-foot-by-
three-foot hole in your wall just to pull one wire through it. It does mean, however,
that you’ll have some wall and ceiling repairs to do after the electrician is finished.
Positively Shocking
Your electrician can rightfully put
a clause in your contract that he
or she will not assume any re-
sponsibility for damage to house-
hold items left in the way or not
adequately protected on the
work site. This includes anything
hanging on a wall that could
loosen and fall from hammering,
sawing, or drilling through the
wall.
Electrical Elaboration
Major electrical work requires more than one inspection. An initial inspection covers the
rough-in work, the running and securing of cable inside the walls. When this passes inspec-
tion, it’s “good to cover,” which means the drywall or plaster can be installed. You cannot
cover electrical work until it’s been inspected, so don’t schedule it until after the inspection.
12 8964 CH10 2/1/00 8:11 AM Page 133

Part 2
➤
Safety, Tools, and Contractors
134
Drywall and plaster repair costs need to be figured into your electrical budget unless
you do the work yourself (see Chapter 15, “Working Around Existing Wiring”). It
doesn’t stop there, however. Your electrician might have to drill through paneling or
wallpaper whose patching is a little more problematic. If a room hasn’t been painted
in many years, the paint will have faded and won’t necessarily match up very well
with the can of Colonial blue latex sitting in the garage. Figure this into your plan-
ning costs so it’s not such a surprise later.
Electricians Hate Plaster Walls
I wouldn’t go so far as to suggest that plaster walls are a nemesis of electricians, but
they’re not exactly fond of them. Some plaster, particularly from the Victorian era,
can be very brittle and will fall apart easily when being cut through. All it takes is a
piece of wood lath vibrating roughly and a four-inch hole becomes a 12-inch crack.
Worse yet is metal lath, which can be a mess to cut through. Don’t be surprised if a
bidding electrician figures in extra cost if you have plaster walls.
Fire Blocks
A fire block is a horizontal 2×4 nailed between two wall studs to slow the spread of
fire through the wall. Electricians find them the hard way when they drop a fish tape
or chain (used for pulling electrical cable through finished walls), only to find them
blocked part of the way down. This requires cutting into the wall near the block and
drilling through it to get the cable through. In addition to slowing down the job, it
means more wall repairs for you to do later.
The Least You Need to Know
➤
Other homeowners will be your best source of referrals when you’re looking
for an electrician.
➤ Only hire a licensed, bonded, and insured electrician to work on your home.
➤ Clearly written job specifications help both you and the electrician come up
with an accurate, fair price for the job.
➤ Only sign contracts that you fully understand; if you have any questions, ask away.
➤ As a customer, understand your responsibilities to your contractor.
➤ Be prepared to do some wall and ceiling patching after major electrical work.
12 8964 CH10 2/1/00 8:11 AM Page 134

Part 3
Components and Simple Repairs
Enough with the theories, history, and precautions. Now it’s time to do something
with your new tools and newfound knowledge. Older homes always have small elec-
trical jobs to do—from repairing a lamp cord to replacing a switch. These are good
jobs to start with until you’re comfortable working around electricity.
The chapters in Part 3 will walk you through basic repairs and troubleshooting.
Because these are small jobs, you won’t have to live in the dark with all your power
shut off in the event that you don’t finish on the day you start the work. The small
jobs (such as replacing an old receptacle or switch) will take less than an hour (appre-
hension factor included).
Repair and replacement mean new components: switches, receptacles, wires, and lights.
I’ll discuss all the different flavors, from a plain-vanilla-white duplex receptacle to a
four-way switch with a brass cover plate. Chapter 15 will show you how to get your
cable from one point to another without tearing up your house too much in the process.
These chapters won’t make you a card-carrying journeyman electrician, but they will
give you a much better sense of the work involved and your degree of comfort with it.
13 8964 Part 3 2/1/00 8:55 AM Page 135

13 8964 Part 3 2/1/00 8:55 AM Page 136

Chapter 11
Switches and
Receptacles
In This Chapter
➤
Know what each device does
➤ GFCIs in detail
➤ Two- and three-wire receptacles
➤ Choosing the right-size box
➤ Cover-plate choices
We use them every day, but we don’t think about them much. This is a good indica-
tion of the reliability of switches and receptacles. A bathroom light switch, for ex-
ample, might be clicked on and off 10 times a day (depending on the size of your
family). That’s a few thousand clicks each year, and the switch keeps going and going.
If only our computers and operating systems were that reliable.
A switch controls the flow of electricity between a source and an end device such as a
light fixture. In a standard modern light switch, a metal arm inside the switch con-
nects the two screw terminals to which the black, or hot, wires are connected. In the
“Off” position, this arm moves out of the way and cuts off the flow of electricity
along the conductors.
Receptacles don’t face as much mechanical wear and tear as a switch undergoes. A
common house receptacle is called a duplex receptacle because it can accommodate
two plugs. The metal connector between the screw terminals is fixed in place, unlike
14 8964 CH11 2/1/00 8:36 AM Page 137

Part 3
➤
Components and Simple Repairs
138
the movable arm in a switch. Each prong of a plug is held in place by two pieces of
spring metal to maintain a solid electrical contact.
Both switches and receptacles can wear out, especially the original ones in an old
home. This chapter discusses the most common types and some of the less-common
ones as well.
There’s One for Every Purpose
The world of electrical devices is quite varied. The light switch in your bedroom isn’t
quite the same as those at the top and bottom of your staircase. The latter most likely
are three-way switches (possibly four-way), which control an electrical load (in this
case, the light) from more than one location. You might have an emergency switch
that controls your oil furnace or a timer switch connected to a bathroom fan. You
need to know one from another when you go to replace an existing switch or install
a new one.
Receptacles are no different. You’re already familiar with a standard duplex outlet
(your house is full of them) and a GFCI receptacle. There also are single receptacles
that take one plug, receptacles for clothes dryers and electric ranges that carry both
120 and 240 volts, and special hospital-grade receptacles. Older homes might have
original unpolarized receptacles or even some old twist-lock-style receptacles. You
have to know what you’re dealing with before you replace it; otherwise, you could
create a hazardous situation.
As always, follow the unwritten rule of electrical work: Buy only UL-approved mate-
rials. The world of Internet trading and crashing trade barriers means more nonlisted
devices than ever will be available, but stick with the tried and true, even if your code
allows the others. You want some assurances that you’re buying a safe product.
Electrical Elaboration
A large appliance receptacle carries both 120 and 240 volts because it has to supply two
different loads. A clothes dryer needs 240 volts, but the dryer’s timer, lights, motor, and
buzzer run on 120 volts. An electric range needs 240 volts but not so its clock and lights.
14 8964 CH11 2/1/00 8:36 AM Page 138

139
Chapter 11
➤
Switches and Receptacles
Switches
The most common switch in your house is a
single-pole switch with a toggle marked “On” and
“Off.” It typically is used to control a light fixture
or a receptacle. Single-pole simply refers to elec-
tricity flowing in one direction. In most cases, one
black (hot) wire is connected to one terminal
screw (or it might be back wired), and a second
hot wire is connected to the other terminal screw,
proceeding on to the light. In terms of physics, a
pole is just one of two opposite points on a magnet
that manifest the magnetic properties. (Remember,
a spinning magnet, called a dynamo, at your
utility’s power plant creates the electric current.)
Unlike older switches, modern versions often
come with a ground terminal for the green or bare
copper ground wire.
A single-pole switch controls the current to its
load from one location only. Other switches control
the current from two or even three different locations.
Three-Way Switch
Three-way switches come in twos so you can control a light from two locations. Their
most common location is at the top and bottom of a staircase or at opposite ends of
a large room with more than one entrance. Three-way switches come with three ter-
minal screws: Two are the traveler screw terminals; the third, which is darker in color,
is the common screw terminal. The traveler terminals connect one switch to the other.
The cable that runs between the switches has two hot wires: one neutral, and one
ground, as shown in the following diagram.
Four-Way Switch
This one is always found between a pair of three-way switches. You’d have to have a
really long hallway or a large room needing switch controls from three locations. A
four-way switch comes with two pairs of color-matched terminal screws that conve-
niently connect with color-matched wires from the two three-way switches.
Bright Idea
If you expect to be doing more
repairs or modifications to your
electrical system in the future,
pick up a half a dozen or so
extra switches and receptacles to
have on hand. It’s a small invest-
ment to make for the conven-
ience of having them when you
need them.
14 8964 CH11 2/1/00 8:36 AM Page 139
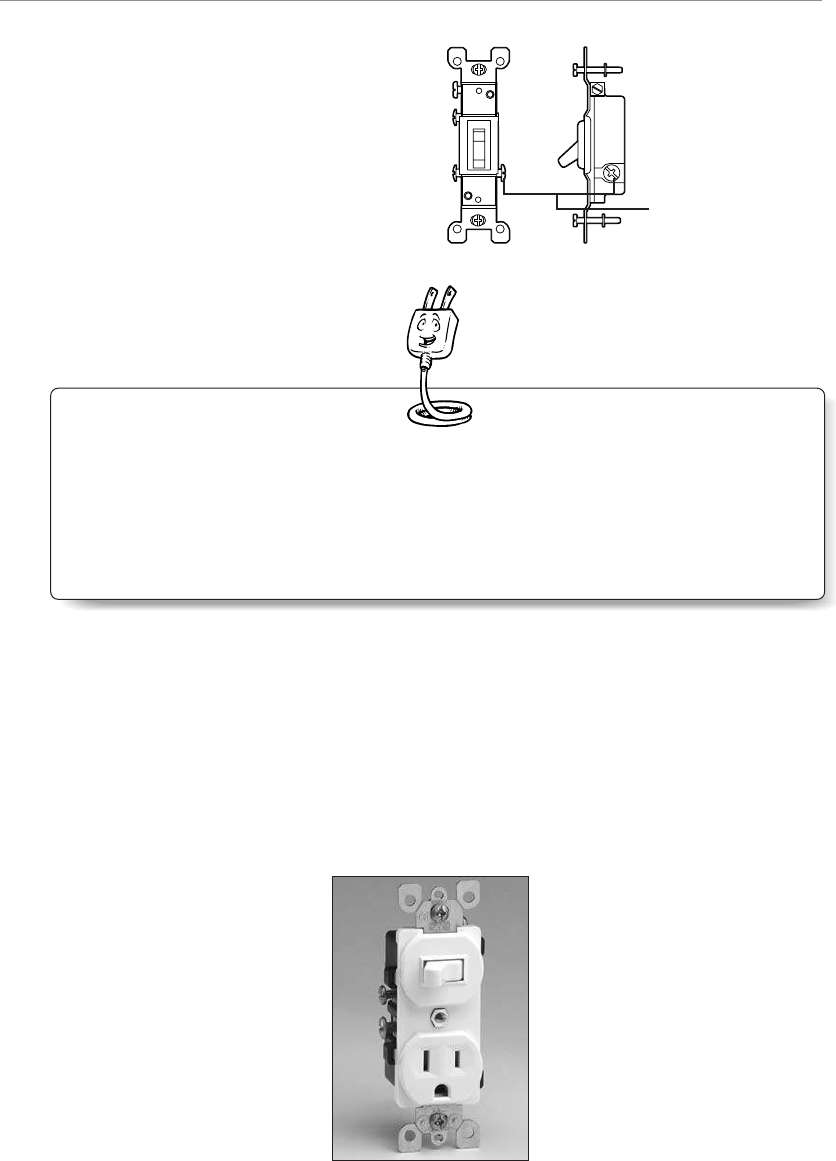
Part 3
➤
Components and Simple Repairs
140
Switch/Receptacle Combo
This handy device is half receptacle and half switch. It’s a quick way to add a recep-
tacle to a room (after you’ve calculated the amperage of the new load—remember not
to overload your circuits). The receptacle will be at switch height, which typically is
four feet from the floor to the top of the receptacle box. The switch and the recep-
tacle can operate independently of each other, or the receptacle can be controlled by
the switch, perhaps for a hanging ceiling lamp not directly wired to a circuit that
came with a lamp cord and plug.
OFF
A three-way switch, trav-
eler screw terminals, and
a common screw
terminal.
(Courtesy of Leviton)
Electrical Elaboration
Switches weren’t always the familiar toggle design we use today. A rotary-style switch, which
was turned clockwise to open and close a current, was used at the turn of the century. In
the 1920s and 1930s, push-button switches were introduced, and they are still in working
condition in period homes. Early toggle switches were first manufactured in the 1930s.
A naked switch/receptacle.
(Courtesy of Leviton)
terminal screws
14 8964 CH11 2/1/00 8:36 AM Page 140

141
Chapter 11
➤
Switches and Receptacles
Ganging Up
Switches for multiple light fixtures often are ganged up in one box. If all the lights are
on the same circuit, one feed wire from the panel will supply the power for all the
switches and their loads. A separate cable will run to each fixture. Sometimes you’ll
run across a single gang box with a double switch, but this isn’t very common in resi-
dential systems.
How many switches can you fit in one box? Leviton offers one switch plate that has
space for 10 switches. You’ll find these in commercial settings or maybe in an
Internet gazzillionaire’s new mansion.
Pilot-Light Switch
A pilot-light switch resembles a standard single-
pole switch, except it has a built-in bulb (either
the toggle is illuminated or the bulb is on the face
of the switch) that lights up when the switch is in
the “On” position. This usually is installed when
the fixture or light is out of sight of the switch
(say, a light in a detached garage). The illuminated
switch lets you know if someone forgot to turn
the lights off.
Dimmers
In addition to their romantic value, dimmer
switches enable you to decrease the lighting in
the dining room so your kids can’t see that you’re
feeding them Brussels sprouts, a side dish that no
human being should ever eat anyway. Dimmer
switches come in several styles including those
with …
➤ A toggle control.
➤ A dial control.
➤ A sliding control.
➤ Automatic dimming.
A dimmer reduces the voltage reaching a light fixture, but in doing so, the switch
builds up a small amount of heat. Because of this heat and the large size of a dimmer
switch compared to other switches, it might not work as a replacement for an ex-
isting switch if you have an undersized or crowded box.
Ask an Electrician
One definition of gang is “com-
bining electrical boxes together
to form a larger box for addi-
tional switches or receptacles.”
You can buy premade boxes in
an appropriate size, or you can
combine metal boxes that have
removable side walls. Plastic
boxes aren’t meant to be ganged
together and will become dam-
aged if you attempt to do so.
14 8964 CH11 2/1/00 8:37 AM Page 141

Part 3
➤
Components and Simple Repairs
142
Timers and Doorbells
Timers, either manual or automatic, also are types of switches. Manual timers regu-
larly are used with bathroom fans and heat lamps. A frequent residential use of auto-
matic timers is to control a whole-house ventilation system.
Doorbells are switches, too. When you press the button, a low-voltage current flows
to the chimes or the buzzer. Thermostats are another low-voltage switch, except these
are activated by temperature changes. Elaborate thermostats have separate switches
for controlling the furnace fan and for turning heat and air conditioning on and off
manually.
Receptacles Galore
Most of the receptacles in your home are the duplex type and have been in common
use for the better part of the century. Current versions differ from those used through
the 1950s because the newer ones have a grounding hole. Polarized receptacles came
into use in the 1920s (see Chapter 4, “If Your Walls Could Talk”). The different-size
slots (the longer one always goes with the neutral wire, the shorter with the hot)
maintain consistent, directed current flow along the respective hot and neutral wires.
The earliest receptacles were an odd arrangement. The plug-in part of the outlet was
actually a screw-in affair, something like a light bulb. The receptacle plate had a small
flap that flipped up to reveal a socket into which the plug-in was screwed. (Hey, elec-
trification had to start somewhere.)
The following are specialized types of duplex
receptacles:
➤ Floor receptacles
➤ Clock receptacles
➤ GFCIs
Floor receptacles are specially designed to withstand
foot traffic. They are installed in the middle of large
rooms or in other areas far away from a wall recep-
tacle. They often are seen in offices and other com-
mercial settings with large, undivided floor spaces.
A clock receptacle is recessed so that a clock and its
cord can be hung flush against a wall. You used to
see these more often in kitchens, but you don’t see
them as often now, especially since the advent of
inexpensive battery-powered wall clocks. This type of
receptacle is now more common for plugging in
microwaves and for picture lights that plug in behind
pictures and paintings.
Positively Shocking
This bears repeating: Never file
down or otherwise alter a polar-
ized plug so it will fit into a non-
polarized receptacle. Use your
electrical components the way
they were designed. If you only
have nonpolarized receptacles,
use adapters for your polarized
plugs.
14 8964 CH11 2/1/00 8:37 AM Page 142
143
Chapter 11
➤
Switches and Receptacles
A GFCI can be used for a single location such as a bathroom or a kitchen, or it can
offer protection to an entire circuit of receptacles or other loads. This is possible only
if the GFCI is the first receptacle on a circuit. From that point on, anything beyond it
on the same circuit will have GFCI protection. If it’s in the middle of a circuit or in
any other position than the first receptacle, it will not offer any protection to any
load between it and the service panel.
Don’t Forget the Boxes
The NEC code requires that any wires connected
to each other or attached to a fixture or device
must be enclosed in a box with a cover plate. This
means that receptacles, switches, lights, wall
heaters, anything that requires electricity will have
its wiring housed in a box. A box serves a number
of purposes:
➤ It serves as a point of attachment for a device
or a fixture. (It has to be screwed to some-
thing.)
➤ It keeps wires that could short and then spark
away from wood framing, decreasing the pos-
sibility of fire.
➤ It protects people from accidental exposure
to wires and possible shock.
There are boxes for every purpose: ceiling lights,
retrofitting fixtures into existing walls, weather-
proof designs for outdoor use, and junctions for
wire connections that aren’t immediately attached
to a device or fixture. As with switches and recep-
tacles, you’ll have to choose the right box for the
job at hand.
They’re Not All the Same
The following is a list of the most common elec-
trical boxes:
➤ Rectangular for switches and receptacles
➤ Square for junctions or two receptacles/
switches
➤ Octagonal and round for ceiling fixtures
Bright Idea
Consider buying a package of
child-protective caps to stick
into any unused receptacles,
even if you don’t have small
children in the house. You never
know when you might have
overnight guests with toddlers.
Some receptacle covers snap
tightly in place for something
more permanent.
Positively Shocking
Never conceal an electrical box!
The NEC states that these boxes
must remain visible and acces-
sible, even if it seems unimpor-
tant to you.
14 8964 CH11 2/1/00 8:37 AM Page 143
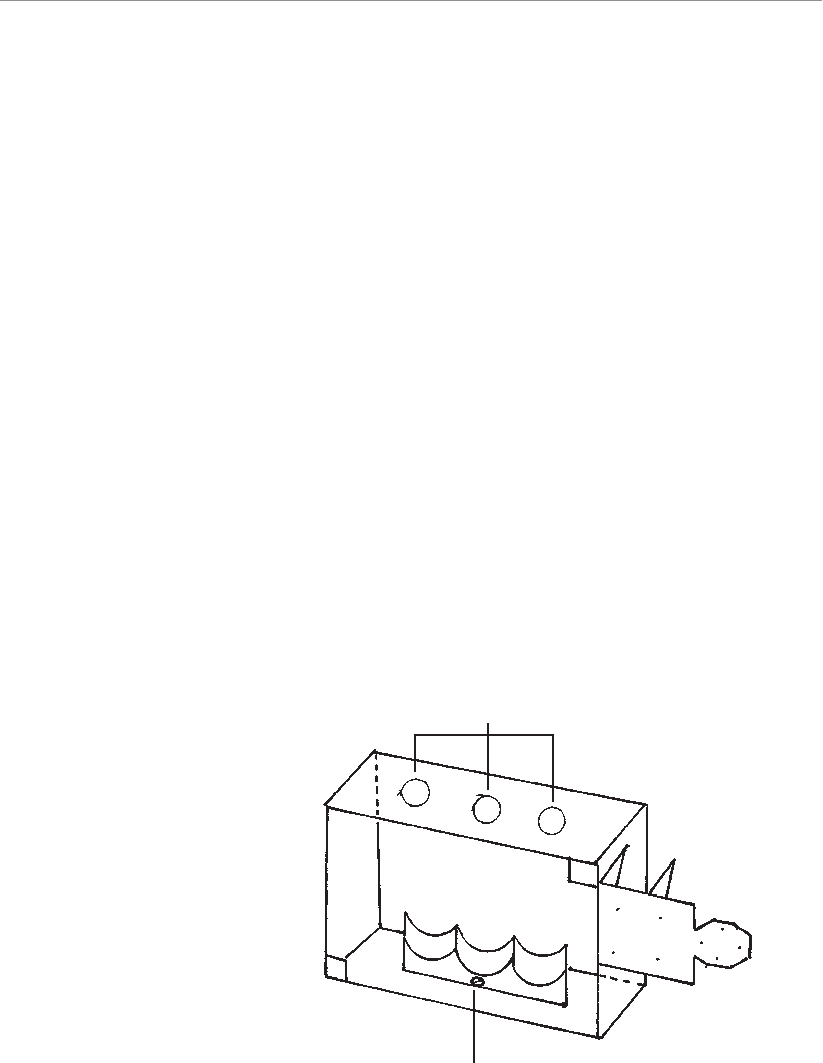
Part 3
➤
Components and Simple Repairs
144
➤ Retrofit types for inserting into existing walls and ceilings
➤ Aluminum and PVC plastic for exterior use
➤ Boxes with extendible bars or braces for attaching between joist
➤ Pancake boxes for limited circumstances when a regular box is too deep for the
wall or ceiling space (Most of the plastic ones are not listed as tested by UL, and
the metal ones are rated for only one cable, usually 14 gauge.)
➤ Fan-rated boxes—the only boxes you can use to install paddle fans
Boxes can be attached to framing, plaster, and drywall in a variety of ways, as shown
in the following figures.
A single gang plastic box
with nails.
clamp to secure cables
knockouts
A double gang metal box
with a bracket.
14 8964 CH11 2/1/00 8:37 AM Page 144
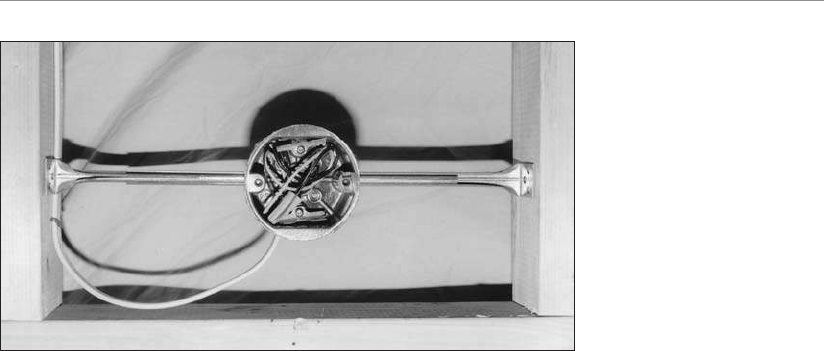
145
Chapter 11
➤
Switches and Receptacles
Plastic or Steel?
Both plastic and steel boxes are used in residential construction. A box has to with-
stand a certain amount of construction trauma when it’s installed and later when
drywall is installed around it. (Drywall hangers are not necessarily kind and gentle
people, at least not when they’re getting paid by the square foot.) Plastic boxes are
lightweight and are easy to install, especially those that come with nails for direct at-
tachment to a wall stud or a floor joist.
Metal boxes are standard in most commercial work. Unlike a plastic box, a metal box
is a good conductor of electricity and must be grounded along with the device or fix-
ture. Special fittings are used to connect a metal box to conduit and conductors to
the box. These fittings include an array of clamps, clips, and locknuts, most of which
you’ll never use in the course of residential repairs and remodeling.
A plastic box works well for a single gang or device use, but some electricians find
that a larger plastic box’s shape distorts during installation or when the drywall is
installed. For these reasons, they use tougher boxes, either Bakelite (reinforced phe-
nolic) or metal for two gang installations and metal for three gang. The larger the
box, the more difficult it is to keep it level and in line.
Check the Size
Boxes come in different sizes based on the installation need. Rectangular boxes, the
most common ones used for single devices, generally are two inches by three inches
for residential use. Depth ranges from 1
5
/
8
inches to 3
19
/
32
inches. The deeper the box,
the more wires it can accommodate and the easier it is to tuck in the wires and install
a device and still meet code. You’ll really appreciate this when you’re dealing with
12-gauge wire.
A round box with
extendible bars.
14 8964 CH11 2/1/00 8:37 AM Page 145

Part 3
➤
Components and Simple Repairs
146
How many cables can your box accommodate? Well, the bigger the box the better,
but to be more exact …
➤ Count the number of intended cables for the box. Each hot and neutral con-
ductor counts as one wire each, and all the grounding conductors together
count as a single wire.
➤ Take this total and add one for any cable clamps (if they’re the same type of
clamp). If you have two different types, you have to count each as a separate
number.
➤ Take this new total and add two for each device (switch or receptacle).
➤ If the box contains 14-gauge wire, multiply the total number (of wires, clamps,
and devices) by 2 cubic inches. If 12-gauge wire is being used, multiply the total
by 2.25 cubic inches.
➤ The result of this multiplication is the minimum allowable volume of wires,
clamps, and devices for that box. (The volume of a box usually is stamped on
the back of the inside of the box.)
Let’s say you have a light switch in a plastic box with two 14-gauge cables coming
into it. (One is the line; one is the load.) This gives you two hot conductors, two neu-
trals, two grounding conductors (these count as one wire in our calculations), and
one switch. Therefore …
Two hot conductors: 2
Two neutrals: 2
One grounding conductor: 1
Device: 2
Total: 7
7 × 2 cubic inches = 14 cubic inch minimum box size
(Note: Most plastic boxes do not have any type of clamp.)
Cover ’Em Up
Every electrical box needs a cover plate. A junction box, which is used solely to house
wires and their connections but not devices, needs a blank cover plate. The cover
plate keeps probing fingers, especially those of kids, away from the wires and the ter-
minal screws on the device, all of which are fine sources of electrical shock.
Plastic is the material of choice for most cover plates, but metal is used in some com-
mercial work and with metal boxes. Outdoor boxes have plates with foam gaskets to
keep moisture out. Outdoor receptacles have additional protection: A section of the
cover plate closes over and covers the receptacle when it isn’t in use.
14 8964 CH11 2/1/00 8:37 AM Page 146

147
Chapter 11
➤
Switches and Receptacles
Plastic cover plates have been used since the 1920s, but other materials have been
used as well.
Brass: New and Old
Many older homes have original brass cover plates, often with a dark bronze tone.
These will readily take to a buffing wheel and will come out a fine, shiny brass if
that’s your preference. New replacement brass plates also are available. Some home-
owners and designers install them in kitchens and bathrooms, but such damp loca-
tions aren’t the best places for brass unless you like polishing them from time to time.
The Artful Flare of Ceramics
If you go to any good-size street fair, at least in a large city, you’re likely to run into
an artist’s booth selling ceramic electrical plates. Some have a theme (such as stars or
suns); others are a little more whimsical. Check to see if they’re listed by UL; if
they’re not, decide whether you think it’s a problem. These plates are usually ceramic,
nonconducting material and can be pricey.
Local gift and design shops might carry these types of plates as well. They usually are
purchased for a single room, such as a bathroom or a baby’s room, rather than an en-
tire home.
The Least You Need to Know
➤
Every switch and receptacle has a specific purpose; they’re not interchangeable.
➤ Despite their long working life, devices occasionally need replacement—a
simple job for homeowners.
➤ Every device, fixture, and junction needs an electrical box to meet code re-
quirements.
➤ Cover plates are required for all boxes so that no wires are exposed, especially
to small, probing fingers.
14 8964 CH11 2/1/00 8:37 AM Page 147
14 8964 CH11 2/1/00 8:37 AM Page 148

Chapter 12
Replacing Old
Switches and
Receptacles
In This Chapter
➤
Shutting the power off first
➤ Picking the right device
➤ Working with old wire
➤ Upgrading old receptacles
Now that you know about switches and receptacles, it’s time to replace any that are
broken or to upgrade existing ones. The most common upgrade is swapping a standard
toggle switch for a dimmer. Newer, quieter models—that don’t have the resounding
“click” of old switches—sometimes are installed in older homes that still have their orig-
inal devices.
The most common reason for replacing a device is wear and tear. The clips in a recep-
tacle that hold a plug tautly or the metal arm in a switch eventually can fatigue and no
longer work properly. A simple loss of power to a fixture or an appliance, however, is
not necessarily a reason to replace a device. You have to do a few system checks first,
which we’ll discuss in this chapter.
The short projects in this chapter will help you get your feet wet—don’t take that liter-
ally, however, when working around electricity—and gain a degree of comfort with your
electrical system. Three- and four-way switches require more troubleshooting skills, but
we’ll cover the most common situations with both switches. We’ll also discuss up-
grading your current two-wire receptacles and making them safer when the situation
calls for it—without updating the entire system with a grounded conductor.
15 8964 CH12 2/1/00 8:51 AM Page 149

Part 3
➤
Components and Simple Repairs
150
Probing the Problem
You flick the light switch and nothing happens. The coffeemaker, which was set on a
timer to go off at 6
A.M., sits with pot of cold water on your kitchen counter. Before as-
suming that the devices are shot, follow this checklist:
❏ Confirm that the circuit has power and that the fuse hasn’t burned out or the cir-
cuit breaker tripped.
❏ Check to see if the appliance or fixture is working by checking light bulbs, cords,
and plugs.
❏ Inspect the connections at the fixture and at the terminal screws to ensure they
are tight.
❏ Check for a problem in the circuit itself.
The very first thing you should do is confirm that power is getting to the device. Every
electrician has a story about going on a service call to repair a dead circuit only to dis-
cover that the breaker had tripped and no one checked. That’s a pretty expensive dis-
covery for a homeowner. Your first step is to examine your fuse box or service panel.
Does everything look okay? Are there burned-out fuses
or tripped breakers for that circuit? Check carefully.
Some breakers have very little sponginess and don’t
move much when they trip. You might have to test
several breakers if you haven’t done a circuit map and
are uncertain which breaker controls the failed device.
If you can eliminate the power source as the problem,
check the connections (see the following figure) by
taking the following steps:
1. Turn the power off.
2. Remove the cover plate from the device, and un-
screw the device from the box.
3. See if the terminal screws are tight and have good
contact with the wires.
4. If the device is back wired, there shouldn’t be any
bare wire showing, only insulation.
5. Check the wire nuts or taped-and-soldered con-
nections to be sure they’re tight.
If there are no problems with the connections, you’ll have to probe further with your
handy voltage tester and a continuity tester.
Positively Shocking
Turn the power off before
pulling a device out of a box.
This isn’t necessary if you can test
it without removing it, but you
can get shocked during removal
if it’s shorting. Running down to
the panel box only adds a few
minutes to the job, but it in-
creases your safety immeasurably.
15 8964 CH12 2/1/00 8:51 AM Page 150
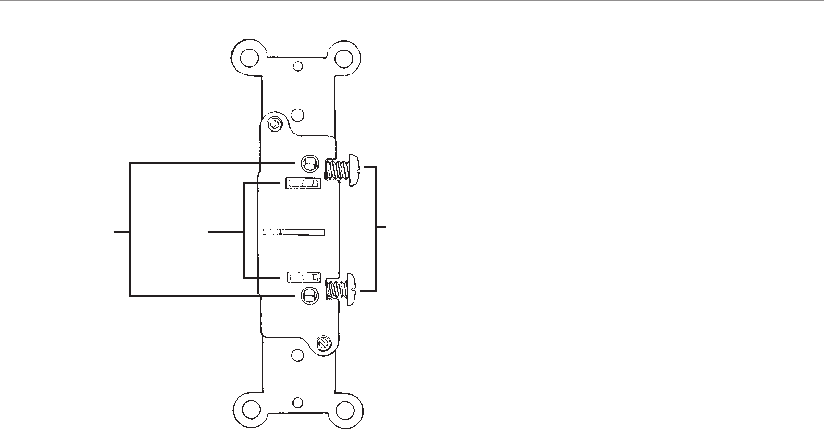
151
Chapter 12
➤
Replacing Old Switches and Receptacles
Checking the Devices
Switches, appliances, and fixtures test a bit differently than receptacles. The first three
are tested for continuity and power and require both testing tools. A continuity tester
will indicate whether the circuit’s pathway within the switch has any breaks in it from
metal fatigue. It also checks other appliances and fixtures for similar breaks. Let’s start
with testing for a switch.
Follow these steps to test a switch for power:
1. With the switch off, touch one of the voltage tester’s probes either to the bare end
of the ground wire (the inside of the wire nut holding the neutral wires together)
or, if it’s a metal box, to the side of the box.
2. Place the other probe against each black wire either at the terminal screw or at the
back-wired slot.
3. The bulb should light up for at least one of the hot wires, the line wire coming
from the panel or fuse box. If the tester does not light up for either black wire, the
problem is somewhere in the circuit between the panel and the device. (Go to step
4 if it does light up.)
4. Turn the switch on and check the other black wire, which is the load conductor.
If the bulb on the tester does not light up, the switch is bad and needs to be re-
placed.
5. If both black wires show current passing through them, recheck the fixture and
the appliance because the problem is not with the switch.
wire
releases
back-wired
slots
terminal screws
A rear view of a single-
pole switch.
15 8964 CH12 2/1/00 8:51 AM Page 151
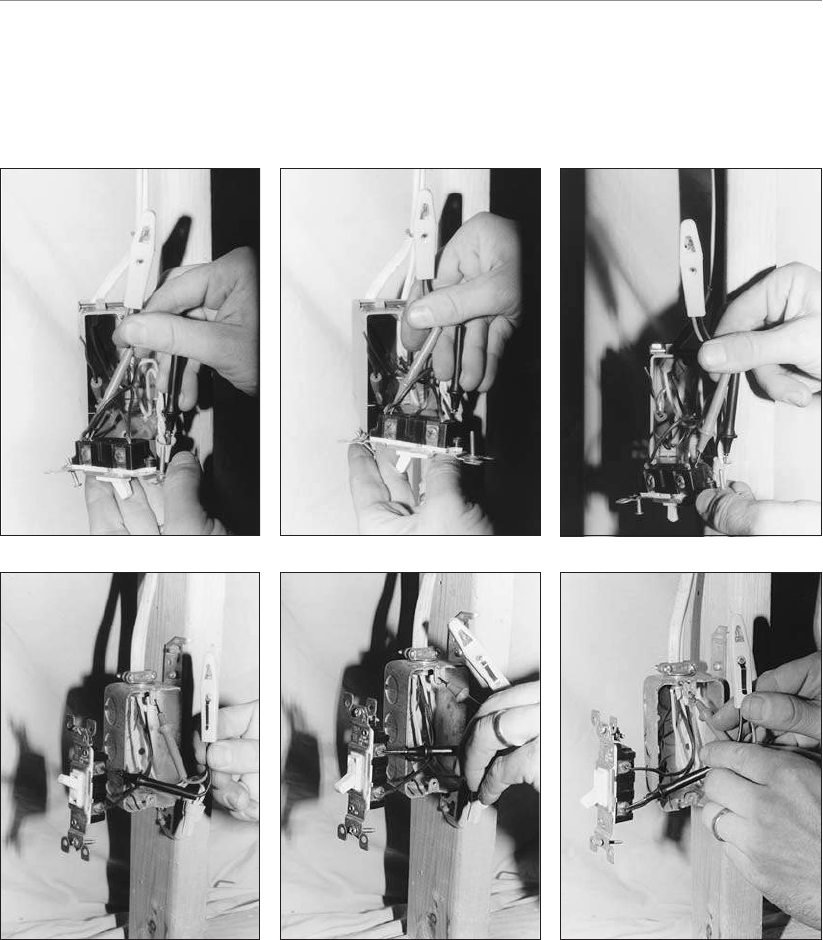
Part 3
➤
Components and Simple Repairs
152
6. Note: In some older homes with knob-and-tube wiring, the neutral wire has been
switched and used as a “hot” conductor. This makes the task of troubleshooting
much more difficult. If you have any questions or concerns while testing, call an
electrician.
Testing terminals and testing back wiring.
15 8964 CH12 2/1/00 8:51 AM Page 152
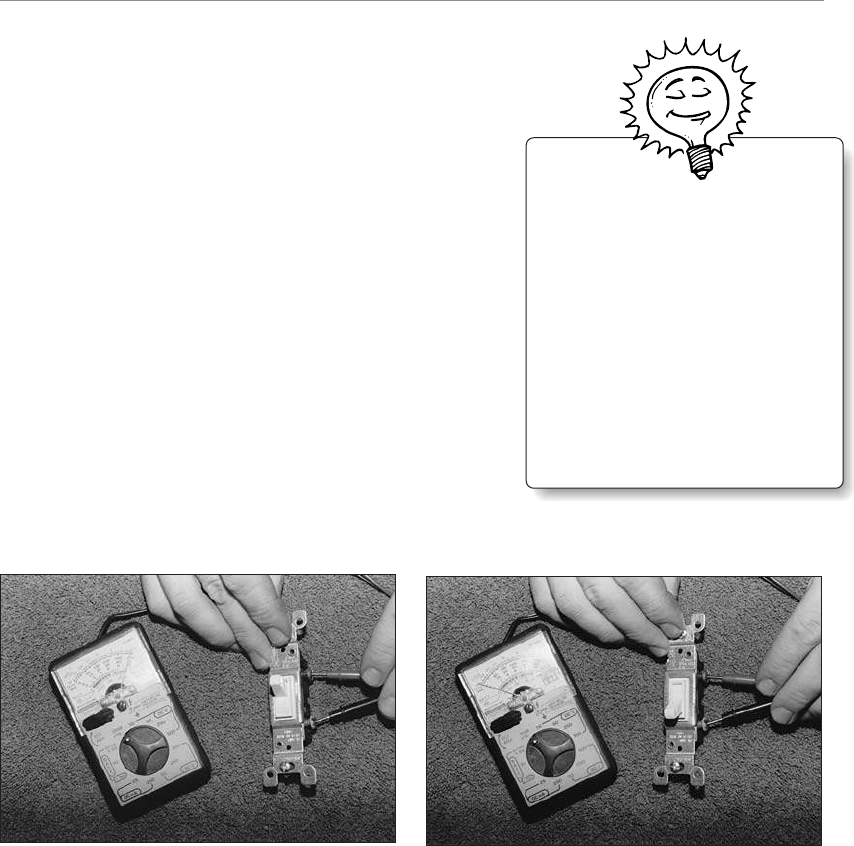
153
Chapter 12
➤
Replacing Old Switches and Receptacles
Continuity Coming Up
A continuity test will tell you whether a switch’s
metal components, which are critical for the flow of
the current, are intact or broken. A continuity tester
is battery-powered and provides a current that
passes from the tester’s clip through a device or fix-
ture. The tester’s other component is a probe that
lights up if a current is passing through the device
as designed. To perform the test, a switch or fixture
must be disconnected from its power source and re-
moved. (The tester will supply the current for the
test.) A continuity tester should never be used on a
live current.
The following figures show you how to do a conti-
nuity test on a single-pole switch and a three-way
switch. If your tests show you that the switch is the
problem, it’s time to replace it.
If your tests show you that the switch is the
problem, it’s time to replace it.
Bright Idea
It’s almost easier to simply hook
up a new single-pole switch to a
circuit than to run a continuity
test on one that isn’t working. By
the time you’ve tested for volt-
age and have removed it to test
for continuity, you could have
popped a new switch in and
known right away if the switch is
the problem.
Attach the tester’s clip to one of the screw terminals, and attach the probe to the second terminal. Flip
the switch to “On” and “Off.” If the tester lights up in the “On” position but not in the “Off” posi-
tion, the switch is good.
15 8964 CH12 2/1/00 8:51 AM Page 153
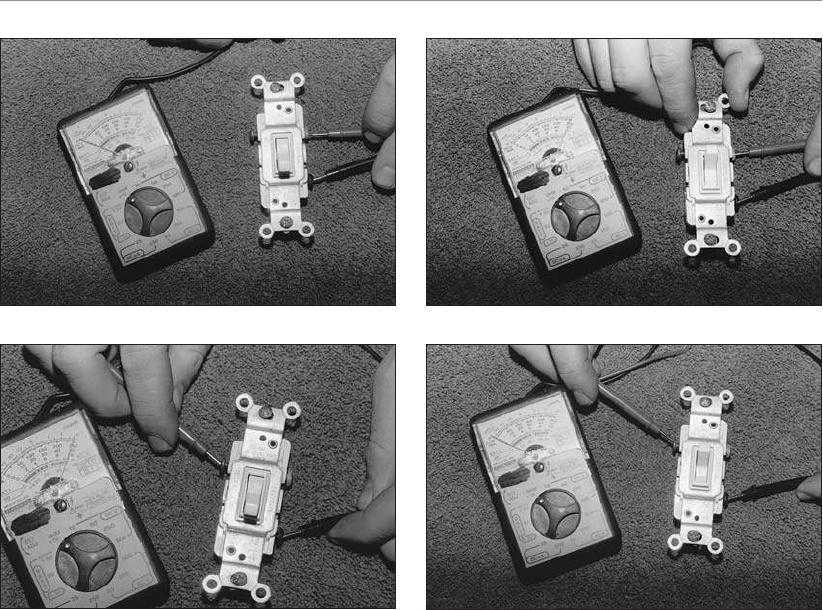
Part 3
➤
Components and Simple Repairs
154
Attach the clip to the common screw terminal (the darker screw), and attach the probe to one of the
traveler terminals. The switch is good if the tester lights up when the switch is in one position but not
both. Attach the probe to the other traveler terminal and repeat the test, moving the toggle. This time,
the tester should light up when the toggle is in the opposite position from the first test with the other
traveler terminal.
New Switches
The easiest switch to replace is the single-pole switch. Before popping in a new one—
and this is true with any device—read the specifications on the old switch. These usu-
ally are listed on the metal mounting strap and include the following:
➤ The amperage and voltage ratings
➤ The type of current it will carry (AC only for house current)
➤ The type of wire that’s compatible with the device (CU for copper only, CO/ALR
for copper or aluminum, ALR for aluminum only)
➤ Its Underwriters Laboratory or other testing service listing
The back of the device will indicate the acceptable wire gauge and a stripping gauge for
measuring the amount of insulation to be removed prior to installation.
15 8964 CH12 2/1/00 8:52 AM Page 154
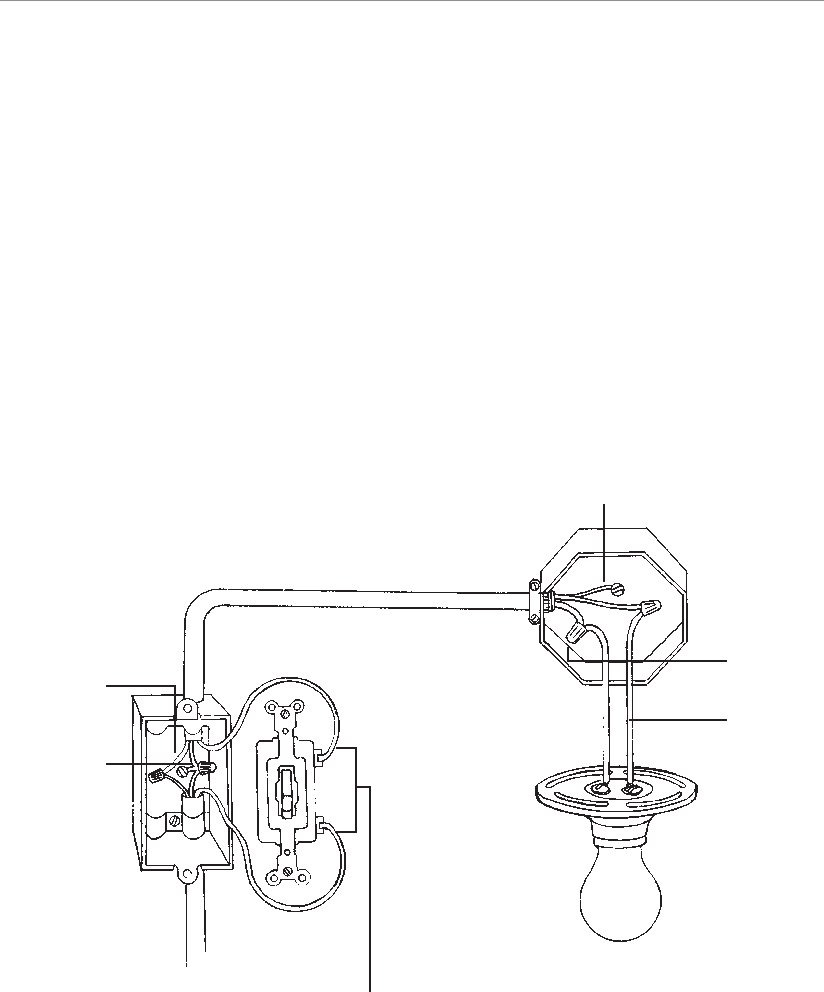
155
Chapter 12
➤
Replacing Old Switches and Receptacles
The location of your switch will determine how its replacement gets wired. A switch
can be at either the middle or the end of a run (one complete circuit). These positions
in the run are simply defined:
➤ A middle-of-the-run switch can be anywhere between the beginning and the end of
the circuit. There will be at least two cables entering the box (at a minimum, one
on the line side coming from the panel and one leading to a fixture or other de-
vice).
➤ In an end-of-the-run switch (also referred to as a “switch loop”), the cable runs from
the fixture to the switch. This requires special treatment of the white wire.
The following figures show a middle-of-the-run switch and an end-of-the-run switch.
Remember to shut the power off at the service panel or fuse box and to test the switch
with a voltage tester before removing the wires. Note the condition of the ends of the
wires. You don’t want to reuse damaged or nicked wires. If you find any damage, cut off
the minimum amount of wire necessary to remove this section and then strip off suffi-
cient insulation (about
5
/
8
of an inch) so the wire will make a solid contact.
grounding conductor
hot
neutral
hot conductors
neutral
conductors
grounding
conductors
Middle-of-the-run switch.
15 8964 CH12 2/1/00 8:52 AM Page 155
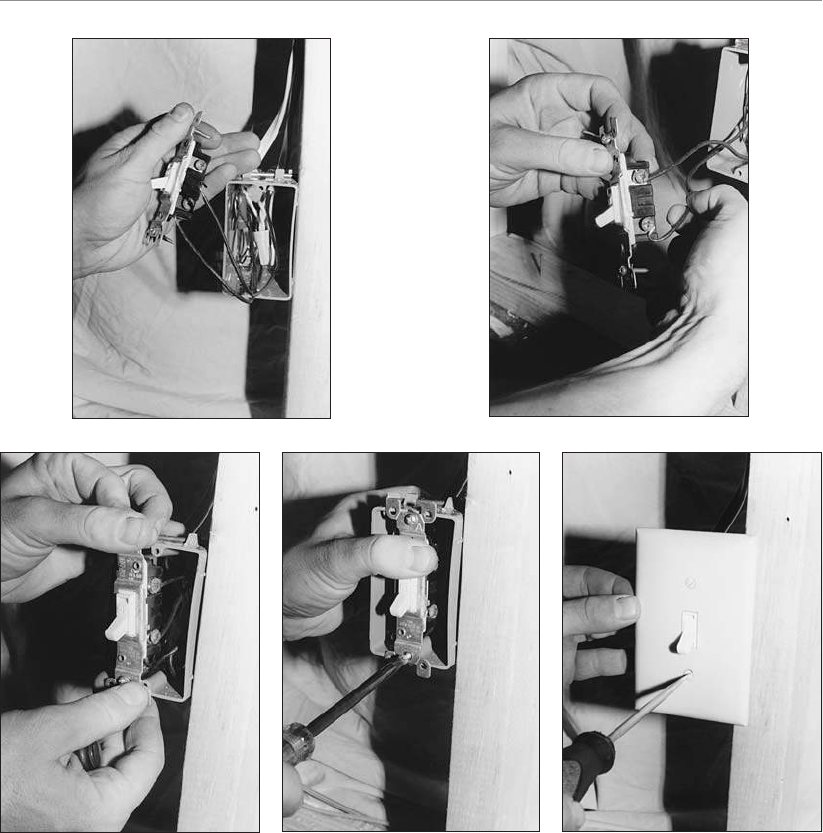
Part 3
➤
Components and Simple Repairs
156
A middle-of-the-run switch: Loosen the terminal screws and carefully remove the black wires. Attach
and secure the wires (hand tighten, but don’t overtighten) to the new switch and install with the
toggle in the “Off” position pointing down. (The black wires can go on either terminal screw.)
Carefully tuck the wires back inside the box, pushing them to the side of the neutral wires as you
mount the switch to the box. The mounting strap has two
6
/
32
screws that insert into the box. Secure
the switch to the box, making sure it’s straight, and reattach the cover plate.
15 8964 CH12 2/1/00 8:52 AM Page 156
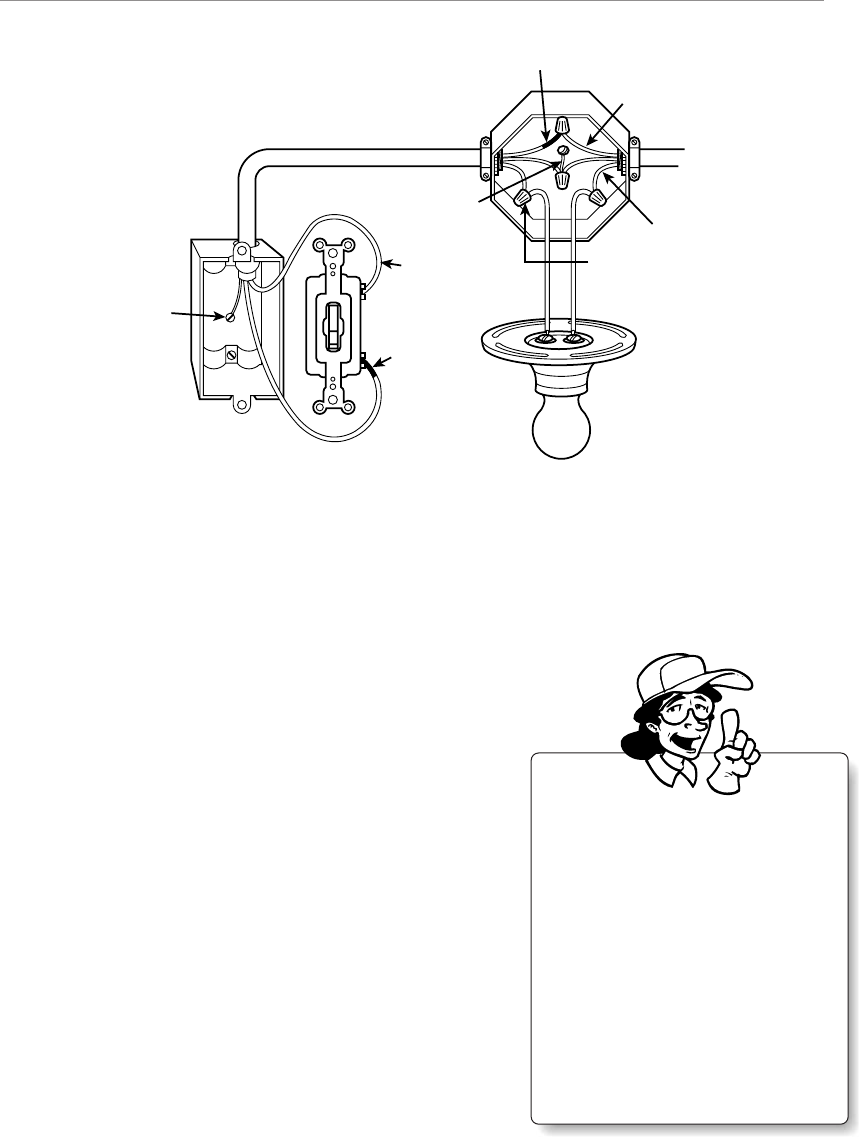
157
Chapter 12
➤
Replacing Old Switches and Receptacles
End-of-the-run switch (or switch loop): In this case, only one cable enters the box, and it’s the one
coming from the fixture. The white wire will serve as a black conductor, as shown in the following
figure. The code requires that the white wire be the “hot” or phase conductor leading to the switch.
That is, it will connect to the incoming black wire (the line conductor) in the fixture’s electrical box.
The black wire leading to the switch will be used as the load or switched conductor, which will run
back to the fixture. To avoid confusion, you can mark the white wire with a small piece of black elec-
trical tape so anyone looking at the switch in the future will know that both wires are hot.
Three-Way Switch
Replacing a three-way switch is more involved than
replacing a single-pole variety. Now you have trav-
eler wires to deal with (these connect the two
three-way switches) as well as the common wires.
This means the cable running between the switches
is 12/3 (or 14/3) cable rather than the more
common 12/2 (or 14/2).
Follow the same safety and testing procedures that
you would with a single-pole switch. Because three-
way switches (and four-way switches) are more ex-
pensive than a common single-pole switch, you
want to be certain that the switch is really broken
before throwing it away and replacing it.
Hot
Conductor
Hot
Conductors
Neutral
Marked Black
Hot
(Power Source)
Neutral
Conductor
Marked Black
Neutral
Grounding
Conductors
Grounding
Conductor
In Metal Box
Ask an Electrician
Cable is manufactured according
to its gauge and the number of
wires it contains. 12/2 is 12 gauge
with one hot wire (usually black),
one white or gray neutral, and a
ground. 12/3 also is 12 gauge
with two hot wires (one black and
the other commonly red), one
neutral, and the ground. 12/3 en-
ables you to run one cable to var-
ious nonsequential devices.
15 8964 CH12 2/1/00 8:52 AM Page 157

Part 3
➤
Components and Simple Repairs
158
fixture
common terminals
red (not conductor)
all neutrals
connected wtih
wire nuts at
switches
black
common
terminal
traveler terminals
black
traveler terminals
black
black
black
red
red
black
black
white
white
black
white
white
white
power source
A three-way switch; trav-
eler terminals; traveler
wires; common wire;
common terminal; ground
wires with jumper.
15 8964 CH12 2/1/00 8:52 AM Page 158
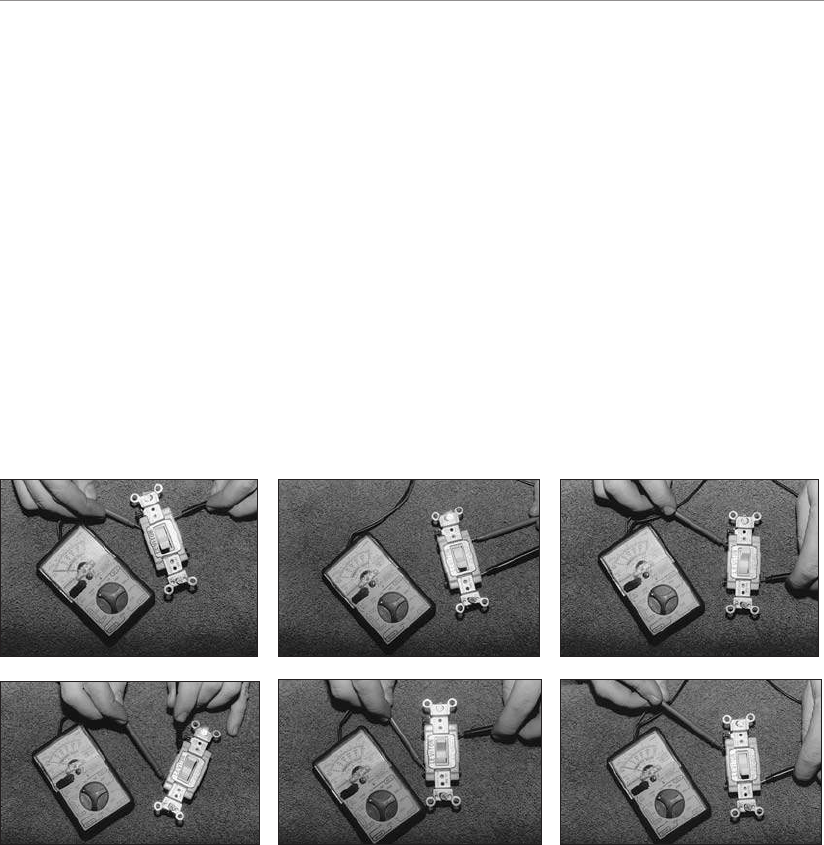
159
Chapter 12
➤
Replacing Old Switches and Receptacles
When removing a three-way switch from its box, note to which terminal screws or
back-wired slots the wires are connected. Mark the common wire with a small piece
of masking tape, or attach each wire to the new switch as you remove them from the
old switch. The common terminal screw usually is copper; the traveler terminals are
brass or sometimes silver. Note whether the neutral wire is being used as a hot con-
ductor.
Four-Way Switch
A four-way switch has two sets of traveler wires running between it and a pair of three-
way switches. There is no common wire nor is there a common terminal. The conti-
nuity test for a four-way switch requires a few extra steps. You need to put the clip on
any pair of traveler screw terminals separately and then touch each of the other screws
with the probe. This is a total of six tests for each position of the toggle (see the fol-
lowing figures). The test should show two continuous currents for each position of the
toggle switch. (The paths between specific traveler screw terminals vary with different
manufacturers.)
A four-way switch; 1, 2, 3, 4; testing screw terminals by pairs (1-2, 3-4, 1-4, 2-3, 1-3, and 2-4).
A four-way switch box has two cables with three conductors coming into it (thus four
hot conductors or wires). Two are black; the other two are a second color, most likely
red. When you replace the switch, be sure to match the wires to the correct traveler ter-
minals. New four-way switches either match their terminals up by color (two are brass
and two are copper), or the back of the switch might have wiring instructions. This
makes your job easier. You simply have to match one color of wire insulation to one set
of screws (red wires to brass screws, for example). See the following figures for a typical
installation.
15 8964 CH12 2/1/00 8:52 AM Page 159
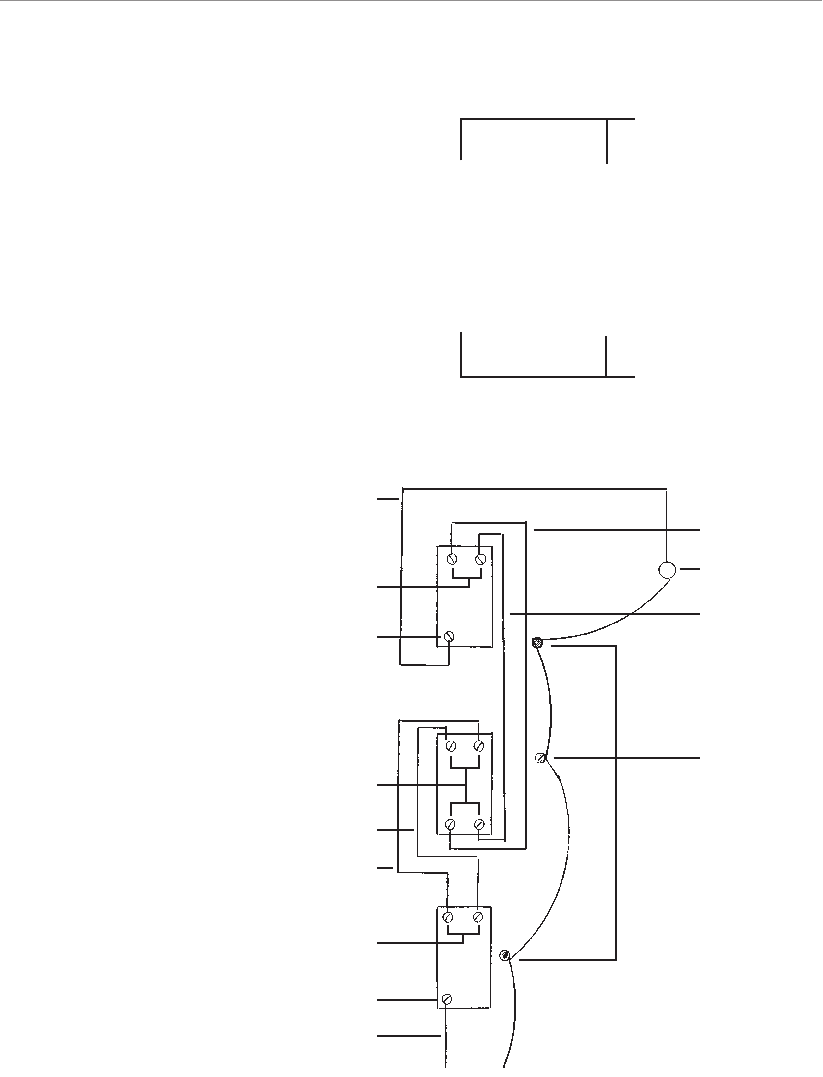
Part 3
➤
Components and Simple Repairs
160
brass traveler terminal
screws
A four-way switch.
copper traveler
terminal screws
black
fixture
red
power source
neutrals
connected
with wire nuts
at switches
black
common
terminal
traveler
terminals
red
black
traveler
terminals
common
terminal
traveler
terminals
black
15 8964 CH12 2/1/00 8:52 AM Page 160
161
Chapter 12
➤
Replacing Old Switches and Receptacles
The Great Outdoors
You cannot replace an outdoor switch with an indoor switch unless you also use a
bubble-type cover or a cover with a flip-style lid. These are weatherproof covers. Better
yet, you can use a cover with a built-in, horizontal, lever-type switch that comes with a
foam gasket between the cover plate and the box. The lever activates a regular toggle
switch underneath. Other than that, the replacement procedure is the same as a regular
single-pole switch.
Dimmers
You can replace any interior single-pole switch with a dimmer if the box is large
enough to accommodate the larger body of the dimmer. Don’t try to pack it into a
tight or overcrowded box because this is a fire hazard (see the instruction sheet that
comes with the dimmer). Dimmer switches come with about four inches of their own
wiring or lead wires (line and load and ground wire) ready to connect with cable from
the circuit with wire nuts.
Old Wire, New Switch
It can be difficult working with the deteriorated
knob-and-tube wire ends inside a box. You might
have to snip off the end, and the remaining wire
can be a little too short to easily connect to a new
switch or receptacle. In this case, you can pigtail a
short, new piece of wire to the existing wire and
connect the pigtail to the terminal screw on the de-
vice. This also will bring the wires into compliance
with the NEC, which calls for six inches of workable
wire length inside a box. The following diagram
shows this type of pigtail.
Ask an Electrician
A wire nut (Wire-Nut Ideal
Industries, Inc.), also known as
a solderless connector, is a
plastic, twist-on connector used
to connect and protect wire ends
that have been twisted together.
Each size nut is color-coded ac-
cording to its manufacturer and
can only accommodate a certain
number of wires.
15 8964 CH12 2/1/00 8:52 AM Page 161
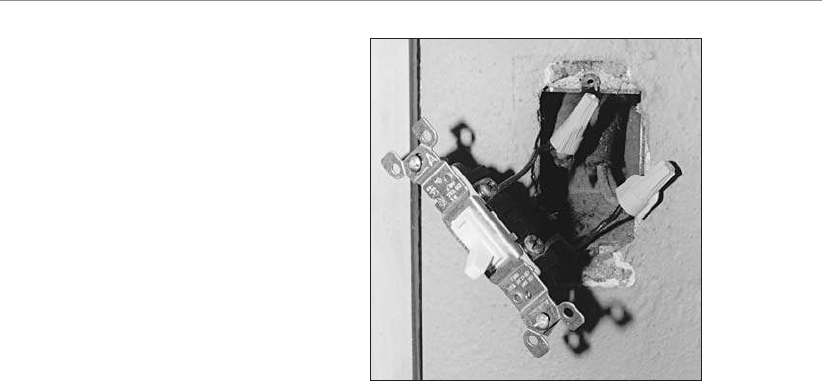
Part 3
➤
Components and Simple Repairs
162
Disreputable Receptacles
Receptacles are pretty long-lasting, but old ones eventually can give out when the clips
no longer hold a plug snuggly. There also are drawbacks to some old receptacles if
they’re neither polarized nor grounded. Receptacle bodies also get broken if furniture or
toy trucks somehow bang into them. (This happens at gyms all the time, only barbells
do the damage.)
You want your receptacles and their cover plates to be intact. Broken or missing sections
can set up you and yours for a shock or worse. When replacing an old receptacle, you
can’t simply pop a new, grounded receptacle into an existing two-slot outlet. It doesn’t
work that way, although there is a trick you can do with a GFCI that will give you some
protection, but it will not ground any equipment plugged into the receptacle. A GFCI
does not give grounding protection unless a grounding conductor already is present.
Check and Check Again
Receptacles, like switches and fixtures, need to be checked with a voltage tester before
you do any work on them. The test is similar for both grounded and ungrounded recep-
tacles, except you’ll be testing for grounding as well with the former. A grounding test
can only be done with the power on.
Knob-and-tube wiring
with pigtails.
15 8964 CH12 2/1/00 8:52 AM Page 162
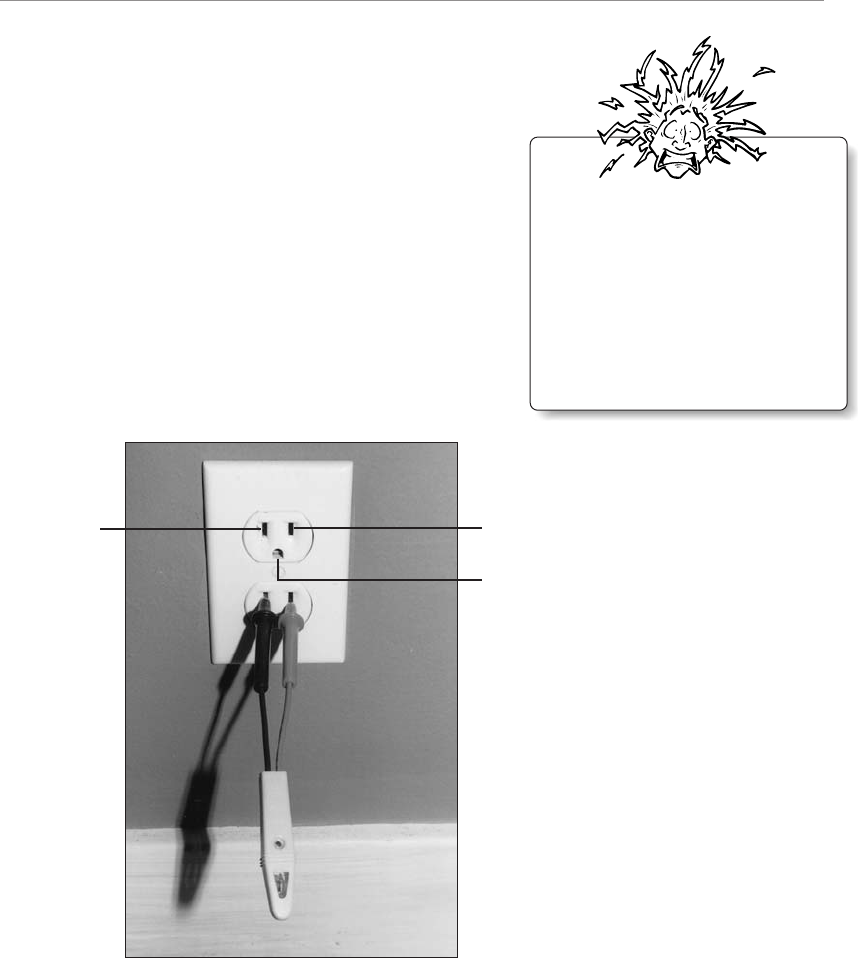
163
Chapter 12
➤
Replacing Old Switches and Receptacles
With the power off, insert both ends of your voltage
tester into the slots of the receptacle. The light in
the tester should not go on. If it does, the power has
not been turned off, or the wrong circuit was shut
off. Even if the tester bulb does not light up, you
can’t be sure that the current is off. The receptacle
might be damaged but still receiving a current.
Remove the cover plate and carefully pull the recep-
tacle out. Place one probe on the brass terminal,
which should be connected to the black or hot wire.
Place the other probe on the silver or neutral ter-
minal. You must touch both terminals to complete
the circuit. The bulb shouldn’t glow if the power has
been shut off.
Positively Shocking
Be sure to install a correctly
rated receptacle when you re-
place an existing one. Most will
be 15 amp. Installing a 20-amp
receptacle on a 15-amp circuit
can lead to overloading and can
be a fire hazard.
Testing for grounding.
longer,
neutral slot
shorter,
hot slot
grounding hole
15 8964 CH12 2/1/00 8:52 AM Page 163
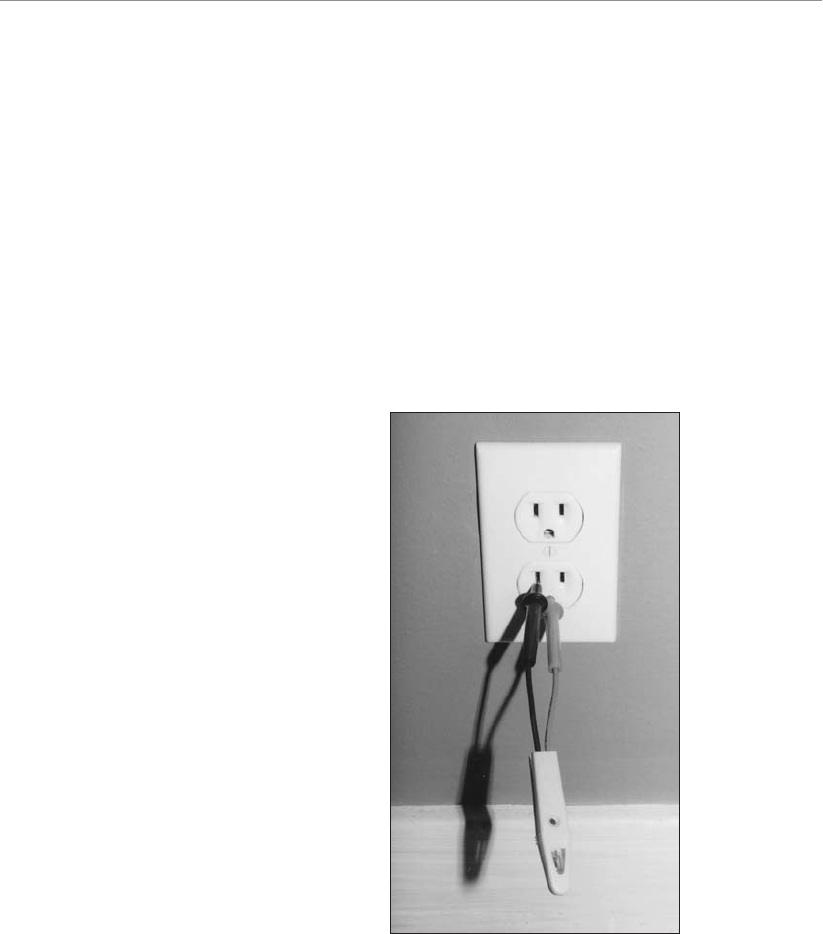
Part 3
➤
Components and Simple Repairs
164
Testing for grounding; the
shorter, hot slot; grounding
hole.
Test for Grounding
You can test a grounded, three-slot receptacle for grounding (remember, the power is
on) by placing one probe of your tester in the short slot and one in the hole for a plug’s
grounding pin. The short slot is for the hot wire. The bulb should glow to indicate that
the receptacle is grounded. If it doesn’t, keep one probe in the grounding hole and
place the other one in the longer, neutral slot. In this position, if the bulb glows, it
shows that the receptacle is grounded, but the black and white wires have been reversed
(they’re attached to the wrong terminal screws) and should be corrected. If the bulb
doesn’t glow in either case, the receptacle isn’t grounded.
A three-slot receptacle that isn’t grounded is misleading and dangerous to a user. It
might indicate that only the individual receptacle is incorrectly wired or that it was in-
advertently used to replace an ungrounded receptacle. Either way, you want to know so
you can correct the problem.
15 8964 CH12 2/1/00 8:52 AM Page 164
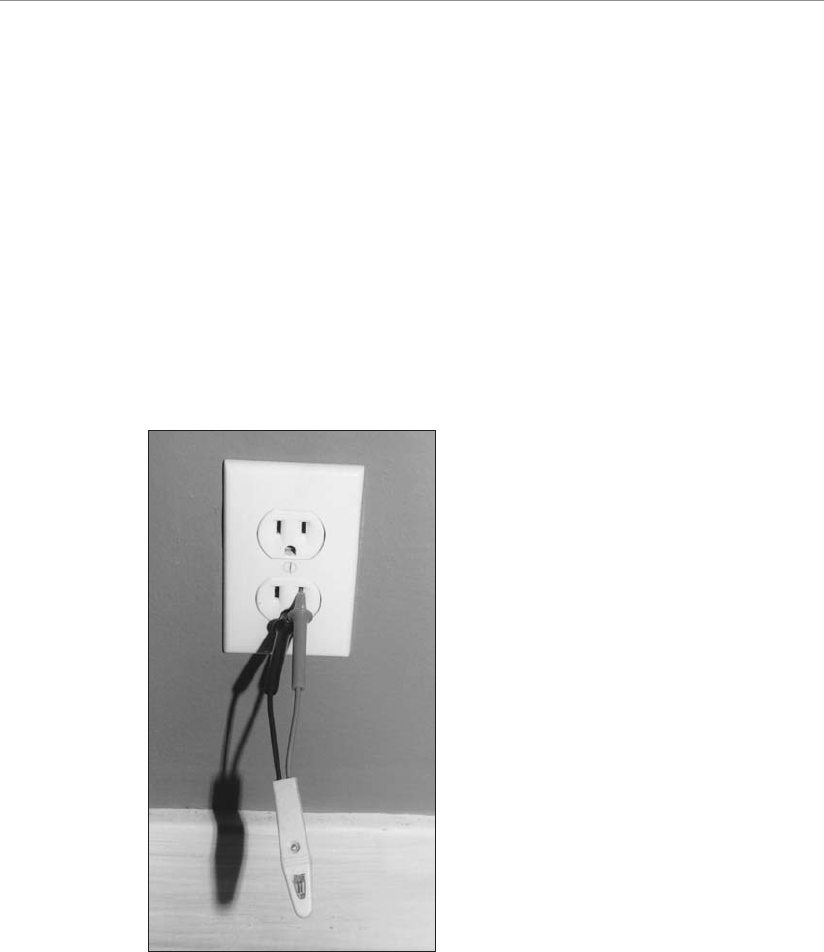
165
Chapter 12
➤
Replacing Old Switches and Receptacles
Two-Wire Grounding
Do the following to test a two-slot receptacle:
➤ Place one probe in the hot slot and the other end on the screw securing the cover
plate. The screw must be clean as well as paint and grease free.
➤ If the receptacle is grounded, the tester’s bulb will light up.
➤ Put the probe in the neutral slot if the tester does not light up in the hot slot. If it
lights, the receptacle is grounded, but the neutral and hot wires have been re-
versed and are attached to the wrong terminals. If the bulb doesn’t glow at all, the
receptacle isn’t grounded.
➤ To be absolutely sure that the receptacle is grounded (if your test indicates that it
is), turn the power off and remove the cover plate. Check to see if an actual
grounding conductor is present.
Testing a two-slot recep-
tacle for grounding.
15 8964 CH12 2/1/00 8:52 AM Page 165
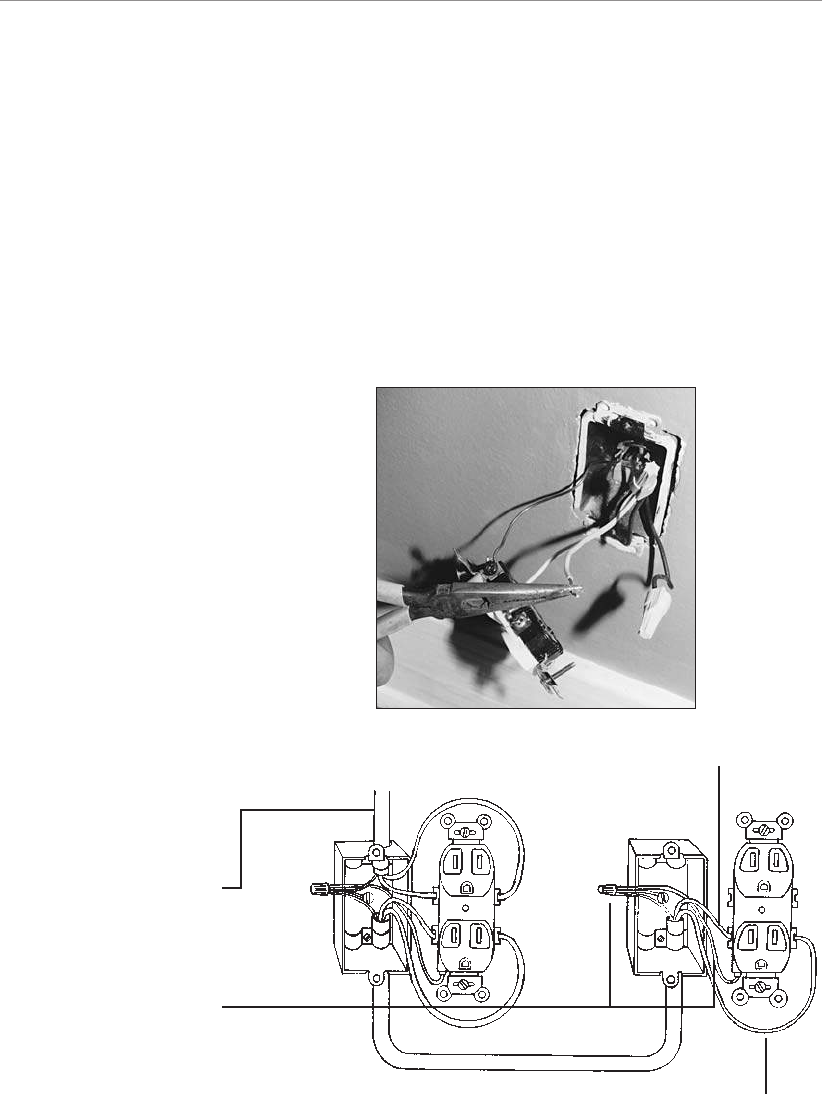
Part 3
➤
Components and Simple Repairs
166
Note the wire locations on
the receptacle.
Installing a New Receptacle
Receptacles are a little more straightforward than three- and four-way switches. With a
single duplex receptacle, you’re dealing with one or two cables coming into the box. An
end-of-the-run receptacle will have one cable, and a middle-of-the-run will have two.
The receptacle has two sets of terminal screws, silver for the neutral wires and brass for
the hot.
After shutting off the power and testing the terminal screws, remove the outlet by loos-
ening the screws attaching it to the box. Remove the hot and neutral wires, noting their
position on the outlet (hot upper, hot lower, neutral upper, neutral lower) by marking
the position on an attached piece of masking tape. Reconnect to the new receptacle in
the same locations, and gently push the wires back into the box while reattaching the
new receptacle. Turn on the power at the service panel or fuse box and test.
Installing a new receptacle.
cable to power source
grounding conductors
hot (black) conductor
neutral (white) conductor
15 8964 CH12 2/1/00 8:52 AM Page 166
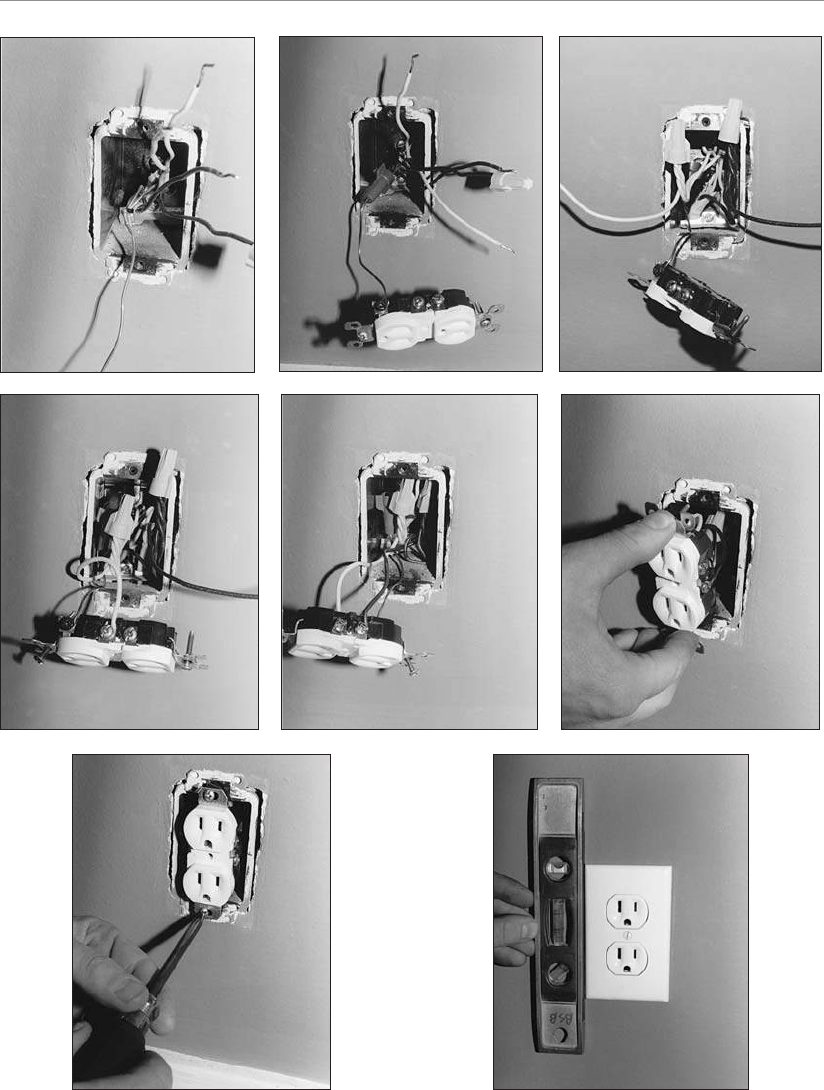
167
Chapter 12
➤
Replacing Old Switches and Receptacles
15 8964 CH12 2/1/00 8:53 AM Page 167

Part 3
➤
Components and Simple Repairs
168
Grounding an Old Receptacle
A properly grounded system ties each device, appliance, and fixture back to the service
panel with a separate grounding conductor (the bare copper or green insulated copper
wire). It’s unrealistic to attempt this with an old electrical system unless you’re replacing
it (in which case, the grounding would be part of replacing the system).
You also could install a GFCI in place of an existing, two-wire receptacle.
The National Electrical Code allows an ungrounded, two-wire receptacle to be replaced
with a GFCI. A GFCI can even protect any receptacles downstream (away from the
panel or power source). A GFCI used in this manner will only protect you from ground
faults; it will not act as a ground for any equipment plugged into the receptacle(s). As a
rule, it’s best for GFCIs to protect only a single box, not multiple receptacles. If you try
to use one GFCI to cover multiple receptacles, you might experience nuisance tripping
due to the greater sensitivity to current fluctuations. A GFCI installed to replace a two-
wire receptacle should be marked “No Equipment Ground.”
A GFCI must be wired according to stamped terminals on the back of the receptacle.
They will be marked “Load” and “Line” as well as “Hot” and “White.” The hot wire
(which runs from the panel or fuse box) is the line conductor; anything going off to an-
other load or receptacle is the load conductor. How do you know which is which?
You’ll need your voltage tester.
With the power off and the old receptacle removed, separate all the wires in the box so
they’re not in contact with each other (or with the box if it’s metal). Turn the power
back on, and put one end of your probe on one hot wire and one on the neutral that
is paired with the hot you are testing. If the bulb doesn’t light up, try the other black
wire and neutral. The one that lights up the tester’s bulb is the line conductor. It’s the
one receiving power from the current you switched back on at the service panel or
fuse box. Connect this to the “Line,” “Hot” side of the
GFCI. It is very important that the line side hot and
neutral conductors or wires be connected to the “Line”
side of the GFCI; otherwise, the GFCI will trip or will
not work at all. If the line and loads are reversed, the
GFCI will still have power if it is tripped, producing a
hazardous situation.
As an alternative to installing a GFCI to replace an
ungrounded receptacle, it is permissible to install a
grounding conductor to an ungrounded circuit by
using an individual No.12 insulated green copper con-
ductor to connect each receptacle being grounded to
the closest cold-water pipe. The grounding conductor
will then have to be secured to the pipe using an ap-
proved clamping device. It also can be run directly
back to the panel and installed in the grounding/
neutral bar.
Positively Shocking
Remember, a GFCI is used in
places such as bathrooms to con-
trol dangerous electricity and
possible shock. If you wire a
GFCI incorrectly, it will not pro-
tect you. There is nothing more
dangerous than thinking you’re
protected when you’re not.
15 8964 CH12 2/1/00 8:53 AM Page 168
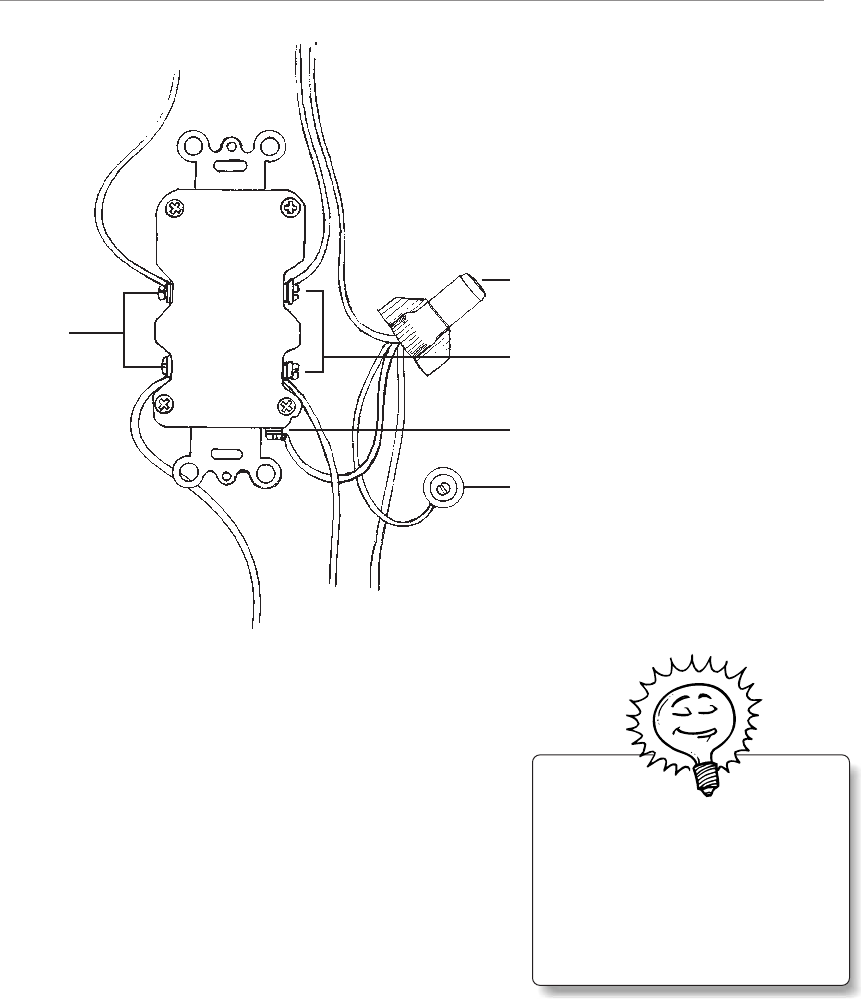
169
Chapter 12
➤
Replacing Old Switches and Receptacles
Aluminum Wiring
Aluminum wiring now requires receptacles and
switches marked CO/ALR (see Chapter 6, “When
You Buy a House”). Do not use any unmarked de-
vices or devices marked CU or CU-CLAD ONLY. You
must wire-brush the connections and apply an an-
tioxidant paste to the ends of the wires before con-
necting them to the terminals.
A GFCI.
grounding conductor
grounding screw for box
grounding terminal
white
hot
load
line
Bright Idea
It’s easier to install a plug-in GFCI
directly into your existing two-
wire receptacle than to install a
GFCI. Consider this option before
replacing your old receptacles.
15 8964 CH12 2/1/00 8:53 AM Page 169

Part 3
➤
Components and Simple Repairs
170
The Least You Need to Know
➤
Before replacing any switch or receptacle that you think is defective, make sure
you don’t have a problem somewhere else in the circuit.
➤ Even if you’ve turned off the power to a device, check it again with a voltage
tester.
➤ Make sure the existing wiring pattern is correct for grounding and polarization
before repeating it with your new receptacle.
➤ A GFCI can be installed in place of a receptacle without a ground. It will pro-
tect you, but it will not ground anything plugged in to the receptacle.
15 8964 CH12 2/1/00 8:53 AM Page 170

Chapter 13
Lighting Up
In This Chapter
➤
Figuring your lighting requirements
➤ Different needs, different lights
➤ Work, mood, and ambient lighting
➤ Outside lights
Before Thomas Edison came up with a working light bulb, we burned different sub-
stances to provide us with light. We burned candles, oil, and kerosene until the late
1800s, and in some urban areas, natural gas was used into the 1920s. Using small
flames as a source of work and reading light left something to be desired. (The tradi-
tional lighting of the Christmas tree occasionally burned down the house.)
The advent of electric lighting changed our lives forever. Workplaces have become
safer and so have our homes. We are less dependent on natural lighting, so produc-
tivity has increased dramatically. On the downside, because we can now wander
around the house at all hours of the day and night and see where we’re going, we
sleep less than ever before.
Today we have a vast array of lighting options to choose from for our homes. From a
basic incandescent lamp to the newest halogen fixtures, we can light up every corner
and do so with timed switches, dimmers, or a standard toggle switch from multiple lo-
cations. This chapter introduces you to some of these choices and how they can affect
your electrical remodeling or additions to your system. There really is life after your
vintage 1960s ceiling fixtures, but you might want to hold on to the lava lamps.
16 8964 CH13 2/1/00 8:25 AM Page 171
Part 3
➤
Components and Simple Repairs
172
How Illuminating
We are way beyond the point when lighting was
simply functional, allowing us to work and not
stumble around after the sun went down. If function
was all it meant to us, every room in our house would
have one huge, efficient, fluorescent light fixture on
the ceiling and maybe a night-light or two for after
dark. Instead, lighting does much more such as …
➤ Create a mood or atmosphere.
➤ Define a space.
➤ Provide security and safety.
➤ Highlight artwork or a section of your home.
Your lighting needs will be defined by these factors and others. Before you install a
particular type of lighting, ask yourself the following questions:
➤ Who will be using this area and for what purpose?
➤ Do I want a traditional or modern look?
➤ How often will anyone be in this room?
➤ How much am I willing to spend?
➤ Is energy conservation important to me?
At a minimum, the code calls for one switch-controlled light per habitable room.
Hallways, stairways, and garages also must meet this code requirement. This can be
accomplished with permanent fixtures, such as ceiling lights, or through a switch-
controlled receptacle into which a lamp can be plugged. Bathrooms and kitchens,
however, must have an installed fixture. Your first step is to establish your minimum
lighting needs and then choose the style of fixture you want to meet them.
Ask an Electrician
Light is a form of radiant energy
made up of electromagnetic waves
of different wavelengths. The rods,
cones, and optic nerves in the
eye’s retina react to light’s electro-
magnetic waves, resulting in vision.
Electrical Elaboration
Despite Edison’s introduction of the incandescent lamp, it would be years before electrification
was prevalent around the country. Builders eventually began installing wiring in homes even if
electricity wasn’t available in the immediate area. As a backup to unreliable electrical generation,
both gas and electric lighting were installed in new homes in some locations until around 1920.
Homeowners wanted the assurance of gas if the power went out for an extended period of time.
16 8964 CH13 2/1/00 8:26 AM Page 172
173
Chapter 13
➤
Lighting Up
Measuring Your Lighting Needs
The NEC calls for a minimum calculation for general lighting and receptacle loads of
three watts per square foot of living space. This comes out to approximately one cir-
cuit every 575 square feet. That doesn’t amount to a lot, but remember, electrical
codes only establish minimum standards. In reality, you’ll want lighting everywhere.
Consider the different areas of your house and their individual needs:
➤ Kitchen. Overhead lighting, natural light from windows and sliding doors, work
light over counters, a light over the stove.
➤ Bathrooms. Primarily lights over the sink(s) and lights over the bathtub and
toilet, depending on the size of the room.
➤ Dining room. A hanging light over the table, recessed ceiling lights, or possibly
wall sconces. This room often has a dimmer switch to tone down the light.
➤ Bedrooms. Children’s rooms often get ceiling lights. Master bedrooms might de-
pend more on reading lamps and switch-controlled receptacles, although large
rooms can use recessed ceiling lighting as well.
➤ Hallway. You might want a long track light to highlight artwork on the walls.
Typical locations of
switch-controlled lighting;
Required at:
Outdoor entrances.
Basements (all finished
rooms, stairs, and storage
areas or rooms with
HVAC or water heaters
which may require main-
tenance).
First floor: all living space
(cannot have switch-
controlled receptacle in
bathrooms or kitchen).
Second floor: all living
space and stairs.
Third floor/attic: if fin-
ished or used for storage.
Garage: inside, but not
mandated for exterior.
16 8964 CH13 2/1/00 8:26 AM Page 173

Part 3
➤
Components and Simple Repairs
174
➤ Garage. At least one light per bay over the hood of the cars. It’s even better to
add one or two at the other end so the trunks are illuminated.
➤ Basement. Depends on whether the space is finished or unfinished. In either
case, you want at least enough ceiling light to cover the entire area thoroughly,
leaving no dark spots.
➤ Closets, storage rooms. At least one ceiling light.
➤ Outdoors. At a minimum, one light over each entry door and over the garage
doors. It’s even better to consider lights to line walkways and illuminate gardens
or security lighting for back and side yards.
Your use of a room obviously will determine your choice of lighting fixtures, their lo-
cations, and their number. A single fluorescent ceiling light will fulfill all the working
requirements of most closets because the requirements are pretty basic: to shed
enough light for you to identify and choose your clothes. A kitchen, on the other
hand, requires all kinds of light for a modern homeowner. You need lights over coun-
ters for close work so you can chop, dice, and mince vegetables instead of your fin-
gers. Overhead lights enable you to read the newspaper and get a better look at
what’s hiding in the back of your pantry. A dimmer-controlled hanging light over the
eating area lets you tone things down for a late-night meal.
Anywhere you’ve got a wall, ceiling, or floor, you can install a light. It’s simply a
matter of extending a circuit or running a new one and choosing your fixtures. The
science of lighting is a little more complicated.
Distinguishing a Lumen from Illuminance
Light output is measured in lumens. According to The American Heritage Dictionary of
Science, a lumen is a unit of luminous flux equal to the amount of light from a source
of one candela radiating equally in all directions. A candela is a unit of luminous in-
tensity equal to
1
/
60
of the radiating power of one square centimeter of a black body at
1,772°C. You can draw two conclusions from this information:
➤ The higher the lumen measurement, the more light you’ll have to work with
from a fixture.
➤ Authors can easily get carried away when they have too many reference books
at their disposal.
Illuminance, which is measured in foot-candles, is the amount of light hitting a point
on a surface. A foot-candle is (easily enough) defined as the amount of light produced
by one candle on a surface one foot away. We can’t see illuminance, but we do see lu-
minance or brightness, although this is somewhat subjective. (What appears to be
dim light to me might be plenty bright to you.) Architects and lighting consultants
take all these measurements into consideration when they calculate the lighting
needs of buildings.
16 8964 CH13 2/1/00 8:26 AM Page 174

175
Chapter 13
➤
Lighting Up
Comfortable lighting selections and light levels are
determined by the tasks that require the lighting,
the distance between the light and the task, and the
degree of glare. One definition of glare is excessive
contrast between the intensity of light on a partic-
ular object or surface and the surrounding area or
background; indirect glare is the glare produced
from a reflective surface. Too much contrast be-
tween them causes glare. (Computer screens are a
common example.) You can reduce this glare by …
➤ Installing fixtures that keep the light level ap-
propriate for the task at hand.
➤ Using a louver or a lens to block or redirect
the light.
➤ Carefully considering the placement and
spacing of light fixtures.
Another measurement of lighting quality is how
well it enables you to see colors accurately. The
better the color rendering, the more pleasing the
living space. Color-rendering capability is based,
naturally enough, on the color-rendering index
(CRI), which measures from 1 to 100. (Natural day-
light measures at 100.) The higher the rating on
the CRI, the more lifelike and accurate the object
being viewed.
Know Your Lighting
Lighting is defined by its use in our homes and
places of work. Designers and architects break it
down into several categories:
➤ Accent lighting emphasizes or highlights a
specific area or object and directs our atten-
tion to it.
➤ Ambient lighting is general illumination.
➤ Task lighting is for illuminating work and
tasks.
It’s never a bad idea to install plenty of ambient lighting, even if you later decide it’s
more than you immediately need. At some point in the future, you might move
things around and decide you need more lighting. I wouldn’t recommend tearing up
Bright Idea
When determining your lighting
needs, keep in mind how
reflective the various surfaces in
a room will be and how much
daylight is available. Dark-green
carpet won’t reflect light the
way white vinyl flooring and
countertops will. Too much light
is just as much a problem as too
little light.
Positively Shocking
Never use a higher-wattage light
bulb than a light fixture can
handle. This can lead to over-
heating and possibly a fire.
Instead, install fixtures that can
handle a higher wattage than
you need so you have the choice
of using either the higher- or
lower-wattage lamps.
16 8964 CH13 2/1/00 8:26 AM Page 175

Part 3
➤
Components and Simple Repairs
176
the walls just to install fixtures, but if you have an open ceiling or already are doing
some installations, consider a few extra light fixtures if the circuit permits.
If you walk into a lighting store or the lighting section of a home-improvement
center, you’ll see dozens and dozens of fixtures to choose from. Where do you start?
Aim High, Low, and Wide
Light from a lamp is aimed somewhere, whether it’s the top of your desk or your
workbench. Even general ambient lighting gets directed somewhere. Recessed ceiling
lights and adjustable spotlights can provide as broad or as focused a beam of light as
you desire. Some lights are installed as wall washers, meaning they shine down a wall
either to highlight artwork or other collections or simply to draw your attention to
the perimeter of the room, conveying a greater sense of size than might truly exist.
The advantages of recessed ceiling lights are their versatility and unobtrusiveness.
Let’s face it, a chandelier automatically draws attention to itself—especially if one of
your party guests is swinging on it. A recessed fixture is far more subtle and almost
hides in the background.
Some fixtures can serve more than one purpose. A wall sconce, for example, can serve
general, task, and accent lighting needs. This versatility is a huge advantage over
ceiling lights when you’re remodeling because it’s far easier to wire and install a wall
fixture than to install most ceiling fixtures.
Lighting Up Outside
I think exterior lighting is always a plus with any home
(see Chapter 21, “The Great Outdoors”). Good lighting
will welcome you and your guests on a rainy night,
provide some measure of security for your family, and
illuminate address numbers, door locks, and staircases.
Before you decide to install fixtures as powerful as
Batman’s searchlight, consider the following:
➤ Know the size of the fixture and its scale com-
pared to your house.
➤ Think about the location and aim of the lights
and their effect on your neighbors. (A little light
goes a long way at night.)
➤ Caulk the top seam between the fixture and the sec-
tion of the house where it’s attached to ensure that
water stays out. Leave the bottom uncaulked so
that, if moisture does get in, it has a place to exit.
➤ Think twice before installing solid-brass fixtures. They won’t rust, but eventually
most will tarnish and need polishing.
Bright Idea
For bedroom reading lights, con-
sider a halogen lamp by the bed-
side. This will give out a very
focused, narrow light rather than
filling the room the way an in-
candescent lamp will. A narrow
light will be less disturbing to a
sleeping spouse.
16 8964 CH13 2/1/00 8:26 AM Page 176
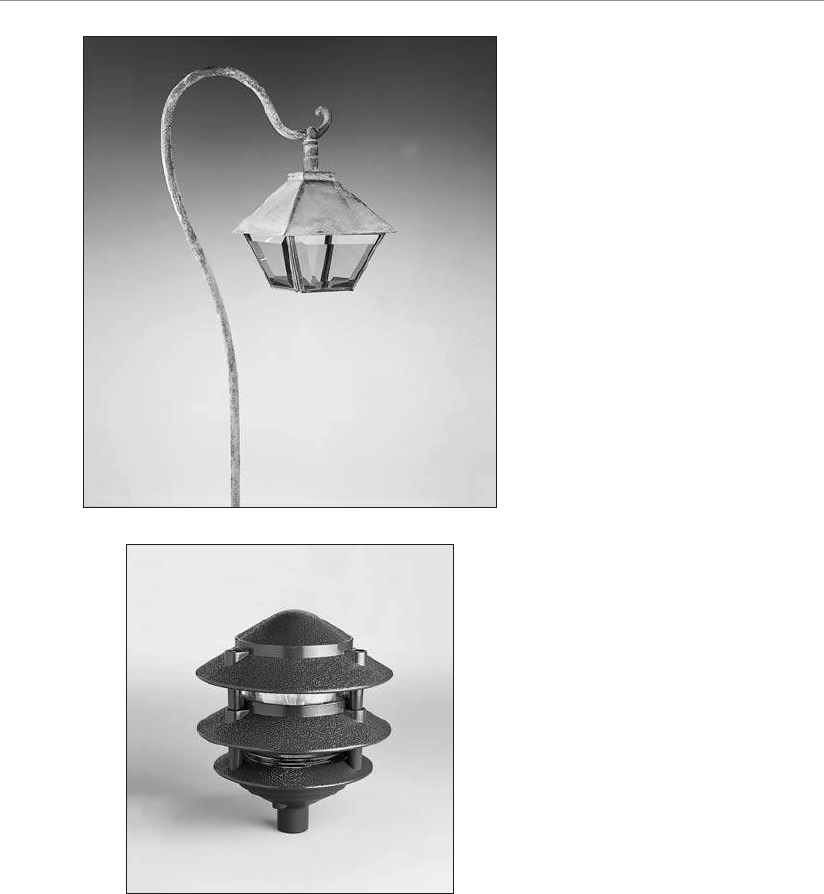
177
Chapter 13
➤
Lighting Up
Outdoor path light.
(Progress Lighting)
Outdoor pagoda light.
(Progress Lighting)
16 8964 CH13 2/1/00 8:26 AM Page 177

Part 3
➤
Components and Simple Repairs
178
Installing outside lighting, like many tasks, can be done the easy way or the hard
way. The easy way means mounting all the fixtures on the walls of your house (and
porch ceilings), which means you can pull your wires from inside the house. The
hard way means digging ditches and running wires and conduit underground, al-
though this will give your yard a much more dramatic presentation. As a final consid-
eration, think about what your outdoor lighting will look like from inside the house.
You can enjoy your yard even in the winter if you set up lighting that accents it well.
Combining Lighting Styles
Most general living space will accommodate more than one lighting style. A closet
obviously doesn’t need accent lighting unless you make a point of giving your guests
a tour of your shoe collection. A dining room needs ambient light, but it can become
very dramatic with, say, floor-to-ceiling lights illuminating the side walls while the re-
cessed ceiling lights are off and a few lit candles are on the table. A mix of lighting
offers the most options and can present a room and its occupants at their best in a
variety of settings.
Whether you’re building something new or remodeling, keep your furniture in mind
rather than strictly installing lights by formula (so many per square feet at such and
such a distance from each other). You might have a grand piano ready to nestle in a
corner of the living room or a windowless wall just waiting for your collection of
family portraits. Either situation calls for very specific fixture placement.
Electrical Elaboration
In some instances, outdoor lighting can be dangerous to wildlife. In parts of Florida and
other coastal areas, residents and businesses are asked to turn off their bright lights during
certain cycles of a full moon because the lights can confuse sea turtles who see them as a
signal to come ashore and lay their eggs.
16 8964 CH13 2/1/00 8:26 AM Page 178
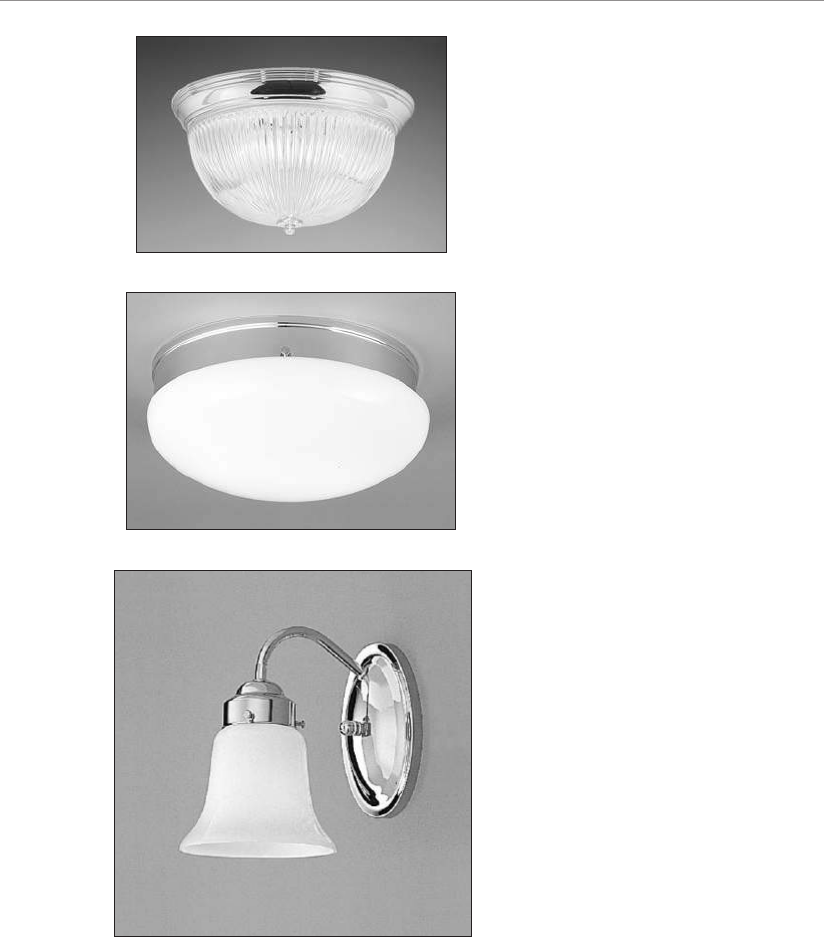
179
Chapter 13
➤
Lighting Up
Close-to-ceiling
incandescent.
(Progress Lighting)
Close-to-ceiling compact
fluorescent.
(Progress Lighting)
Sconce.
(Progress Lighting)
16 8964 CH13 2/1/00 8:26 AM Page 179
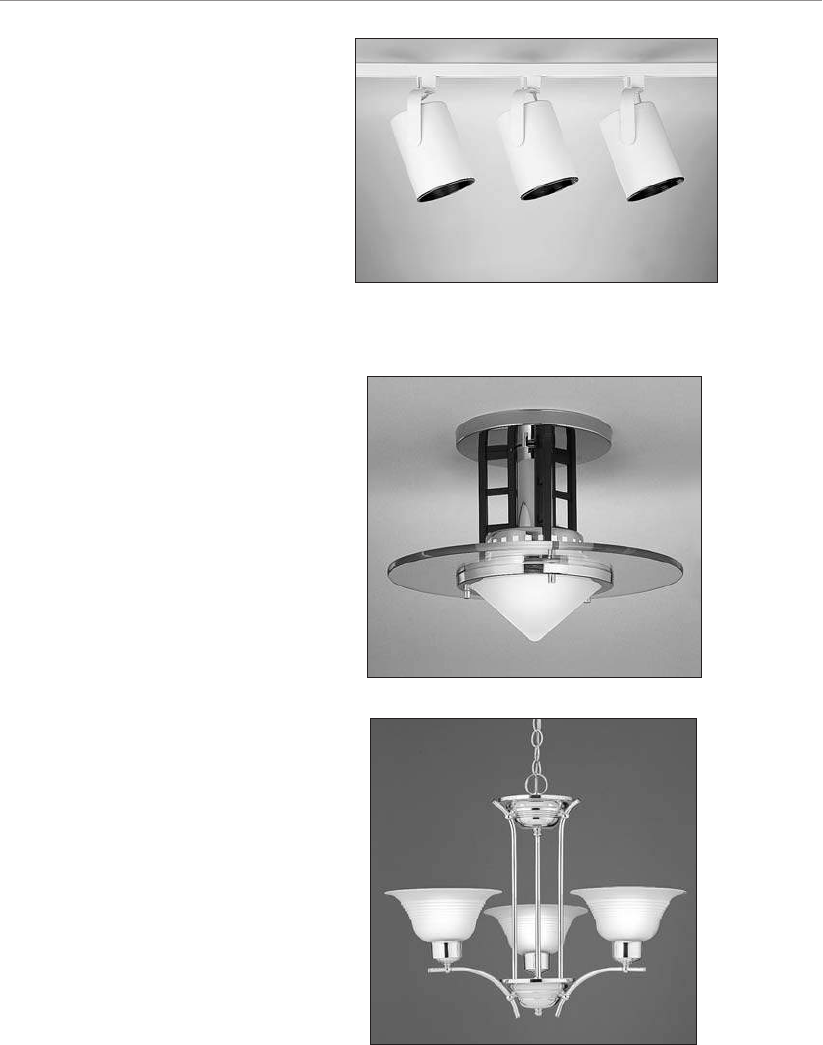
Part 3
➤
Components and Simple Repairs
180
Semi-flush style.
(Progress Lighting)
Chandelier.
(Progress Lighting)
Track lighting.
(Progress Lighting)
16 8964 CH13 2/1/00 8:26 AM Page 180
181
Chapter 13
➤
Lighting Up
Looks Are Something
The cheapest porcelain fixtures with 100-watt
bulbs might provide safe lighting, but they won’t
be much to look at. Visualize the appearance of
the fixture and the lamp as well as their function.
Some fixtures literally are works of art (Tiffany
lamps, for example); others are designer-created
and are very striking to look at. Do you want to
look at a brass hanging light over the kitchen table
or cobalt-blue steel? You’re going to be looking at
them every day, so take your time choosing your
fixtures.
What’s Your Type?
Lighting is divided by the type of lamp used and
the style of the fixture. Lamp types include …
➤ Incandescent.
➤ Fluorescent.
➤ Halogen.
Each of these has distinguishing characteristics, as
described in the following list. When it comes to
fixture styles, the sky’s the limit. They range from
antique reproductions to one-of-a-kind works of
art (with prices to match). The following are some
of the most common light fixtures:
➤ Flush-mounted ceiling lights that include
square, mushroom, or round domes
➤ Hanging ceiling lights and chandeliers
➤ Surface fluorescent lights
➤ Recessed ceiling lights
➤ Track lighting
➤ Bath bars
➤ Sconces and wall-mounted lights
➤ Wall washes
➤ Undercabinet-mounted lights
Bright Idea
Consider installing adjustable re-
cessed fixtures so the light beam
can be aimed in different direc-
tions as your decorating changes.
This is less expensive than trying
to install additional fixtures.
Ask an Electrician
Although we commonly use the
term “light bulb,” the more ac-
curate term is lamp. A bulb, as
my technical editor has pointed
out, is something you plant in
the ground. The complete
lighting unit (lamp, lamp socket,
housing, reflective material,
lenses, and, when called for, bal-
last) is called a luminaire. Iuse
the term “lamp” where possible
in this book. Where I must, I use
the word “light bulb” for clarity.
16 8964 CH13 2/1/00 8:26 AM Page 181

Part 3
➤
Components and Simple Repairs
182
➤ Outdoor lights (floodlighting, landscape lighting, pole-mounted lights, wall-
mounted lights, and security lighting)
All of these will light up a given area. You just have to decide whether they will pro-
vide light that you find both appropriate and pleasing to the eye. Your budget also is
a consideration, especially if you’re buying fixtures for a major remodel. An outdoor
landscaping light, for example, can be a simple pagoda light or an ornate—and ex-
pensive—leaded-glass lamp. (The latter is not recommended if you have kids, dogs, or
errant adults running around the yard.)
Incandescent
This is the most familiar type of lamp. An electric current passes through and heats a
tungsten filament, producing a glowing light. (The term “incandescent” literally means
“to glow or become hot.”) Over time, heat evaporates the tungsten, and it eventually
weakens and breaks. The lamp contains a chemically inert gas that allows the tungsten
vapor from the heated element to deposit on the sides of the glass. This is why standard
incandescent lamps gradually become darker over time. If they are too small, the tung-
sten coating would turn them opaque, and they’d be useless as a source of light.
Incandescent lamps are cheap to produce and are versatile in application, but they
are considered to be impractical by energy conservationists as a source of light given
modern alternatives. They produce a considerable amount of waste heat for the
amount of current they draw, and they have a useful life of 750 to 2,500 hours de-
pending on the lamp. Builders traditionally install incandescent fixtures because both
they and the lamps are inexpensive and are not likely to meet any resistance from
price-conscious buyers. When buying lamps, take note of the voltage rating of the
lamp. Typical lamps sold in stores are rated at 115 or 120 volts. At professional
lighting stores, you should be able to find longer-lasting lamps rated at 130 volts.
Tungsten-Halogen Lamps
These lamps (which are smaller in size than standard incandescent lamps) also heat
up a tungsten filament, but they contain halogen gas. The gas combines with the
evaporated tungsten to create tungsten halide gas that deposits the tungsten back
onto the filament, extending its life. After the deposit, halogen gas is released and the
process starts all over. The smaller size of the lamp enables the filament to heat up to
a higher temperature and a higher efficiency.
Because none of the tungsten is deposited on the glass, a halogen lamp burns
brighter and has a very focused, intense light.
16 8964 CH13 2/1/00 8:26 AM Page 182
183
Chapter 13
➤
Lighting Up
Fluorescent Lighting
Fluorescent lamps are considered to be the most energy efficient, but they often suffer
from a reputation as flickering, eerie sources of light suitable only for institutional set-
tings. They are the light source of choice in industrial and commercial settings be-
cause of their efficiency and long life—something worth considering for your home
as well. Modern fluorescent fixtures have a place in residential settings.
A fluorescent lamp is constructed with …
➤ A glass tube.
➤ Argon or argon-krypton gas and a small amount of mercury.
➤ Phosphor coating on the inside of the tube.
➤ Electrodes at each end of the tube.
As electricity passes between the tube’s electrodes,
it jostles the mercury atoms, which then give off
ultraviolet radiation. The radiation is converted to
light when it interacts with the phosphors lining
the tube. The fixture itself comes with a ballast to
kick-start the current passing within the tube and
to keep it regulated. The range of phosphors avail-
able to manufacturers enables them to produce
lamps with different color tones for different appli-
cations. Fluorescent fixtures also produce less heat
and more light for the amount of electricity they
consume as compared to incandescent lamps.
Electrical Elaboration
Halogen lamps operate at high temperatures. Halogen lights designed for installation
under kitchen cabinets can be tested to UL standard 153. This is a safety standard that
says the wood above the lamp must have a temperature lower than 194°F or 90°C with
the lamp on. Halogen lamps used inside china cabinets (or other cabinets used for dis-
play) also must pass this test to get this UL rating.
Ask an Electrician
Phosphor is a phosphorescent
substance. Phosphorescence
refers to the light given off when
a substance absorbs certain types
of rays such as ultraviolet rays.
16 8964 CH13 2/1/00 8:26 AM Page 183

Part 3
➤
Components and Simple Repairs
184
One of the biggest changes in fluorescent technology is the shape and size of the
lamps. In the past, you were stuck with straight, U-shaped, or circular figures. (The
last always seemed to be used outside small-town, drive-in, ice-cream stands for some
reason.) Now we have compact fluorescent lamps that can be an efficient substitute
for incandescent lamps. A 40-watt compact fluorescent lamp, for example, can re-
place a 150-watt incandescent lamp and can last up to 10 times longer. (It had better,
given the typical cost of $20 or more.) Two types of replacement units are available:
1. Integral units, which include a compact fluorescent lamp and ballast in a self-
contained unit
2. Modular units, in which the bulb is replaceable
Now you know that you can replace your incandescent lamps with compact fluores-
cent lamps, but is it worth it?
When Cheap Power Reigns
At one point in the 1980s, it was estimated that the cost of residential electricity in
Seattle was one tenth the cost in New York City. If it’s any consolation, our deli-
catessens weren’t anything to write home about. The cost differential isn’t that great
anymore, but we’re still below the national average. Lower costs aren’t necessarily a
justification for excessive use of electricity, but they will determine whether more effi-
cient fluorescent lamps will ever pay off for you.
Basically, the higher your electricity costs run beyond the national average (around
8¢ per KWH), the more cost-effective fluorescent lights will be in your home. This
doesn’t mean they will work well for all your lighting needs from a cost standpoint.
The longer a light is continually on, the better a candidate it is for a fluorescent
lamp. An occasionally used attic or storage-room light is best left with an incandes-
cent lamp. Some fixtures, such as recessed ceiling lights, might not have room for a
fluorescent lamp.
Electrical Elaboration
Keep in mind that adding windows also will affect your overall energy costs, probably even
more than the amount of light you’ll be saving by using natural daylight versus electric light.
Nevertheless, it’s hard to put a price on the advantages and the appeal of natural light, es-
pecially during the winter months. Look at all factors before ruling out additional windows.
16 8964 CH13 2/1/00 8:26 AM Page 184

185
Chapter 13
➤
Lighting Up
Other Considerations
The most comfortable light in many instances is natural sunlight. (You may think dif-
ferently if you live in the Sahara desert.) If you’re remodeling or adding on to your
house, think about adding more windows and skylights. Millwork companies can
custom match any existing wood window or come close enough with stock material.
There are enough vinyl and aluminum window manufacturers around that you
should be able to find one that will look like part of your house.
Paint color also affects the impact of light, both natural and electric. Light colors will
be the most reflective, but they might not be your first choice in certain rooms.
Balance out your color choice with adequate lighting.
Finally, look at your choice of controls or switches. Dimmers are inexpensive, and
they greatly expand your options in any room. One minute your living room is
washed in light for your Scrabble club’s monthly game; the next minute it’s dimmed
way low for you and your jo. (Scottish for “sweetheart,” this word works great on a
triple-word score.)
The Least You Need to Know
➤
Good lighting is more than just functional; it provides atmosphere, helps in
your work, and adds highlights.
➤ Be sure to match your light fixtures and lamp choices with the lighting require-
ments you’re trying to meet.
➤ It’s hard to go wrong installing plenty of ambient or general-purpose lighting.
➤ Outdoor lighting should get just as much thought and attention as your indoor
plans.
➤ Fluorescent technology has greatly improved over the years and is a good
choice for residential lighting.
16 8964 CH13 2/1/00 8:26 AM Page 185
16 8964 CH13 2/1/00 8:26 AM Page 186

Chapter 14
Light Fixes
In This Chapter
➤
Basic fixture replacement
➤ Fluorescent fixes
➤ Replace or repair?
➤ Cord and plug patches
➤ Finding the problem
Changing a light fixture can be more involved than simply replacing a switch or a re-
ceptacle. Switches and receptacles almost always are housed in electrical boxes, but
this isn’t always true for light fixtures. If the system is old or has been hacked at
enough, you can disassemble an old ceiling light only to find a couple of wires dan-
gling through the plaster without the hint of a box. As you should know by now, this
is a dangerous situation because all wire connections must take place within a box.
You might feel like cheating by continuing the status quo, but don’t. You’ll need to
install a new box (unless one’s already there).
Lights usually get replaced because tastes change. Old fixtures don’t often wear out,
since they have no moving parts (unlike a switch). Historic or not, the original
hanging lights in your Craftsman home might be ugly to your eyes, or you might
want to replace more modern fixtures with replication period fixtures to restore your
home closer to its original condition.
17 8964 CH14 2/1/00 8:50 AM Page 187

Part 3
➤
Components and Simple Repairs
188
The usual safety precautions apply to replacing fixtures that apply to any other elec-
trical work—turning the power off is number one—but now you’ll sometimes be
working off a ladder. For that matter, two of you might be working off two ladders if
you have to remove an especially heavy or delicate fixture such as a chandelier. One
thing is for certain: With the huge selection of new fixtures to choose from, you’re
bound to find a replacement that will dress up any room in your house.
Inspect First
There are two main reasons for replacing a light fixture:
➤ It isn’t working, and you believe it is somehow broken.
➤ You want to install an updated style or a fixture that will offer more light.
You should do a number of checks before pronouncing a light fixture broken or be-
yond repair. You already know about checking the switch and the fixture itself for
power. In addition, you should look at the following:
➤ The lamp (light bulb)
➤ The socket
➤ The wire connections inside the box
Checking the light bulb is the obvious first course of action—replacing the bulb with
one that’s working. If it got jostled around in a storage drawer or even on the way
home from the hardware store, there’s always a chance a new bulb isn’t working, so
check it in a fixture or lamp you know is working. The next thing to check is the
socket. At the bottom of the socket is a small metal tab that makes contact with the
bottom of the lamp. Turn the power off and check with your voltage tester by placing
one probe on the metal tab and one on the inside of the metal socket. The bulb
should not glow. If it does, the power is still on, and you need to shut off the correct
circuit. With the correct circuit shut off, test the fixture again with your voltage tester.
With the power off, pull the end of the tab up a little bit using the end of a screwdriver.
Screw in the lamp, turn on the power, and try the fixture again. These tabs sometimes
become depressed or flattened out and don’t form a tight contact with the lamp.
Why would the contact suddenly be broken? All it takes is a slight vibration in the
fixture from, say, a large truck passing by. If a light bulb that you know is good
doesn’t work, you have a problem with the socket. Remove the fixture to test the
socket by following these steps:
1. With all glass globes, lampshades, and light bulbs removed, unscrew the fixture
from the box by turning the mounting screws counterclockwise.
2. Carefully pull down the fixture and let it rest on top of the ladder. This is crit-
ical if it’s a heavy fixture.
17 8964 CH14 2/1/00 8:50 AM Page 188
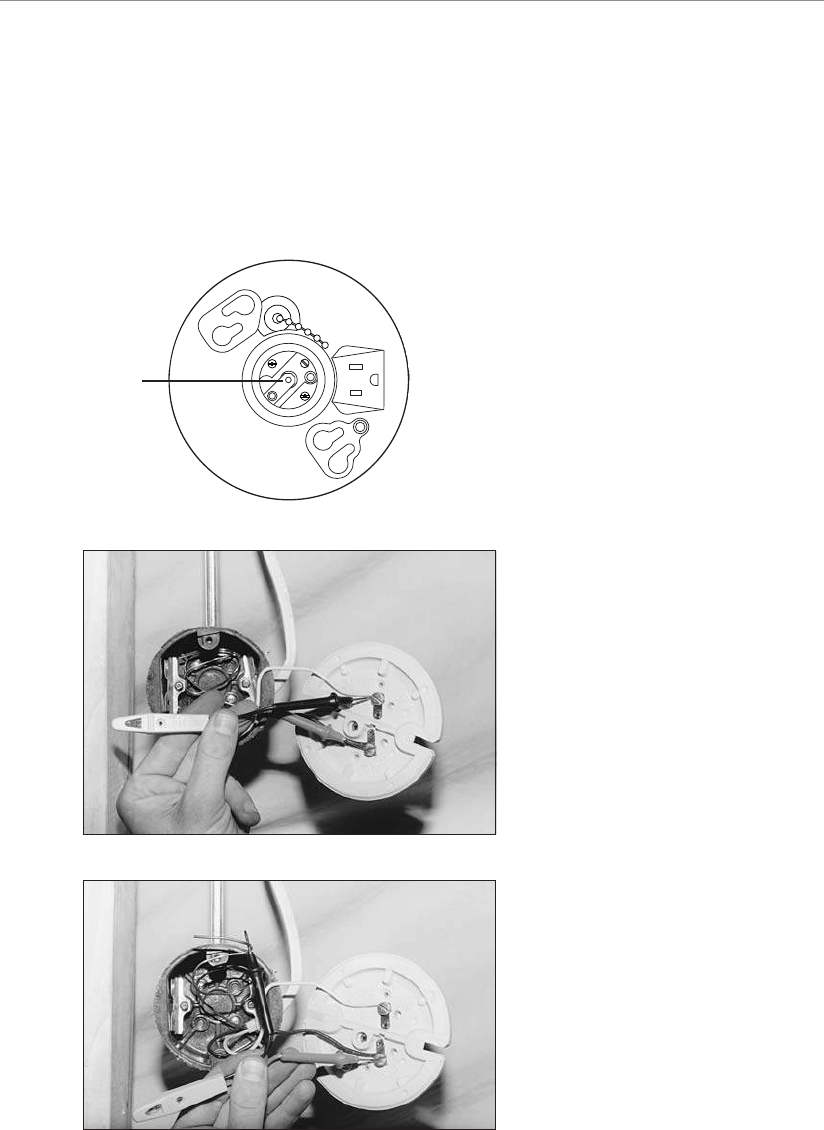
189
Chapter 14
➤
Light Fixes
3. Disconnect the wires from the terminal screws and take down the fixture.
4. Attach the continuity tester’s clip to the hot wire terminal screw, and place the
probe against the metal tab in the socket. If the tester does not glow, the socket
needs to be replaced.
5. Attach the continuity tester’s clip to the neutral terminal and the probe to the
threaded portion of the socket. Again, if the tester’s bulb does not glow, the
socket needs replacement.
Pull up lightly on tab for
better contact with bulb.
(Courtesy of Leviton)
A hot screw terminal;
neutral screw terminal; a
clip; a probe; a metal tab;
a socket.
tab
17 8964 CH14 2/1/00 8:50 AM Page 189

Part 3
➤
Components and Simple Repairs
190
Some sockets are permanently attached to the fixture, in which case the entire fixture
must be replaced. Others are attached to the fixture with screws and can be removed
and replaced. Take your old socket to the hardware, lighting, or electrical-supply store
and purchase an identical replacement.
The same vibrations also can cause the wire connec-
tions to come loose just enough to lose contact with
the fixture.
Time to Replace
Installing new fixtures is a doable homeowner project.
It’s easier to do with modern wiring and boxes, but it
still can be done with older types of wire as well. To
replace a fixture, follow all safety precautions, read the
instructions and diagrams that come with the fixture,
and …
1. Turn the power off and test to make sure it’s off.
2. Follow the preceding steps for testing the fix-
ture’s socket to remove the fixture and undo the
wire connections.
3. If the fixture does not have an electrical box, install
one (see the following section, “Installing a Box”).
4. Install the mounting strap that comes with your
new fixture to the box. (The strap, also called a
mounting yoke, has predrilled holes set to the di-
mensions of the fixture.)
5. Connect the black wire and the white wire from
the fixture to their counterparts in the circuit
wires.
6. Connect the grounding wire to the grounding
screw on the mounting strap and to the ground-
ing conductor that might come attached to the
fixture.
7. Install a light bulb, turn on the power, and test
the fixture. After the test, turn off the power and
remove the bulb.
8. Attach the fixture with its mounting screws to
the mounting strap.
9. Install the light bulb and the globe.
Positively Shocking
Do not install a fixture of higher
wattage unless the circuit can
support it. Only install a lamp
that is equal to or less than the
wattage recommended on the
fixture. (There will be a tag
listing the wattage and voltage
of the fixture.) A lamp of higher
wattage will develop too much
heat, which can damage the fix-
ture and the wiring.
Bright Idea
Be sure to check for tight wire
connections when you inspect
your fixtures. Remove the wire
nuts (or any tape) to confirm
that the wires are making a solid
contact. (If not, that’s all you
have to fix.) It’s sure less work
than replacing a fixture that
doesn’t need replacement.
17 8964 CH14 2/1/00 8:50 AM Page 190

191
Chapter 14
➤
Light Fixes
Installing a Box
A self-supporting retrofit box can be installed in an existing ceiling or wall if your
light fixture doesn’t have a box. This regularly will be the case with very old wiring or
poorly done additions to your electrical system. You’d be surprised how many old in-
candescent fixtures are attached directly to plaster lath instead of to any kind of box.
Retrofit boxes come in two flavors: metal and plastic. Each is designed to fit snugly
against either plaster or drywall by using adjustable ears and brackets that expand
and/or tighten against the wall. A plastic box has an attached, U-shaped bracket that
tightens like a toggle bolt as its attachment screw is tightened. A metal retrofit box
comes with brackets or supports (known as “Madison Holdits” and sometimes as
“battleships”) that fit between the box and the wall. As they are pulled out, they firm
up the fit of the box. The arms of the supports are then bent over the edge of the
box, tucked inside, and pinched tightly with pliers.
Another version of a metal retrofit box features a screw-operated support on each side
of the box. As the screws are tightened, the metal support wedges the box in tightly
against the plaster or drywall. A retrofit plastic box has plastic or metal internal cable
clamps that help secure the cables to the box should it ever slip from the opening.
Metal boxes are a bit trickier to use if you’re unfamiliar with them, so consider using
plastic retrofit boxes for your work.
Neither plastic nor metal retrofit boxes are supported by strong attachments to studs
or floor joist; they are supported only by brackets maintaining a taut fit (and maybe
the hope that no one will yank on them too much). They are not designed to hold
heavy light fixtures or ceiling fans.
To install a box …
1. Shut the power off and remove the existing
fixture.
2. Carefully push the wires up and out of the
way.
3. Using the back of the retrofit box as a tem-
plate, draw an outline on the ceiling or wall
of the hole you need to cut. Make sure it’s
smaller than the ears on the box, which will
brace against the plaster.
4. Carefully cut the hole with a hole saw or a
keyhole saw.
5. Take a screwdriver and, while tapping it with
a hammer, punch out one knockout for each
cable that will be brought into the box.
(Move the screwdriver around to broaden the
hole and to clean up any sharp edges.)
Bright Idea
Always put a large drop cloth or
a piece of plastic under your
work area when you’re cutting
through plaster or drywall. The
last thing you want is damage to
your hardwood floors from fal-
ling chunks of plaster. You also
don’t want to have to vacuum
plaster out of your carpet.
17 8964 CH14 2/1/00 8:50 AM Page 191
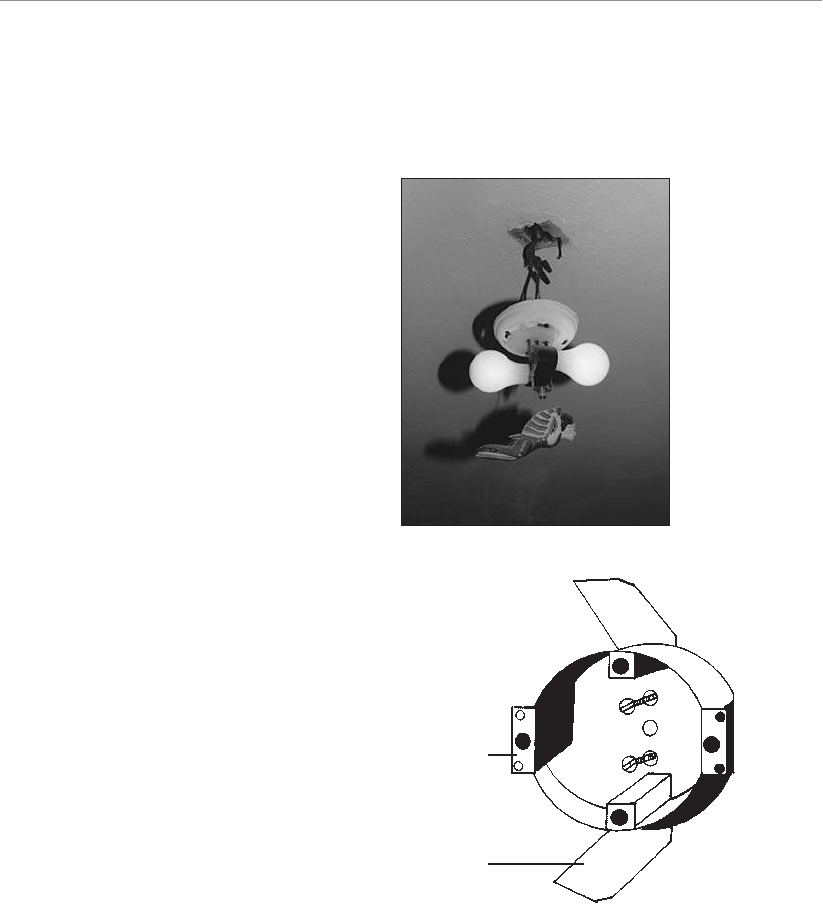
Part 3
➤
Components and Simple Repairs
192
6. Bring the old cable or wires into the box.
7. Tighten the mounting bolts on the box. This will tighten the box to the plaster
or drywall. Connect the wires to the light fixture and tighten the fixture to the
box.
An old fixture installed
without an electrical box.
Tighten the clamps to se-
cure the box to the ceiling;
in plaster, screw plaster
ears to the lath as well.
plaster ear
clamp
Cutting a hole in plaster or drywall using a keyhole saw is a chore, especially if you
have to saw through lath. Most lath in residential construction is wood, but metal lath
is sometimes used in expensive homes and requires either tin snips or a hole saw. (The
lath will dull the saw’s teeth some.) To get a start on your sawing after you’ve outlined
your hole, drill some starter holes in several locations with your electric drill and a twist
17 8964 CH14 2/1/00 8:50 AM Page 192
193
Chapter 14
➤
Light Fixes
bit. For that matter, you can drill a lot of holes all along the outline until you’ve just
about cut out the entire hole. I’m not a purist about this stuff, and I recommend doing
whatever you’re comfortable with as long as it’s safe and works for you.
You have to be careful when cutting through wood lath and be certain your saw
blade is sharp. A dull blade and jerky sawing is a great way to pull on the lath,
causing it to crack the adjoining plaster. Take your time. Drill more holes if necessary.
Don’t worry that you’re not doing it as fast as an electrician.
Electrical Elaboration
Wood lath is nailed to each stud in a wall. If you saw through it too aggressively with a
keyhole saw or a reciprocating saw, it begins to bounce around and crack the adjoining
plaster. With the plaster removed for the box, cut down one side of the lath, leaving an
inch or so uncut. Cut the other side completely, and then return to your first cut. This
way, the lath stays rigid until both cuts are complete. Use a scroll blade for your recipro-
cating saw. If sawing by hand, use a fine-tooth blade or even a hacksaw blade, which is
available with a mini handle that would allow this kind of cutting.
Try a New Style
Styles and fashions change, a fact that’s certainly not lost on America’s retailers. The
dim ceiling fixtures with the square-shaped glass domes from the 1950s and 1960s
just don’t cut it any more, unless you’re into retro-hip lifestyles complete with hula
hoops and strange-looking dinette sets. The array of fixture choices today is as-
tounding. Just about any period of fixture can be matched, or a completely updated
style can be installed. The only limits are your imagination and your checkbook.
Some fixtures can greatly increase the amount of lighting in a room. A single over-
head fixture in a long hallway, for example, might be replaced with track lighting
running the length of the hallway, turning it into a great space to display paintings or
photographs. As always, make sure your circuit can support the increased current de-
mand should you replace a fixture with one of a higher wattage rating.
There’s no need to limit yourself to using incandescent fixtures to replace your existing
ones. Fluorescent fixtures, especially compact models, should be considered as well.
17 8964 CH14 2/1/00 8:50 AM Page 193

* * * Free Preview End * * *
Purchase Required To Gain Total Access
Visit www.landlordleaseforms.com To Purchase Landlord Lease Forms Package